

doubleclutchinweasel
-
Posts
2,617 -
Joined
-
Last visited
-
Days Won
37
Content Type
Profiles
Forums
Gallery
Events
Blogs
BMT Wiki
Collections
Store
Everything posted by doubleclutchinweasel
-
Replacing Slack Adjusters
doubleclutchinweasel replied to doubleclutchinweasel's topic in Air Systems and Brakes
Wow! I forgot to look! They were smaller than I originally thought. Seems like the heads may have only been about 3/4"-7/8". And, with the bolt out, I cold easily slide the adjuster on the shaft. That's how I got a decent measurement on the shaft; by pulling the adjuster out and measuring the shaft "behind" it.Kent -
Replacing Slack Adjusters
doubleclutchinweasel replied to doubleclutchinweasel's topic in Air Systems and Brakes
I found a mail-order outfit that can get these. So, I ordered 2 left and 2 right pieces. Should be here in a couple of weeks. As soon as it quits raining, isn't 120 degrees, and my shoulder and elbow quit killing me, I'm going to pressure wash 4 decades of crud off the steering knuckles, and see what kind of shape the kingpins, bushings, and thrust bearings are in. I plan to replace them all anyway, but it would be nice to find tha it didn't have to be done right now. I'd really like to finish all the air system first, THEN work on the front end. Oh, and I do have 1 broken leaf on the left front spring. I'll need to fix that pretty soon, too. Got my North Carolina "Weighted Antique Auto" tag today! Those guys sure know how to make money! More to come... Kent -
Spring Brake Upgrade
doubleclutchinweasel replied to doubleclutchinweasel's topic in Air Systems and Brakes
Okay... I figured out that these are Bendix "DD3" chambers, or an equivalent. They were most commonly used on buses. Lots of folks on bus and motor home forums talk about them and how to change tham out. So, I'm not in new territory here. And, apparently, you do just remove the override circuit, and upgrade to a more modern chamber. As near as I can tell, these (and the service chambers on the other axle) are size 24 chambers. But, I am not 100% sure, as old chambers and equivalent new chambers vary in appearance and outside dimensions. If this tendonitis would ease up in my shoulder and elbow, maybe I could crawl around under there and see what the heck's going on! More to come... Kent -
Spring Brake Upgrade
doubleclutchinweasel replied to doubleclutchinweasel's topic in Air Systems and Brakes
Looks like I can change this over to a "regular" spring brake cannister, and remove the emergency release mechanism. I am currently looking around to see what is available. These cannisters are fairly small, and there isn't much room to go up to a larger size. As near as I can tell, the rears are only size 20 or 24s. I see that bendix makes a 20/24 and a 24/24, one of which might physically fit. To counteract the relatively small cans, they use a fairly long slack adjuster (7"). So, I probably need to stay with the same cylinder area. It would help if I could find some numbers on the old parts! I'll keep looking. More to come... -
Replacing Slack Adjusters
doubleclutchinweasel replied to doubleclutchinweasel's topic in Air Systems and Brakes
I took one slack adjuster loose to see what was in there. The center bolt and washer do indeed hold a more-or-less standard adjuster in place. The cam shaft is 1-1/2" X 10 splines, which is fairly standard. The adjuster length is 7", and is offset about 5/8". The Bendix numbers I found in the book are 279946N and 279947N. These look right. Now, all I have to do is find some "in-stock" somewhere! -
Water Supply to Air Compressor?
doubleclutchinweasel replied to doubleclutchinweasel's topic in Air Systems and Brakes
That all makes perfect sense. Thanks, Ron.Kent -
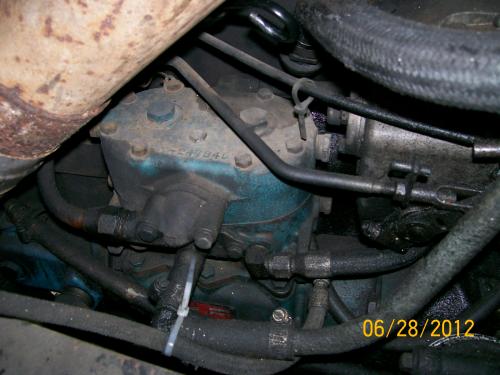
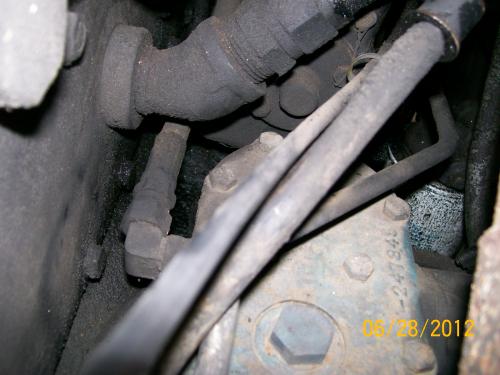
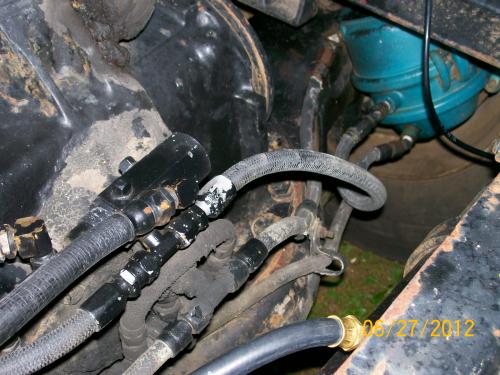
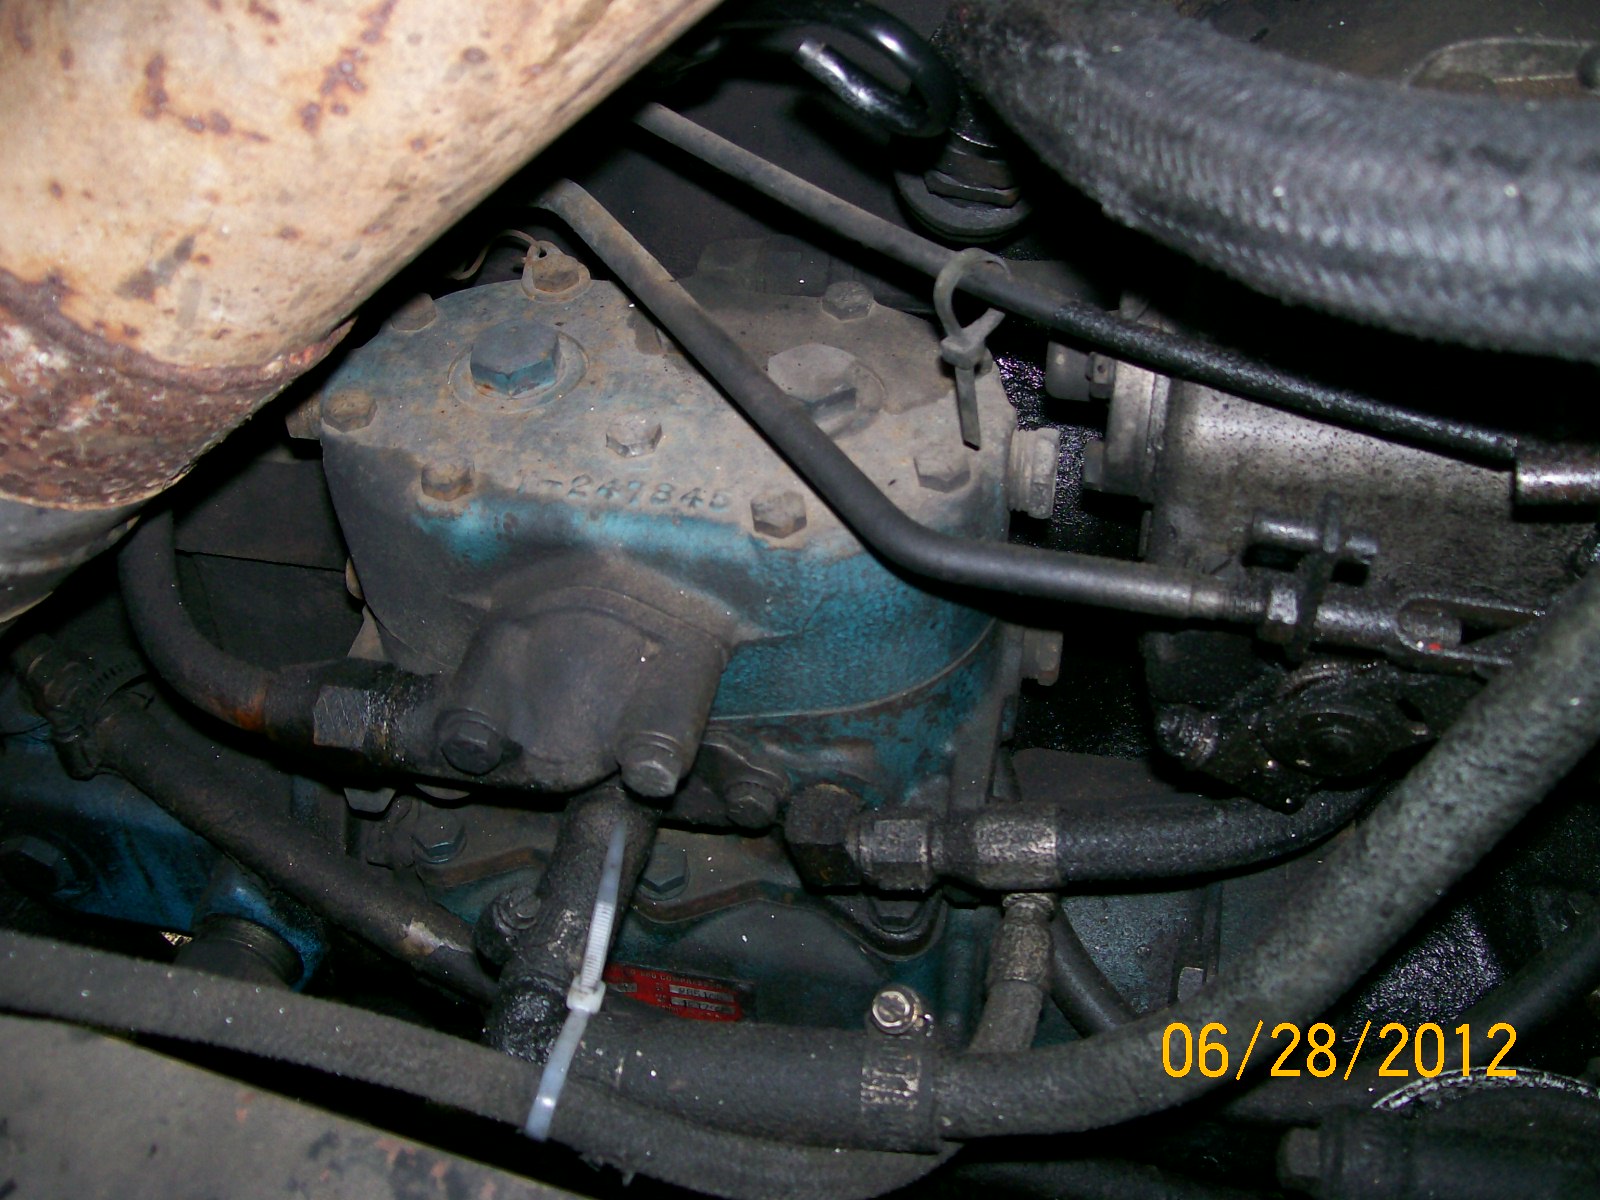
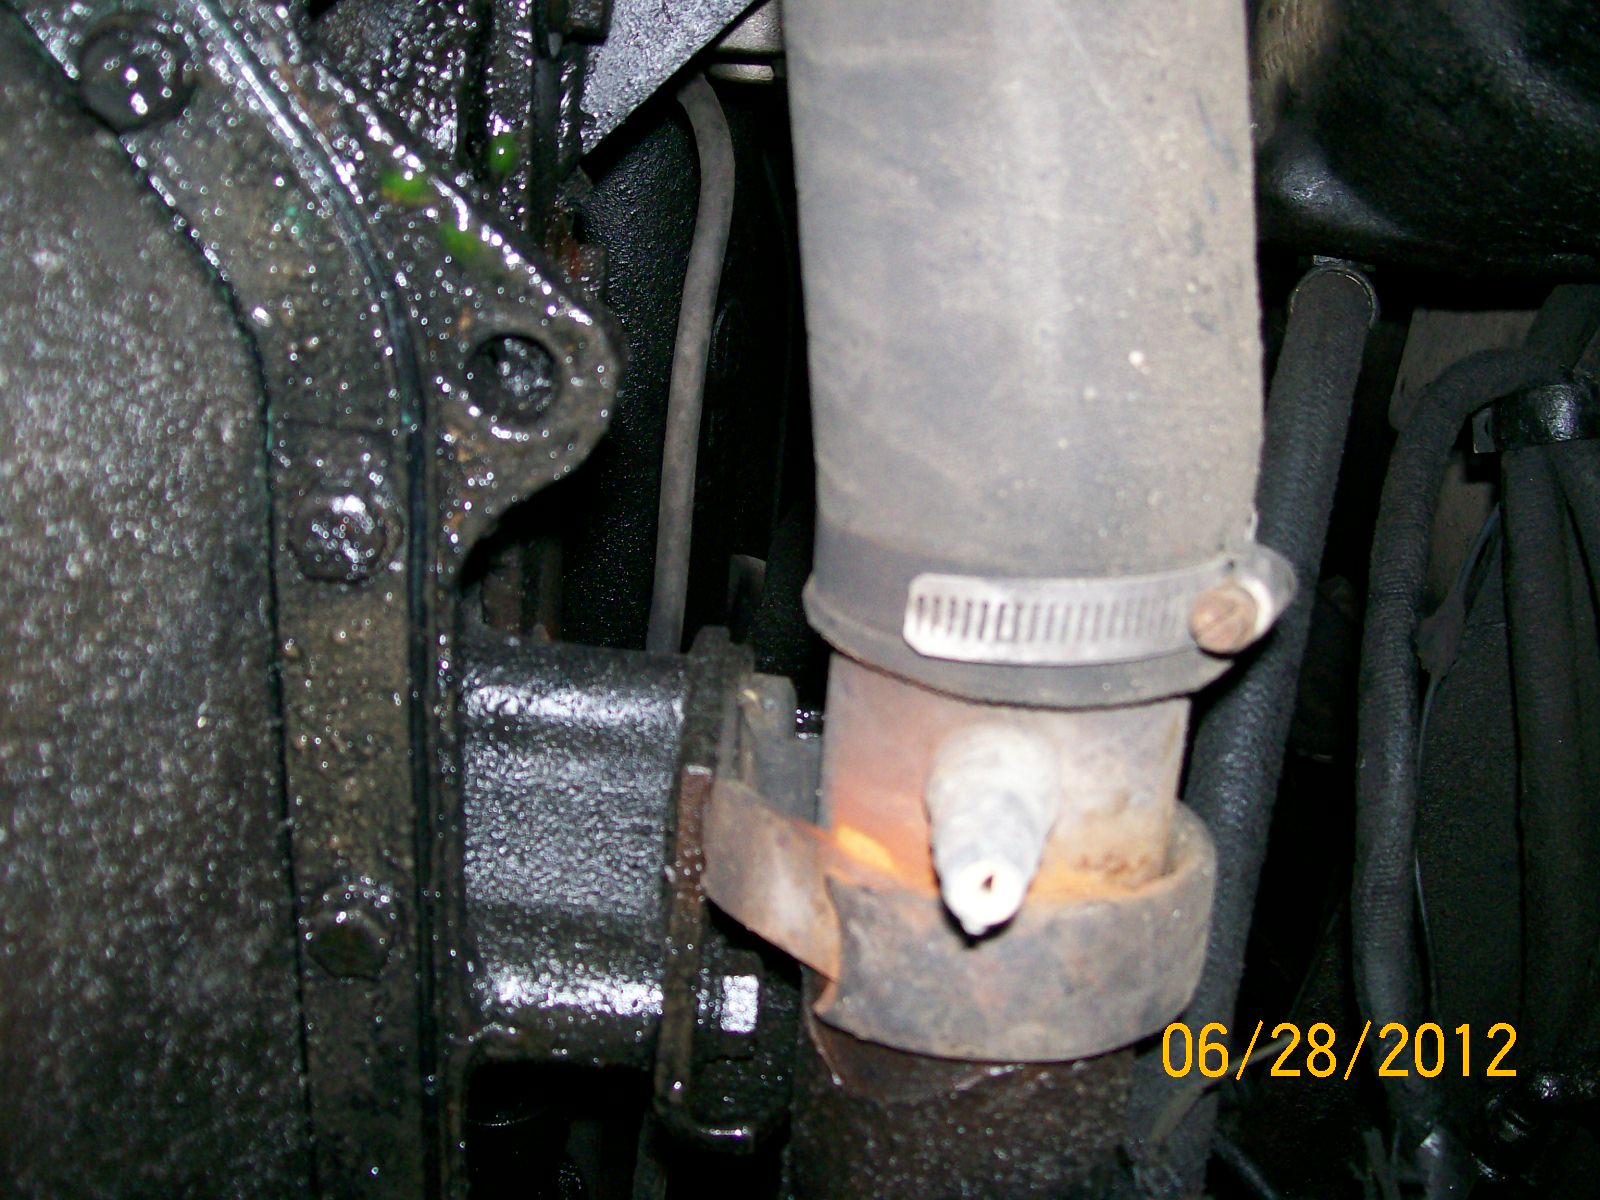
More questions! I was looking at the Tu-Flo 600 on my '70 R600 (ENDT-673C), and trying to figure out the plumbing. The air intake is from the pressure side of the turbo, and the outlet is obvious. But, I'm not too sure about the oil and water lines. I had read in another thread that the oil supply is actually fed into the crankshaft through a tube on the back of the drive shaft. But, I've also read that these compressors can be fed externally. And, I am not sure where the oil return is. I would assume it would have to be at the bottom of the crankcase, gravity feeding back to the engine. But, I'm not sure. I am not even certain that there is cooling water running to the unit! If not, where are the best places to tie into the engine cooling system to provide supply and return water? Maybe tee into the fittings which supply water to the cab heater box? I don't see any plugged-off lines anywhere that look like anyone has removed any plumbing. Or, are 2 of the lines in the pics, below, water lines? I have located 3 external lines on the compressor, but am not sure what does what. I am attaching pictures, below. The left picture clearly shows the inlet and outlet. It also shows 2 smaller lines plumbed-in. The right picture is of the back-side (against the block), and shows a third line plumbed-in. Could 2 of these (the 2 on opposite sides of the body) be coolant lines? Please help!
-
Draining R600 Radiator
doubleclutchinweasel replied to doubleclutchinweasel's topic in Engine and Transmission
Right here, perhaps?
-
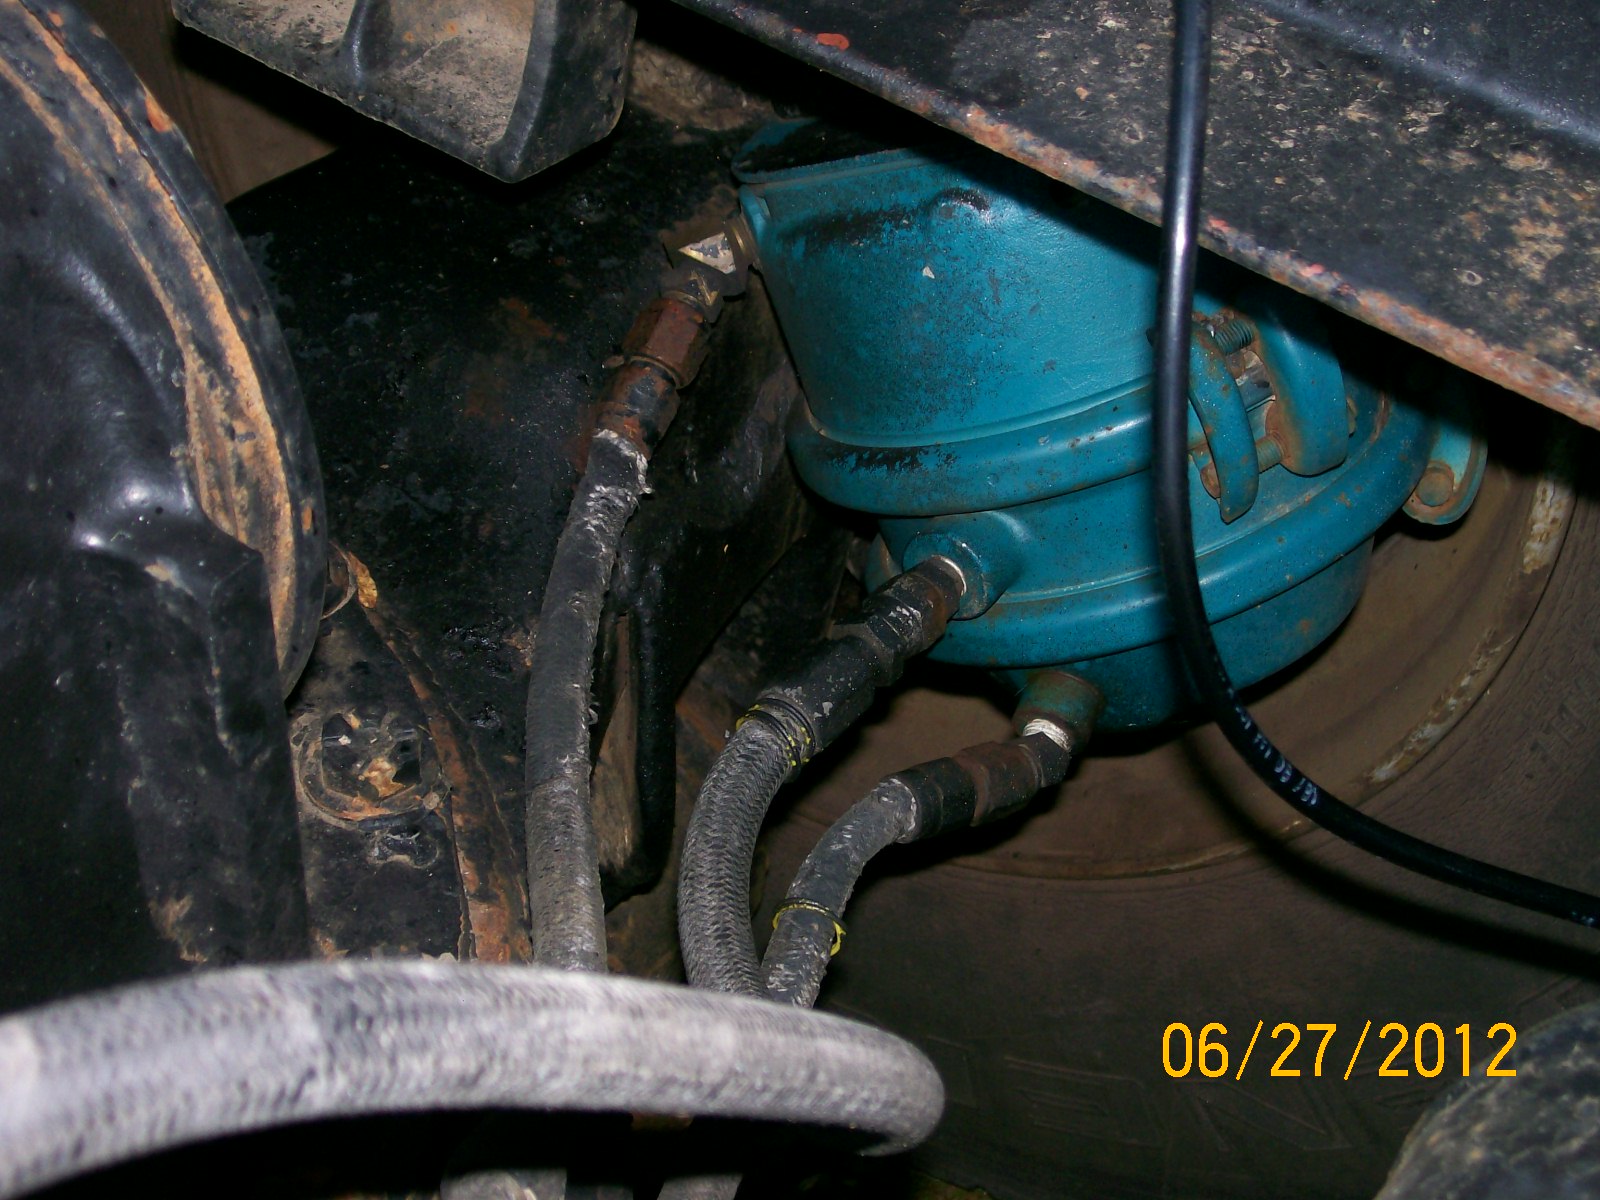
Spring Brake Upgrade
doubleclutchinweasel replied to doubleclutchinweasel's topic in Air Systems and Brakes
Here's what they looked like... I'm thinking this whole rear mess needs to be upgraded! The small reserve air tank in these pictures, I assume, is an isolated air supply specifically to release the parking brakes to allow you to move the truck off the railroad tracks before the train comes!

-
Draining R600 Radiator
doubleclutchinweasel replied to doubleclutchinweasel's topic in Engine and Transmission
Hadn't looked there. Will check it out.Thanks, Kent -
Spring Brake Upgrade
doubleclutchinweasel replied to doubleclutchinweasel's topic in Air Systems and Brakes
I'll get you some pics soon. It's weird! The service and parking brake hoses go into what appears to be the "wrong" end of the chamber. And. the 3rd hose goes into the top of it. Makes no sense.I'll get pics... -
Another of many projects... I'm looking at the spring brakes on the rear of my '70 R600. They are an old-type spring brake, with no provision for a "caging" tool. They are also a bit rough, and are on my list of goodies to replace...very soon. But, the old air system uses 3 lines to the brake chamber; 1 for service brakes, 1 to release the spring brakes, and (apparently) 1 to override the spring brake in the event of main system air loss (via dash-mounted valve). None of the current brake chambers I can find have 3 ports, instead having only 2. I am assuming these new chambers either did away with the emergency override, or the valving/relays are set up to deliver this emergency override through the normal spring-release port. Anybody been there/done that? I see that Bendix has some different service relay valves, and at least one of them has some type of provision to modulate the spring brakes through the foot valve in the event of main system air loss (R14, I believe it was). But, they don't go into great detail about it. I have emailed them, and asked for clarification, but I'm not going to hold my breath waiting on a response. Thanks, kent
-
Draining R600 Radiator
doubleclutchinweasel replied to doubleclutchinweasel's topic in Engine and Transmission
Yeah, that was my plan "B"! I was hoping to find a drain in the bottom.You said "plug", not drain cock. So, am I looking for something fairly flush in the bottom of the tank(s)? Possibly with a recess for a square or hex key to remove it? Thanks, Kent -
Silly question! How do I drain the radiator on my "new" 1970 R611? LOL!! I looked on the bottom of the radiator, but did not see a drain cock or drain plug. I need to replace all the hoses, and would prefer not to get drowned. Also, is there a plug somewhere near the top of the engine to help purge the air out of the system when re-filling? Thanks, Kent
-
WANT TO BUY R model wanted
doubleclutchinweasel replied to doubleclutchinweasel's topic in Trucks Wanted
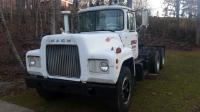
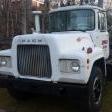
Well, I finally did it! Went to Knoxville today, and brought it home. Put belts on it, checked everything out 1 more time, threw in a few gallons of fuel, and drove it 3 hours home...through the worst thunderstorm I've ever seen. Not a single malfunction, I'm happy to report. Of course, now I have 3-4 years worth of very intense work to do! Going to do some electrical repair first (don't have marker lights). Then, a compressor. Then, new air system. Then a clutch. Then, cosmetic stuff. But...it drives! Yea!!! Kent- 35 replies
-
- 1
-

-
- single axle
- r model
- (and 1 more)
-
WANT TO BUY R model wanted
doubleclutchinweasel replied to doubleclutchinweasel's topic in Trucks Wanted
Oh, I've had dozens of these deals fall through already!I'm still not sure what I'm going to do tomorrow. I think the old girl would drive home fine. I mean, I've already driven it around their area long enough to have been half-way home! I'm just getting old and more easily scared, I guess! Just have these aweful feelings something's going to blow up over in the I40 river gorge! I know the truck runs good, and everything works fine. But, it always will when you're within walking distance of the shop. Problems only show up when you're in "dark territory". Know what I mean? -
Replacing Slack Adjusters
doubleclutchinweasel replied to doubleclutchinweasel's topic in Air Systems and Brakes
Actually, what I saw doesn' look anything like that. I'll check when I get home this evening; I MAY have a picture that shows one of the adjusters. I took several in that area, so MAYBE I got lucky and caught a glimpse of one!Thanks, More to come... Kent -
Replacing Slack Adjusters
doubleclutchinweasel replied to doubleclutchinweasel's topic in Air Systems and Brakes
Sounds like what it looks like. The other post, above, mentioned a fairly small bolt on a Mack-specific adjuster. But, as I said there, this hex is HUGE. It is almost as large as the shaft itself. Any way I can identify what we have here by looking? The adjuster collar/bolt looks exactly like the others I've seen, except for the lack of a snap-ring. -
Replacing Slack Adjusters
doubleclutchinweasel replied to doubleclutchinweasel's topic in Air Systems and Brakes
The hex I can see on the back of the slack adjusters is not a small hex, like you would associate with a 1/2" bolt. This hex is 1-1/4 - 1-1/2 inches across. Not sure if that tells you anything. -
WANT TO BUY R model wanted
doubleclutchinweasel replied to doubleclutchinweasel's topic in Trucks Wanted
Oh, and I can give you an email address if you want to send more pictures. -
WANT TO BUY R model wanted
doubleclutchinweasel replied to doubleclutchinweasel's topic in Trucks Wanted
Well, let me know what you can find out.And, Thanks! Kent -
Replacing Slack Adjusters
doubleclutchinweasel replied to doubleclutchinweasel's topic in Air Systems and Brakes
Excellent suggestion.So, are these Mack adjusters as I described them, above? Or, are they still held on with the snap-ring? I didn't clean it up enough to see any details yesterday. I'm a little concerned about how much it might take to remove that lock-nut...if it is indeed a lock nut! -
Hey, everybody. Thinkin' real serious about the '70 R600 I found recently. Went and drove it today. More right than wrong with it. Planning to re-do all the brake system anyway, if I get it. Brake linings have a bunch of life left. Adjusted the fronts up so it would actually stop bob-tailing. Rears were fairly close to being right. Rear adjusters don't seem to want to co-operate. Some of the "collars" are frozen to the bolt. Others compress, but the bolt seems frozen. Checked prices. Not enough money to worry about. I'll just change them all. Most I've seen use snap-ring to retain the adjuster. These Macks units seem to be retained by a BIG hex-head bolt. Is that how you remove them? I read somewhere the macks were 1.50" X 28 spline. Does that sound right? I think, if I buy this, I'll start by replacing all the cans and slack adjusters...then the compressor...then all the lines. Then it needs a clutch. I just want to get my ducks in a row on these slack adjusters before I jump in over my head. Kent
-
WANT TO BUY R model wanted
doubleclutchinweasel replied to doubleclutchinweasel's topic in Trucks Wanted
Not bad. The one I drove today isn't bad either, though. $4K, and I can drive this one home! Still trying to make up me feeble old mind... -
WANT TO BUY R model wanted
doubleclutchinweasel replied to doubleclutchinweasel's topic in Trucks Wanted
Well, I'm zeroing in on one. But I could be swayed! Let me know what/where/how much/what condition. And, pictures are always nice! I'm looking pretty seriously at one nearby. The condition is pretty good, and the price is right. But, I'd prefer to have a single-axle, as indicated by your VIN. Kent


BMT Forum Logo
