-
Posts
2,617 -
Joined
-
Last visited
-
Days Won
37
Content Type
Profiles
Forums
Gallery
Events
Blogs
BMT Wiki
Collections
Store
Everything posted by doubleclutchinweasel
-
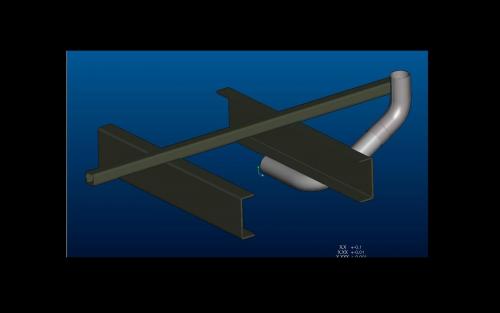
I guess I'd better make a new pipe to go between the flex-pipe (coming from the engine compartment) and the stack. I'm not a huge fan of flex, but it works, and the piece is in excellent condition. The elbow is burned out, and the hanger, which uses a pipe clamp, is cutting through the old rusty pipe. I'm going to try and use "standard" bits and pieces (see image, below), and try to avoid having to cobble too much. I'll get all relative dimensions this weekend, and try to sketch up something workable. And, hopefully, it'll even fit! Hopefully, I'll have a picture or two of the results in a few days. Kent
-

WANT TO BUY Tie Rod (center link) Needed
doubleclutchinweasel replied to doubleclutchinweasel's topic in Parts Wanted
I've been trying to figure that one out, myself. The "standard" 1-1/8" threads are 7TPI and 12TPI. So, those taps WOULD be fairly common. The 16TPI, however is not "standard" on any 1-1/8" bolt. But, 16TPI threads are one of those "universal" threads which can be used on practically anything. We make production parts with "16 series" threads, and I have been known to use 16TPI threads on special tooling I've designed. So, whether it was easier or not, we may never know. I'm just glad you keyed me in on the fact that they MIGHT be different...which they were. So, thanks again for that. Kent- 12 replies
-
- tie rod
- tie rod end
-
(and 1 more)
Tagged with:
-

Tie Rod (center link) Needed
doubleclutchinweasel replied to doubleclutchinweasel's topic in Driveline and Suspension
Sent Adelman's a message. Haven't heard back yet. You know, the "different pitch" method on the threads is not that weird. Years ago, I saw an automatic screw machine which was tapping a hole. The spindle turned the same direction all the time. The tap, likewise, turned the same direction as the part. The only way they could drive the tap in and remove it, without being able to reverse either, was to change the speed of the tap. When the spindle rotated faster, the tap pulled into the hole. When the spindle rotated slower, the tap backed out. Basically, it's the same principle...differential movement. Think of it as the "delta" of the 2 pieces...speed on the tapping operation, and distance on the tie rod ends. Okay. Enough geekiness for now! Kent- 5 replies
-
- tie rod
- center link
-
(and 1 more)
Tagged with:
-
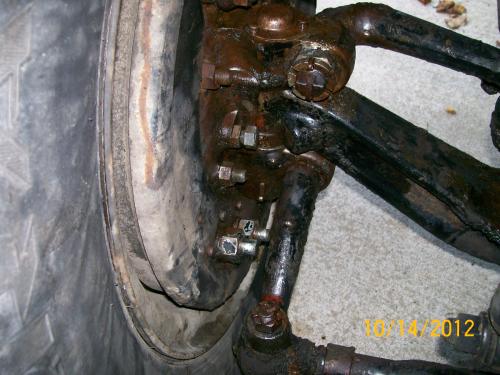
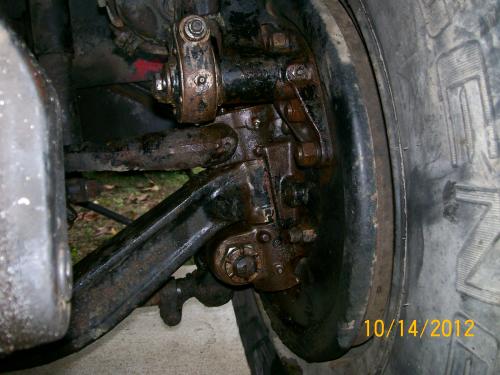
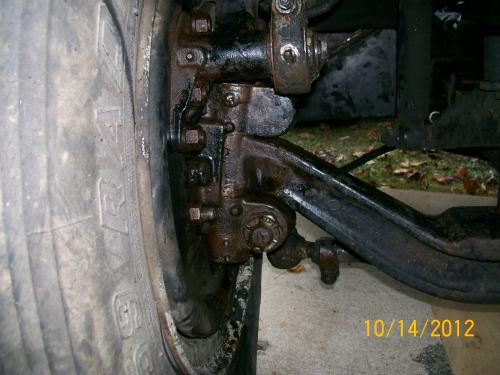
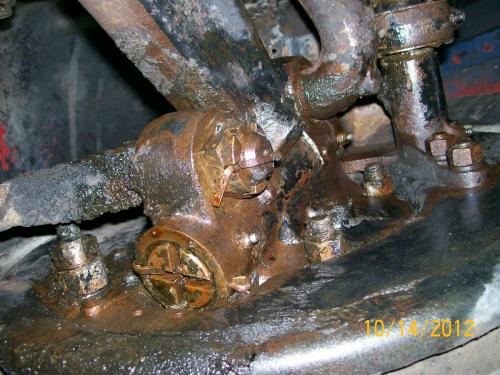
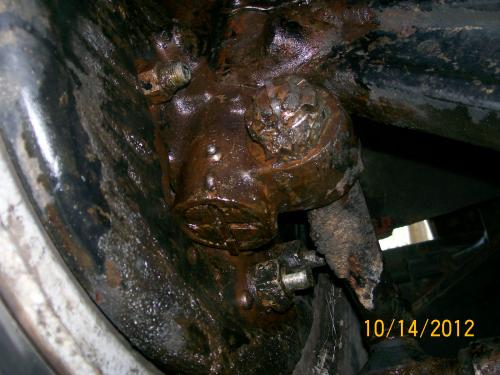
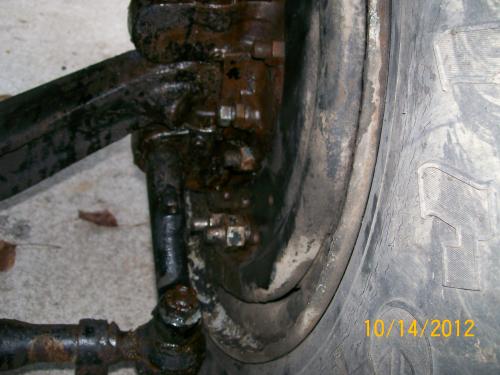
Just for kicks... Here are a few shots of the underneath. I have removed 40+ years worth of Grease-crete, and everything has been soaked down with PB Blaster. This helps loosen everything up, and makes the remaining crud a little easier to remove. Once I get going, I don't think this will be too bad...as long as I dont run into any "unexpected" problems in there! Kent
-

Minor Victories!
doubleclutchinweasel replied to doubleclutchinweasel's topic in Driveline and Suspension
Yep. That sounds like what I did to the front tires. I still have a lot of work to do. But, every little bit helps! Thanks, Kent -

WANT TO BUY Tie Rod (center link) Needed
doubleclutchinweasel replied to doubleclutchinweasel's topic in Parts Wanted
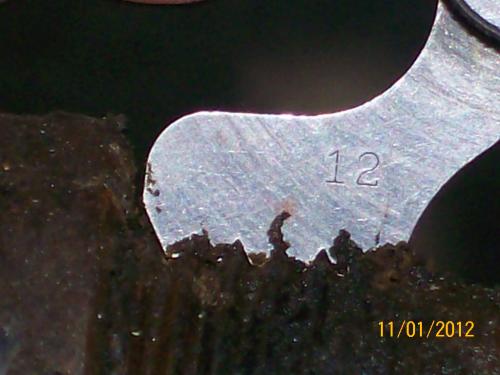
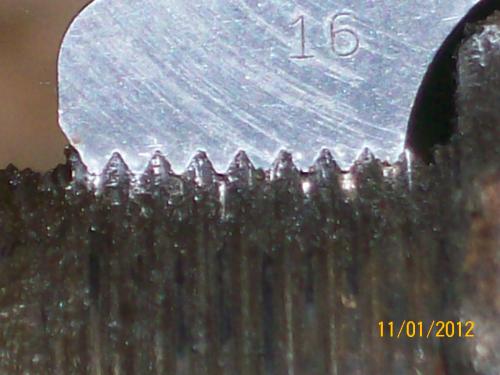
Thanks, Ron. That is what they look like. The pictures, below, show the different pitches. I thought it was funny that someone laughed at me, and insisted they were the same pitch, when I had the pitch gage in my hand! People are funny! The bottom pic is the LH end, with 16TPI (see the number?), and the top is the RH end with 12TPI (pardon the crud!). I would have never guessed they did this. But, seeing is believing! And, hey...it IS Mack we're talking about! Thanks again, Kent- 12 replies
-
- tie rod
- tie rod end
-
(and 1 more)
Tagged with:
-

WANT TO BUY Tie Rod (center link) Needed
doubleclutchinweasel replied to doubleclutchinweasel's topic in Parts Wanted
The 10QH38 crosses over to a CarQuest number 401-1118, which is also an ES-405R. This part matches all the dimensions I can currently get off the RH (bent) tie rod end. This part has 1-1/8" - 12 RH threads on it. The 10QH37 DOES NOT CROSS OVER to anything in the CarQuest "fleet parts" catalog. This is also the one which appears to use a 1-1/8" - 16 thread. I can't tell if it is LH or RH yet. Hopefully, I will be able to see it better this evening. So, there may or may not be an aftermarket alternative to the 10QH37. May have to spring for the Mack part there. Interestingly, the nice lady at the parts counter gave me not only the Mack part number for the drag link end, but the TRW number as well. She did not, however, have a TRW number for either of the tie rod ends. More to come... Kent- 12 replies
-
- tie rod
- tie rod end
-
(and 1 more)
Tagged with:
-

WANT TO BUY Tie Rod (center link) Needed
doubleclutchinweasel replied to doubleclutchinweasel's topic in Parts Wanted
Well, I thought so originally. But, the thread pitch gages seem to say otherwise. The 12 TPI gage fits perfectly on the RH end, BUT, this is the damaged one. So, I don't feel 100% comfortable with this one. The 16 TPI gage fits perfectly on the LH end, and this one is pristine. So, I feel pretty good about it. I may never know for sure until I pull 2 new Mack-sourced tie rod ends out of the box. If I can get a little more daylight tomorrow evening, I'd like to get underneath, and check the thread pitch in the slots of the tube. They should be easier to gage there. I have reason to believe there may be something odd about one of the ends, because the Mack part number for one end DOES cross over to a "standard" part, but the other one does not. Can't remember which one is which. But, Mack lists the numbers as 10QH37 and 10QH38. More to come... Kent- 12 replies
-
- tie rod
- tie rod end
-
(and 1 more)
Tagged with:
-

Minor Victories!
doubleclutchinweasel replied to doubleclutchinweasel's topic in Driveline and Suspension
Hey, Vinny! -

WANT TO BUY Tie Rod (center link) Needed
doubleclutchinweasel replied to doubleclutchinweasel's topic in Parts Wanted
Well, I just dicovered that the left end is 16 TPI and the right side is 12 TPI.- 12 replies
-
- tie rod
- tie rod end
-
(and 1 more)
Tagged with:
-

Tie Rod (center link) Needed
doubleclutchinweasel replied to doubleclutchinweasel's topic in Driveline and Suspension
Okay. I finally got to look closely at the tie rod ends. And, you are correct! The left side is 16 TPI, and the right side is 12 TPI. That would probably explain why 1 of the Mack tie rod ends crosses over to a standard number while the other one does not.Thanks for the insight. Kent- 5 replies
-
- tie rod
- center link
-
(and 1 more)
Tagged with:
-
Well, While I'm waitin' to get all the parts identified and located for the front end rebuild, I'm still tryin' to get in my daily allotment of "tinkering"! The steering gear was WAY out of center on my R600. The steering arm was mis-indexed on the steering box. And, the front end had a wicked bounce in it at highway speeds. So, I knocked the drag link loose, and re-mounted the steering arm onto the steering gear output shaft, with the timing marks aligned. Somebody had used a 5/8" pinch bolt on it. I replaced that with a new 3/4" grade 8 bolt and nut. With the wheels pointed more-or-less straight ahead, and the steering box more-or-less centered (about 3-1/4 turns from either stop to center), the drag ling stud would not re-engage. So, I screwed the adjustable ball (looks like a big tie rod end) in as far as I could get it. Could have used 1-2 more turns on that, as the steering wheel/gear is still a fraction of a turn off-center. But, at least it's a lot closer than it was before! I now have full steering to either side. And, the relief poppets in the steering box are kicking in about right...just before the wheel stops make contact. The steering is quite a bit tighter in the straight-ahead mode than it was before. So, maybe there is something to the vicious runor that the steering boxes were made with tighter lash in the center than at the extremes. I also removed both front rims from the spoke wheels, cleaned the mating surfaces, and re-mounted them. I paid attention to the side wobble of the tires, tightening them in a sequence so as to minimize the side wobble, and torqued them to something in the vicinity of the Mack spec. The right front is now almost dead true, and the left front has very little wobble to it. The difference this made in the ride and the controllability of the old truck was unreal! It will now run out to it's top speed (somewhere between 60 & 65 MPH) without the front end bouncing all over the road. The rears still have a bit of hoochy-coo in them, but the front is 10 times better than it was. I know the kingpins and bushings are shot. And, with the bent tie rod/tie rod end, the toe HAS to be out a little. But, this gave me a glimmer of hope that the world can, indeed, be a better place! Not bad for a few minutes wrenching. Now, when I can work on the rest of the front end, it should start to behave like a good puppy! Kent
-

Tie Rod (center link) Needed
doubleclutchinweasel replied to doubleclutchinweasel's topic in Driveline and Suspension
I'll give them a shout. Thanks.As far as I can tell, these are 1-1/8" - 12 on both ends (LH thread on one end, and RH thread on the other).- 5 replies
-
- tie rod
- center link
-
(and 1 more)
Tagged with:
-
Yeah, that looks a lot like mine! I hope that, when I get in there, mine is serviceable, too. I figured it would take longer to disassemble the hubs/brakes/linkages than it would to do the actual knuckles! I've already cleaned the surrounding areas the best I could, and have soaked everything down with penetrant. Hopefully, the backing plates will un-bolt fairly easily. Looks like I will be delayed a bit due to the weather turning colder and the days getting shorter. It's freakin' dark when I get home...and the time hasn't even changed yet. This truck has the oil-filled Stemco hubs on it, too. So, i figure I'll do a little work in there while I'm at it. I hope the pressed-on seal rings aren't too badly worn, as new ones cost WAY more than the seals themselves. According to my Mack service manual, the bearings are retained by the nut/lockwasher/locknut system, rather then the pinch-type nut. I have no idea what size spindle nut wrench that takes. Got any ideas?
-
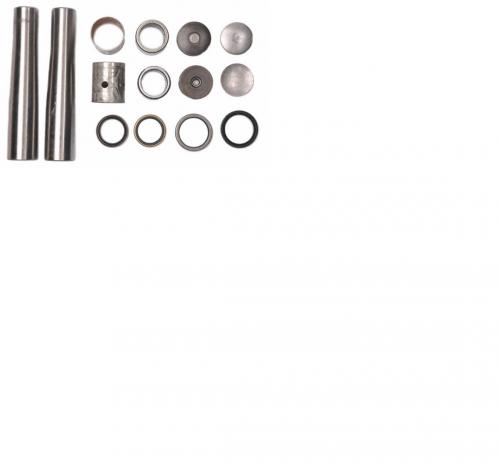
Hi, Everybody! Well, as soon as I identify definite sources for all the bits and pieces on the front end of the old R600, I will start pulling the front end apart so I can replace the kingpins and bushings. I am working on a "dolly" right now, which should help me to pull the tire/wheel/hub assembly off. Of course, I probably won't have the correct spindle nut wrench (I never do!). Then, I guess I get to fight those ancient bolts/nuts holding the backing plate on. Yea! More rusty fasteners! Thank God for PB-Blaster. Then, maybe I can get to the knuckles themselves. As far as I can tell, this axle (FA-535) uses the "bushing on the bottom / needle bearing on the top / thrust bearing underneath" setup with tapered pins (301 SQ 46B kit - see image below). The kits now appear to come with the "drive plug" to close off the top, like the later models. Mine actually uses the bolt-on cap. But, as near as I can tell, the new "B" kit will work for either configuration. I plan to replace the tie rod (it's bent on the end), the tie rod ends, the drag link end, the kinpins/bushings, and all the oils seals and such on the spindles. I have (hopefully) good part numbers on everything, and am currently confirming availability of some of the smaller parts from multiple sources. I am hoping that the needles in the bearings have not worn through the races, and started digging into the bore in the knuckle itself. If they have, then a new needle bearing won't live long in that bore! If the knuckle bores are damaged, then a whole new game plan might be needed. Anybody ever seen one wear that far? Or, is most of the wear concentrated on the pins, as it should be? Kent
-
Hey, Anybody got a good, straight tie rod tube (center link) for an FA-535 front axle? The tube is about 2" diameter in the middle, and steps down at the ends. The ends of the tube are internally threaded 1-1/8" (12 threads per inch). The overall length is right at 60". I THINK the Mack part number may be 7 QH 243. Mine is bent right through the threaded portion. The tie rod end is bent there as well. So, a curved tie rod end in a curved hole! That's not coming out! I have a guy looking for one, but don't know when he will be able to concentrate on it enough to do me any good. So, I thought I'd ask the brain trust! This is posted in both the "parts wanted" and "suspension" forums. Kent
- 12 replies
-
- tie rod
- tie rod end
-
(and 1 more)
Tagged with:
-
Hey, Anybody got a good, straight tie rod tube (center link) for an FA-535 front axle? The tube is about 2" diameter in the middle, and steps down at the ends. The ends of the tube are internally threaded 1-1/8" (12 threads per inch). The overall length is right at 60". I THINK the Mack part number may be 7 QH 243. Mine is bent right through the threaded portion. The tie rod end is bent there as well. So, a curved tie rod end in a curved hole! That's not coming out! I have a guy looking for one, but don't know when he will be able to concentrate on it enough to do me any good. So, I thought I'd ask the brain trust! This is posted in both the "parts wanted" and "suspension" forums. Kent
- 5 replies
-
- tie rod
- center link
-
(and 1 more)
Tagged with:
-

Replacing Slack Adjusters
doubleclutchinweasel replied to doubleclutchinweasel's topic in Air Systems and Brakes
Yeah, different clutch. Cable-operated, twin-disc, pull-style. Has noisy t/o bearing, which only comes with the pressure plate.Kent -

Replacing Slack Adjusters
doubleclutchinweasel replied to doubleclutchinweasel's topic in Air Systems and Brakes
This one does not have the spacers. It is a cable-operated two-disc pull-style clutch. The only reason I need to change it is because the t/o bearing is pretty noisy. Discs have life left in them, but the t/o bearing only comes with the pressure plate. Bummer, huh? Besides, I'd hate to tear it down that far and NOT replace everything in there!Kent -

Replacing Slack Adjusters
doubleclutchinweasel replied to doubleclutchinweasel's topic in Air Systems and Brakes
Thanks, Ron.Stops like a new one, too! And, leaks a lot less! You know, everything I'm doing on this truck turns into an "education". Nothing is simple! Everything reqires research, study, planning, and (finally) execution. And, the big parts are not usually the problem. Usually it's the little 1/4" bolts that hold the wires up out of the way that cause all the sweatin' and cussin'. Makes me feel old! I was out there last night, with the flashlight in my mouth (again) finishing up a couple of more air lines. Ten minutes to run the air lines, but two hours to get the old ones off. Wait a minute... That's what we love about workin' on these old trucks, isn't it?!!! More to come... Kent -
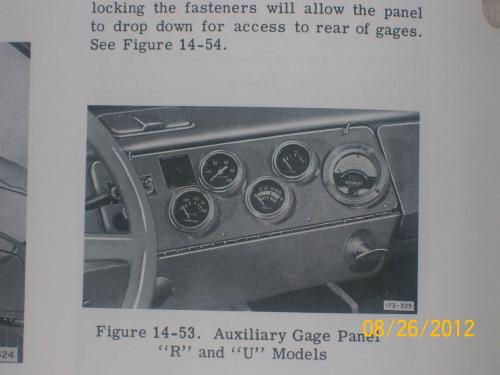
The manual states that "additional" gages could be mounted in this panel, or that the standard gages could be moved there, if there was a tachograph (or tachographs) installed in the conventional location in the main dash. Apparently, if there was one or two recording instruments installed in the main dash, there was no room left for anything else.The angled gages do look really cool, don't they?! Kent
-

B61T upgrade to Springbrakes
doubleclutchinweasel replied to thomastractorsvc's topic in Air Systems and Brakes
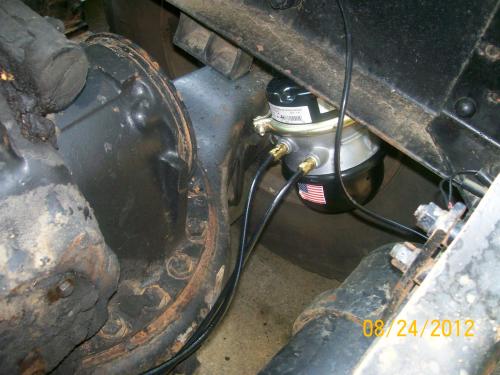
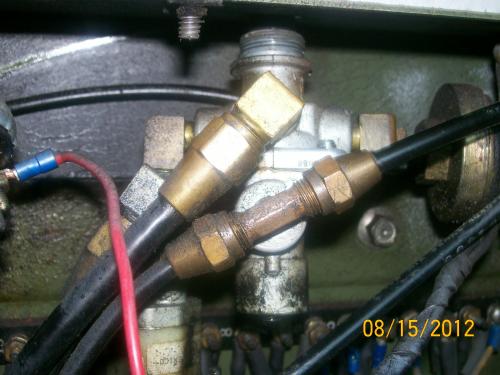
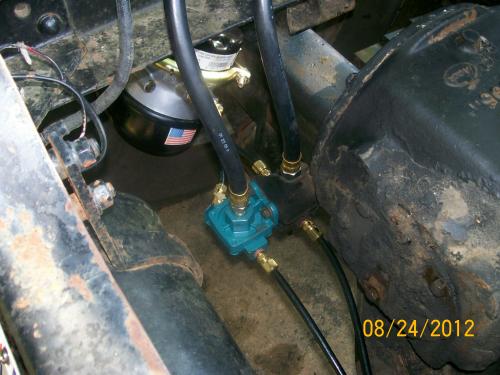
Nice job. I just did some similar work on my R600, which originally had DD3 chambers. Looks like we may have used the same brand of chambers. Looks like the ones from Ranger Brake in Tennessee. I got mine from CarQuest. Talked to the son of the founder of the company. Pretty cool little family business. They made components for other brake folks for years, and then started selling their own. They still sell to the other guys from time to time, And, I liked the price! I didn't notice how you handled the anti-compounding function (sorry). My truck had a PP-2 control valve instead of a PP-1. This valve has built-in anti-compounding capability, via a line tee'd off the service brake line. It is the one attached to the lower part of the valve. Of course, you may have handled this a dozen different way. If so, sorry for the distraction. I used a Haldex-Midland-remanufactured Bendix QR-1 as a quick release valve, as well as a convenient place to tee the lines. I still have LOTS of lines to upgrade! Keep up the good work. Kent -

Replacing Slack Adjusters
doubleclutchinweasel replied to doubleclutchinweasel's topic in Air Systems and Brakes
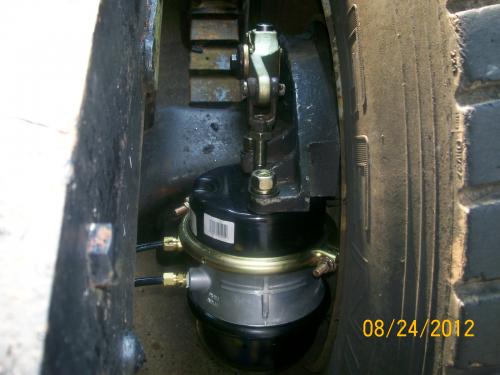
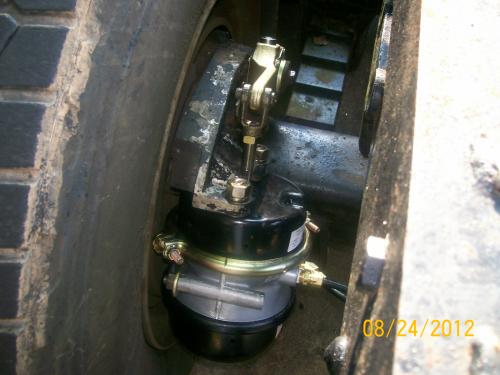
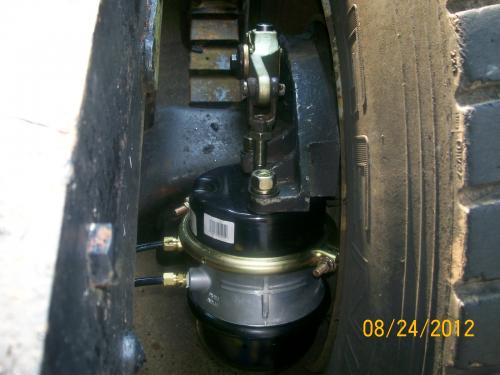
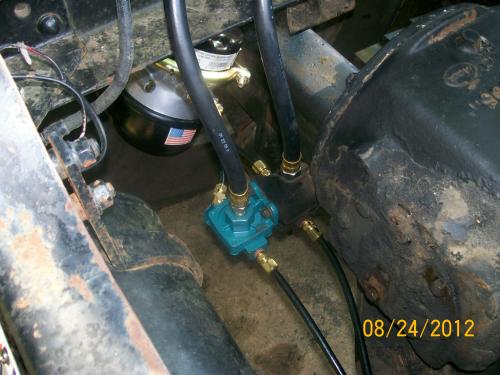
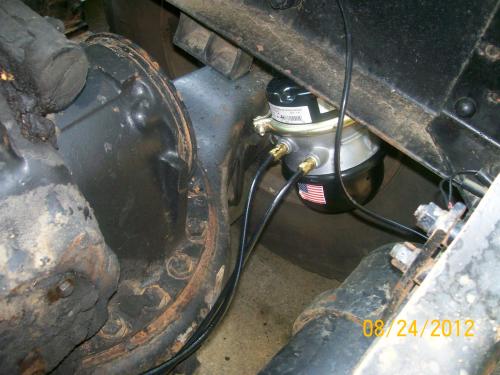
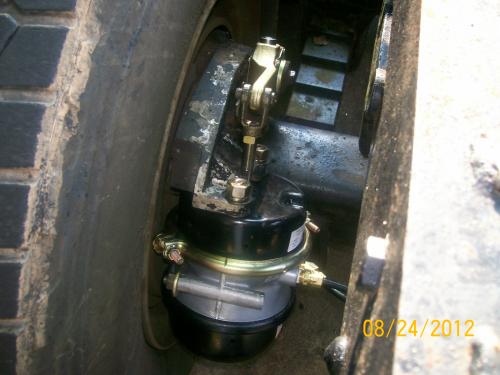
Just a couple of shots of the new slack adjusters and spring brakes on the old Dog. Notice the bolt-on retention instead of snap rings... -

Spring Brake Upgrade
doubleclutchinweasel replied to doubleclutchinweasel's topic in Air Systems and Brakes
A few shots of the new spring brake chambers, new tubing, and new slack adjusters. Gonna do a little more "detailing" on it this weekend, and maybe do the next axle.
BigMackTrucks.com
BigMackTrucks.com is a support forum for antique, classic and modern Mack Trucks! The forum is owned and maintained by Watt's Truck Center, Inc. an independent, full service Mack dealer. The forums are not affiliated with Mack Trucks, Inc.
Our Vendors and Advertisers
Thank you for your support!


