


mattb73lt
-
Posts
1,427 -
Joined
-
Last visited
-
Days Won
146
Content Type
Profiles
Forums
Gallery
Events
Blogs
BMT Wiki
Collections
Store
Everything posted by mattb73lt
-

B-73 Restoration
mattb73lt replied to mattb73lt's topic in Antique and Classic Mack Trucks General Discussion
It is, which I’m very happy about!! Still a lot to do, but I think that it will go reasonably quick too as a lot has been done already and it will be a lot of paint and assembly. -
B-73 Restoration
mattb73lt replied to mattb73lt's topic in Antique and Classic Mack Trucks General Discussion
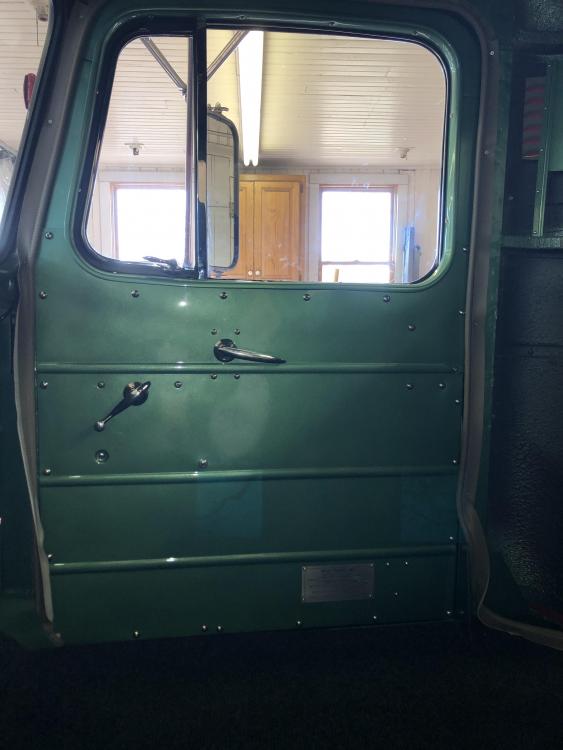
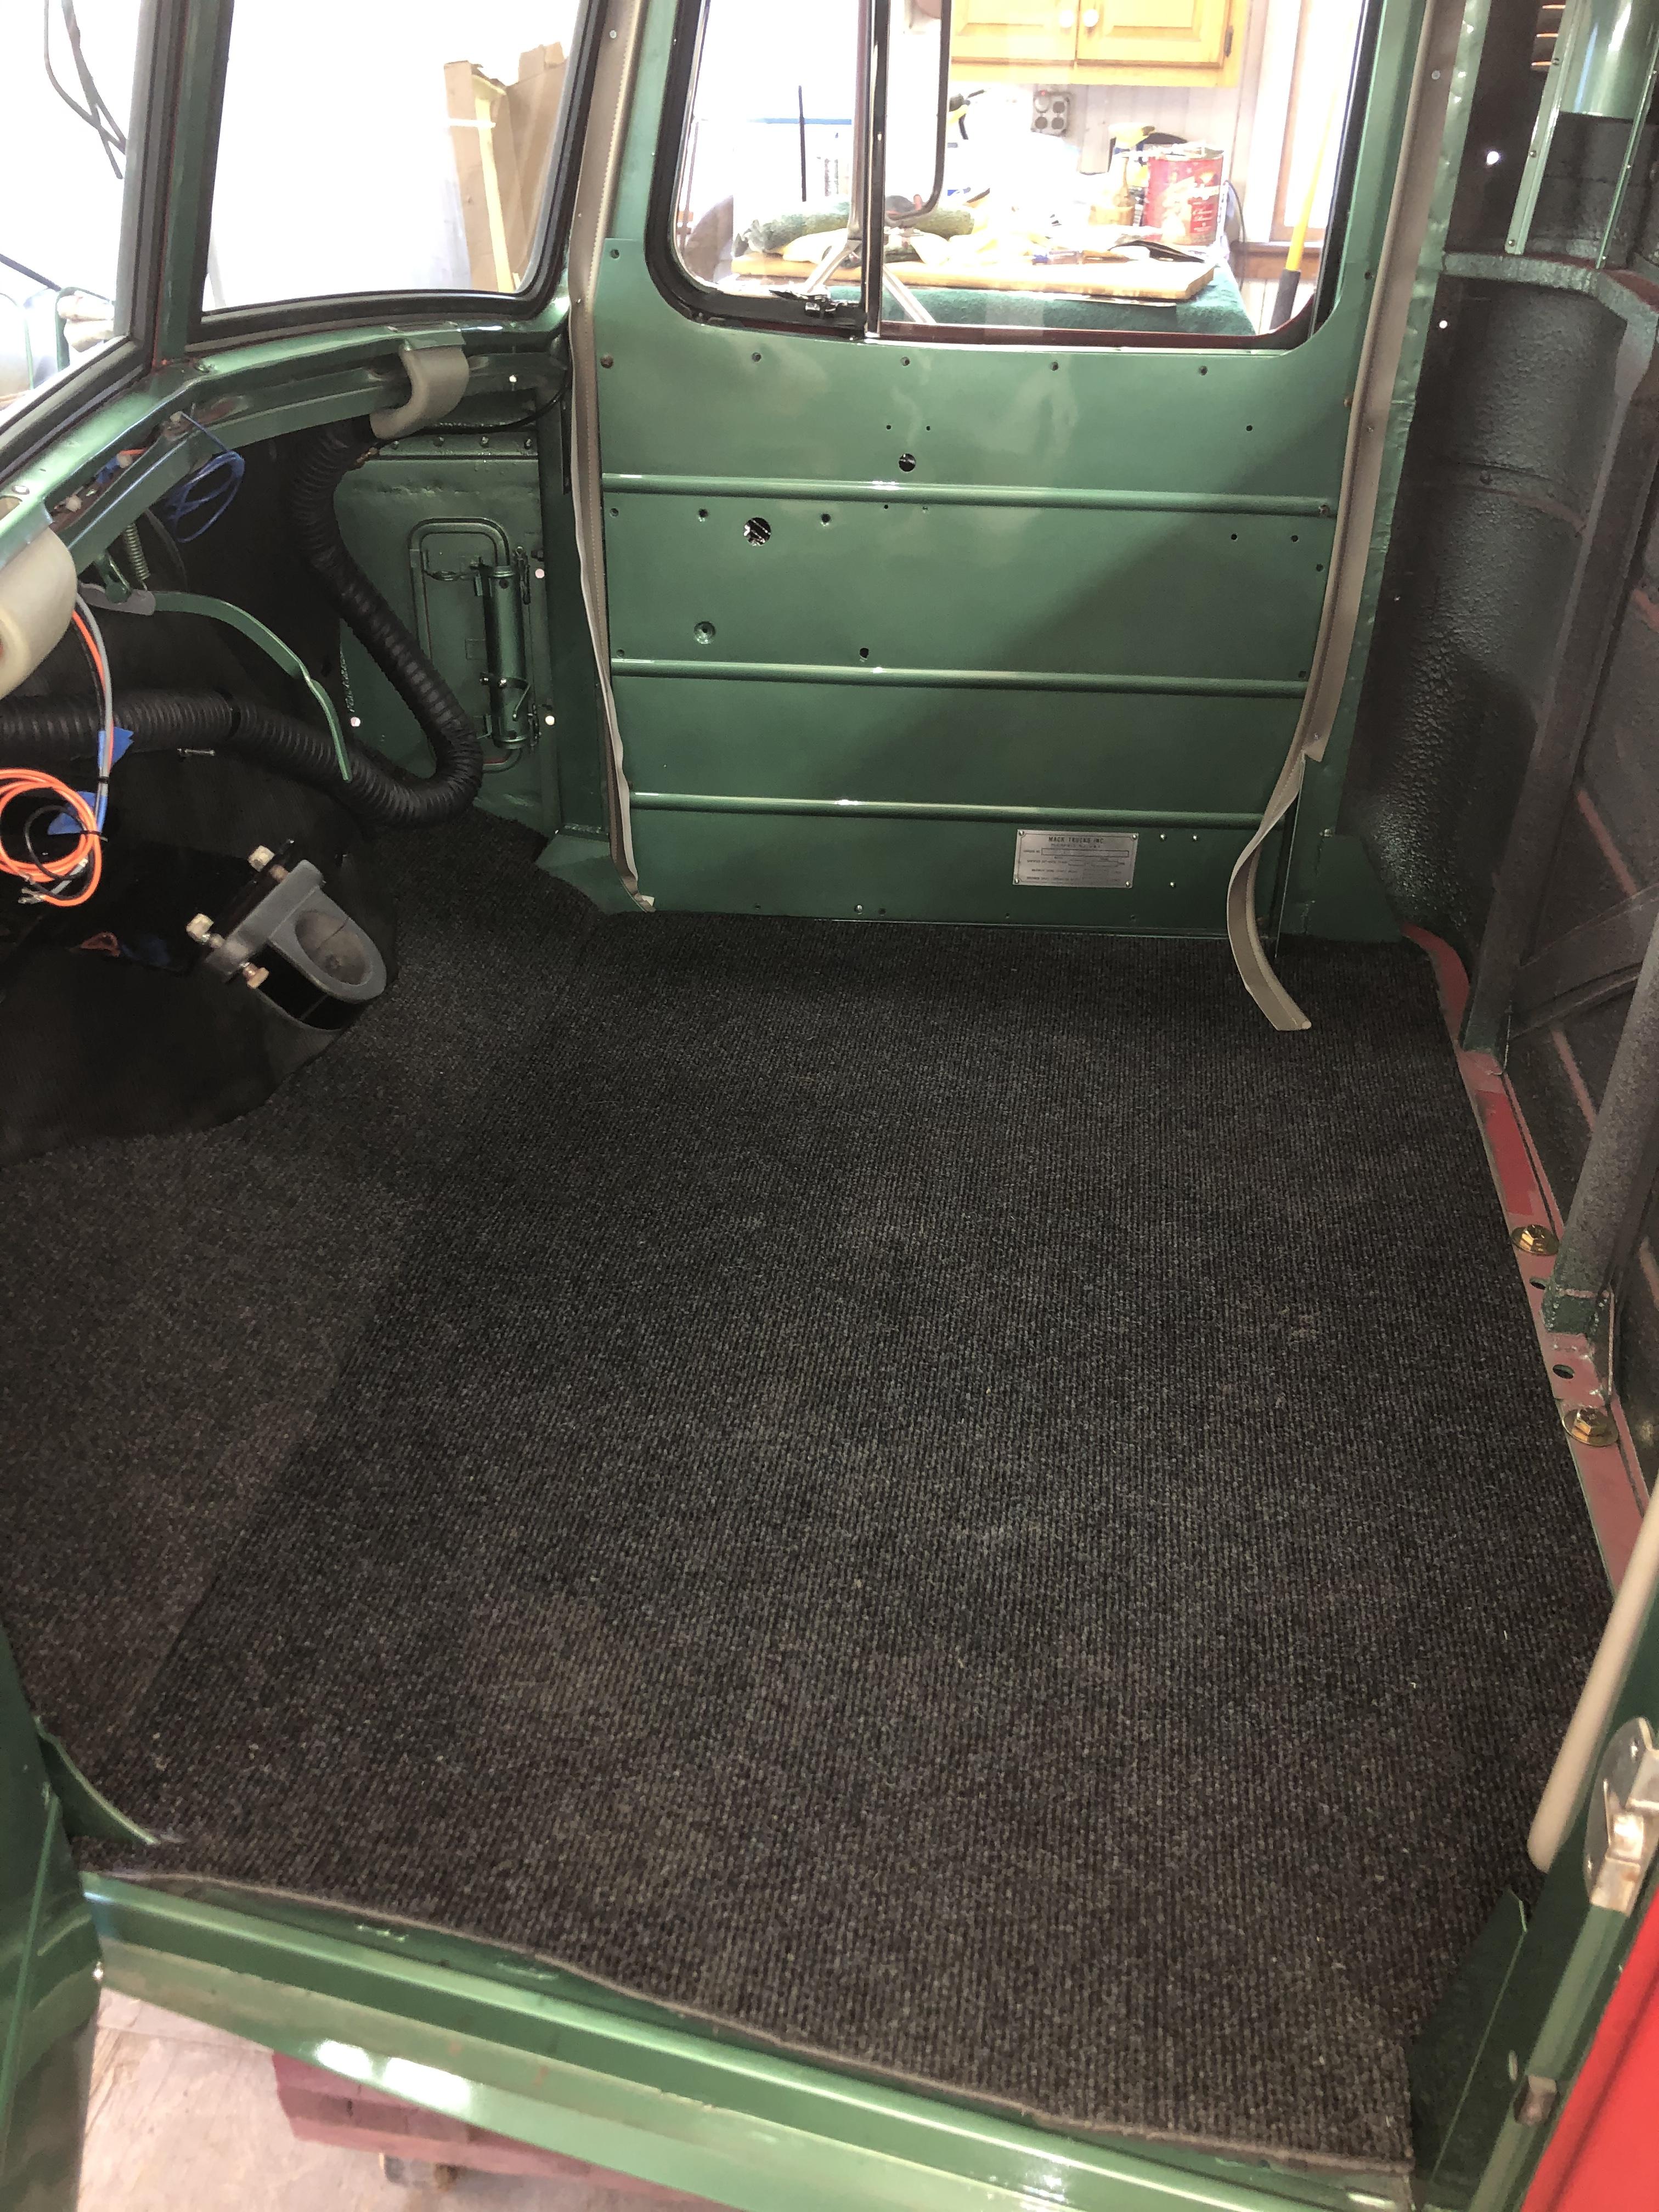
Hurtling towards completion!! Passenger door is done, all stainless hardware really makes the panel pop. A temporary carpet to protect the floor. All the glass is in. Driver’s door to finish and still haven’t received the glove box liner, so the dash is still out. I should have this done by my deadline. It’s really looking good and boy is it getting heavy with almost everything back in it.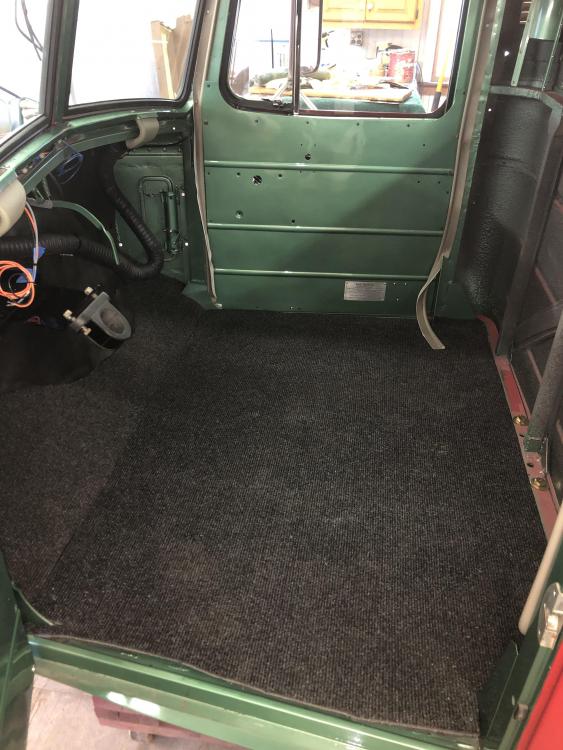
-
In talking to the old timers it was. I want to get the sound right, too. I’m back and forth on a straight pipe or a muffler, too. Maybe just a resonator. I also don’t want to go deaf on long trips. Another thought was an under frame muffler. I’m installing a stack support to the frame, to remove the stack off the corner of the cab. I didn’t want it resonating the cab, creating other noise. The whole cab has Lizard Skin sound and heat coating applied to it. I’ll supplement that with patches of Dynamat. I want the sound, but I also want it to be comfortable.
-
B-73 Restoration
mattb73lt replied to mattb73lt's topic in Antique and Classic Mack Trucks General Discussion
I’ve got a upholstery guy who has the cardboard I need for it. There was almost none of it left when I got the truck. I’m just going to have him do the back wall, headliner and the three headers over the doors and windshields. Using factory photos, photos I’ve taken at shows and shards of what was left to get if close to original. I have a nice piece of industrial carpet, with a 1/4” rubber backing for the floor that I’ll cut to fit the floor. It’s charcoal in color. I’m putting two air ride cloth seats in it. I removed the small factory bench on the right and the large bin that was underneath it for more space. I’ll have the upholsterer cover the entire back wall with factory type cardboard. Keeping it simple for now, but may change it down the road. -
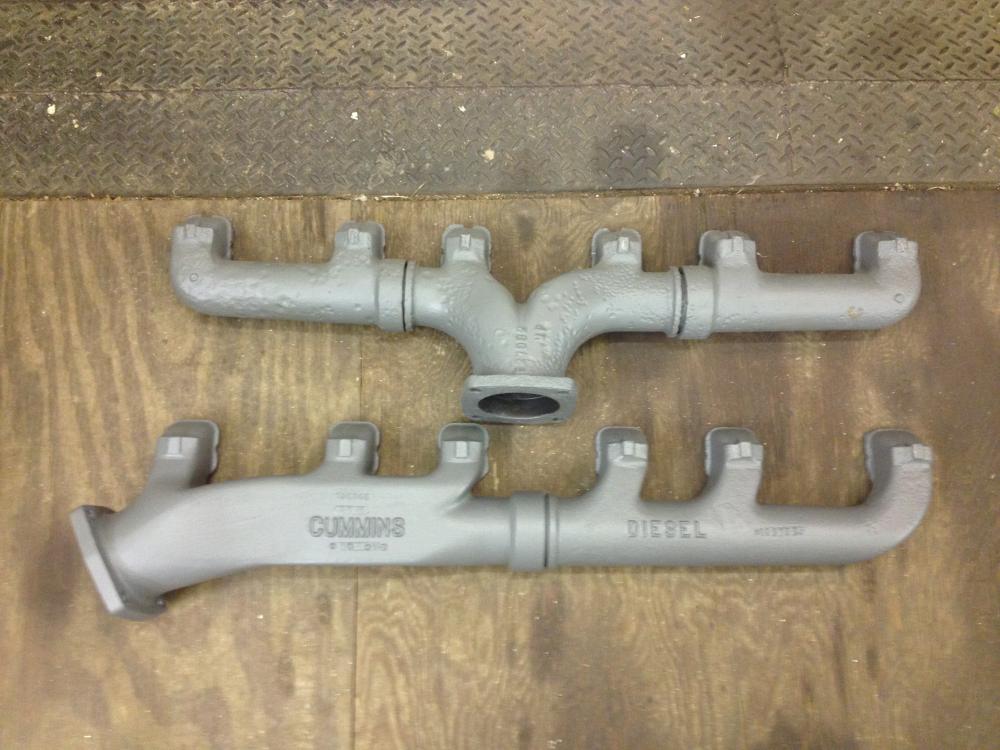
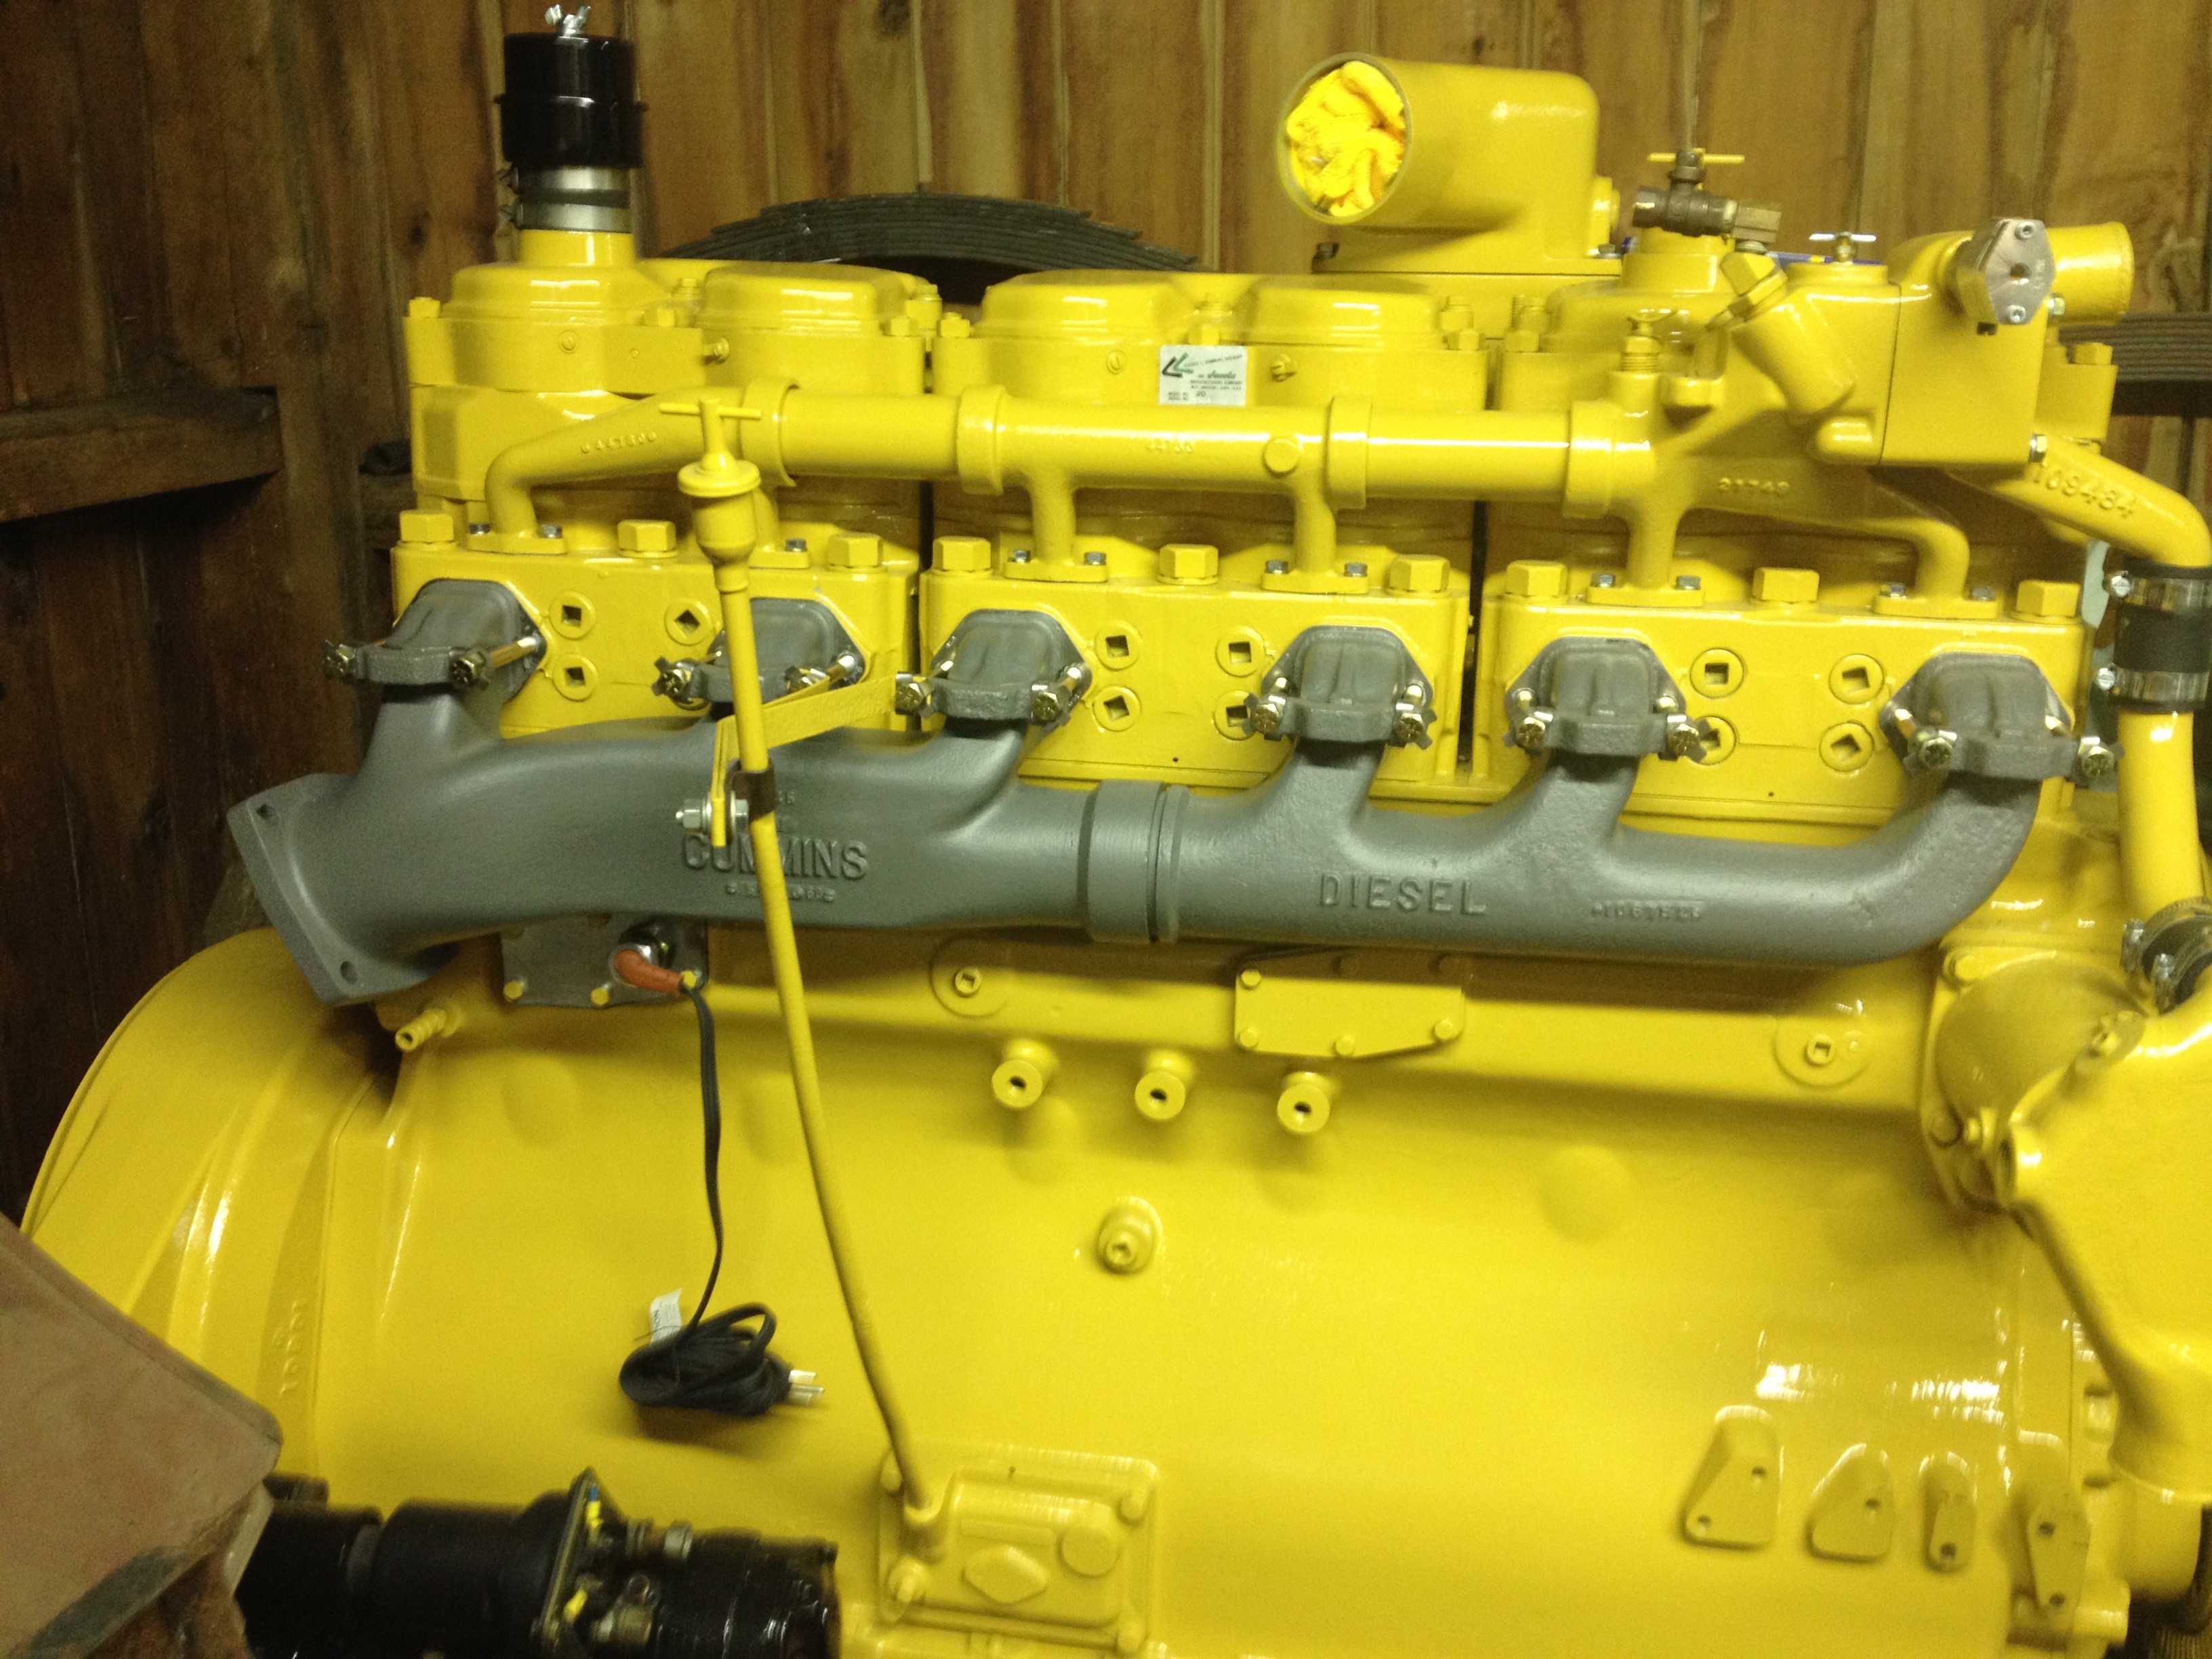
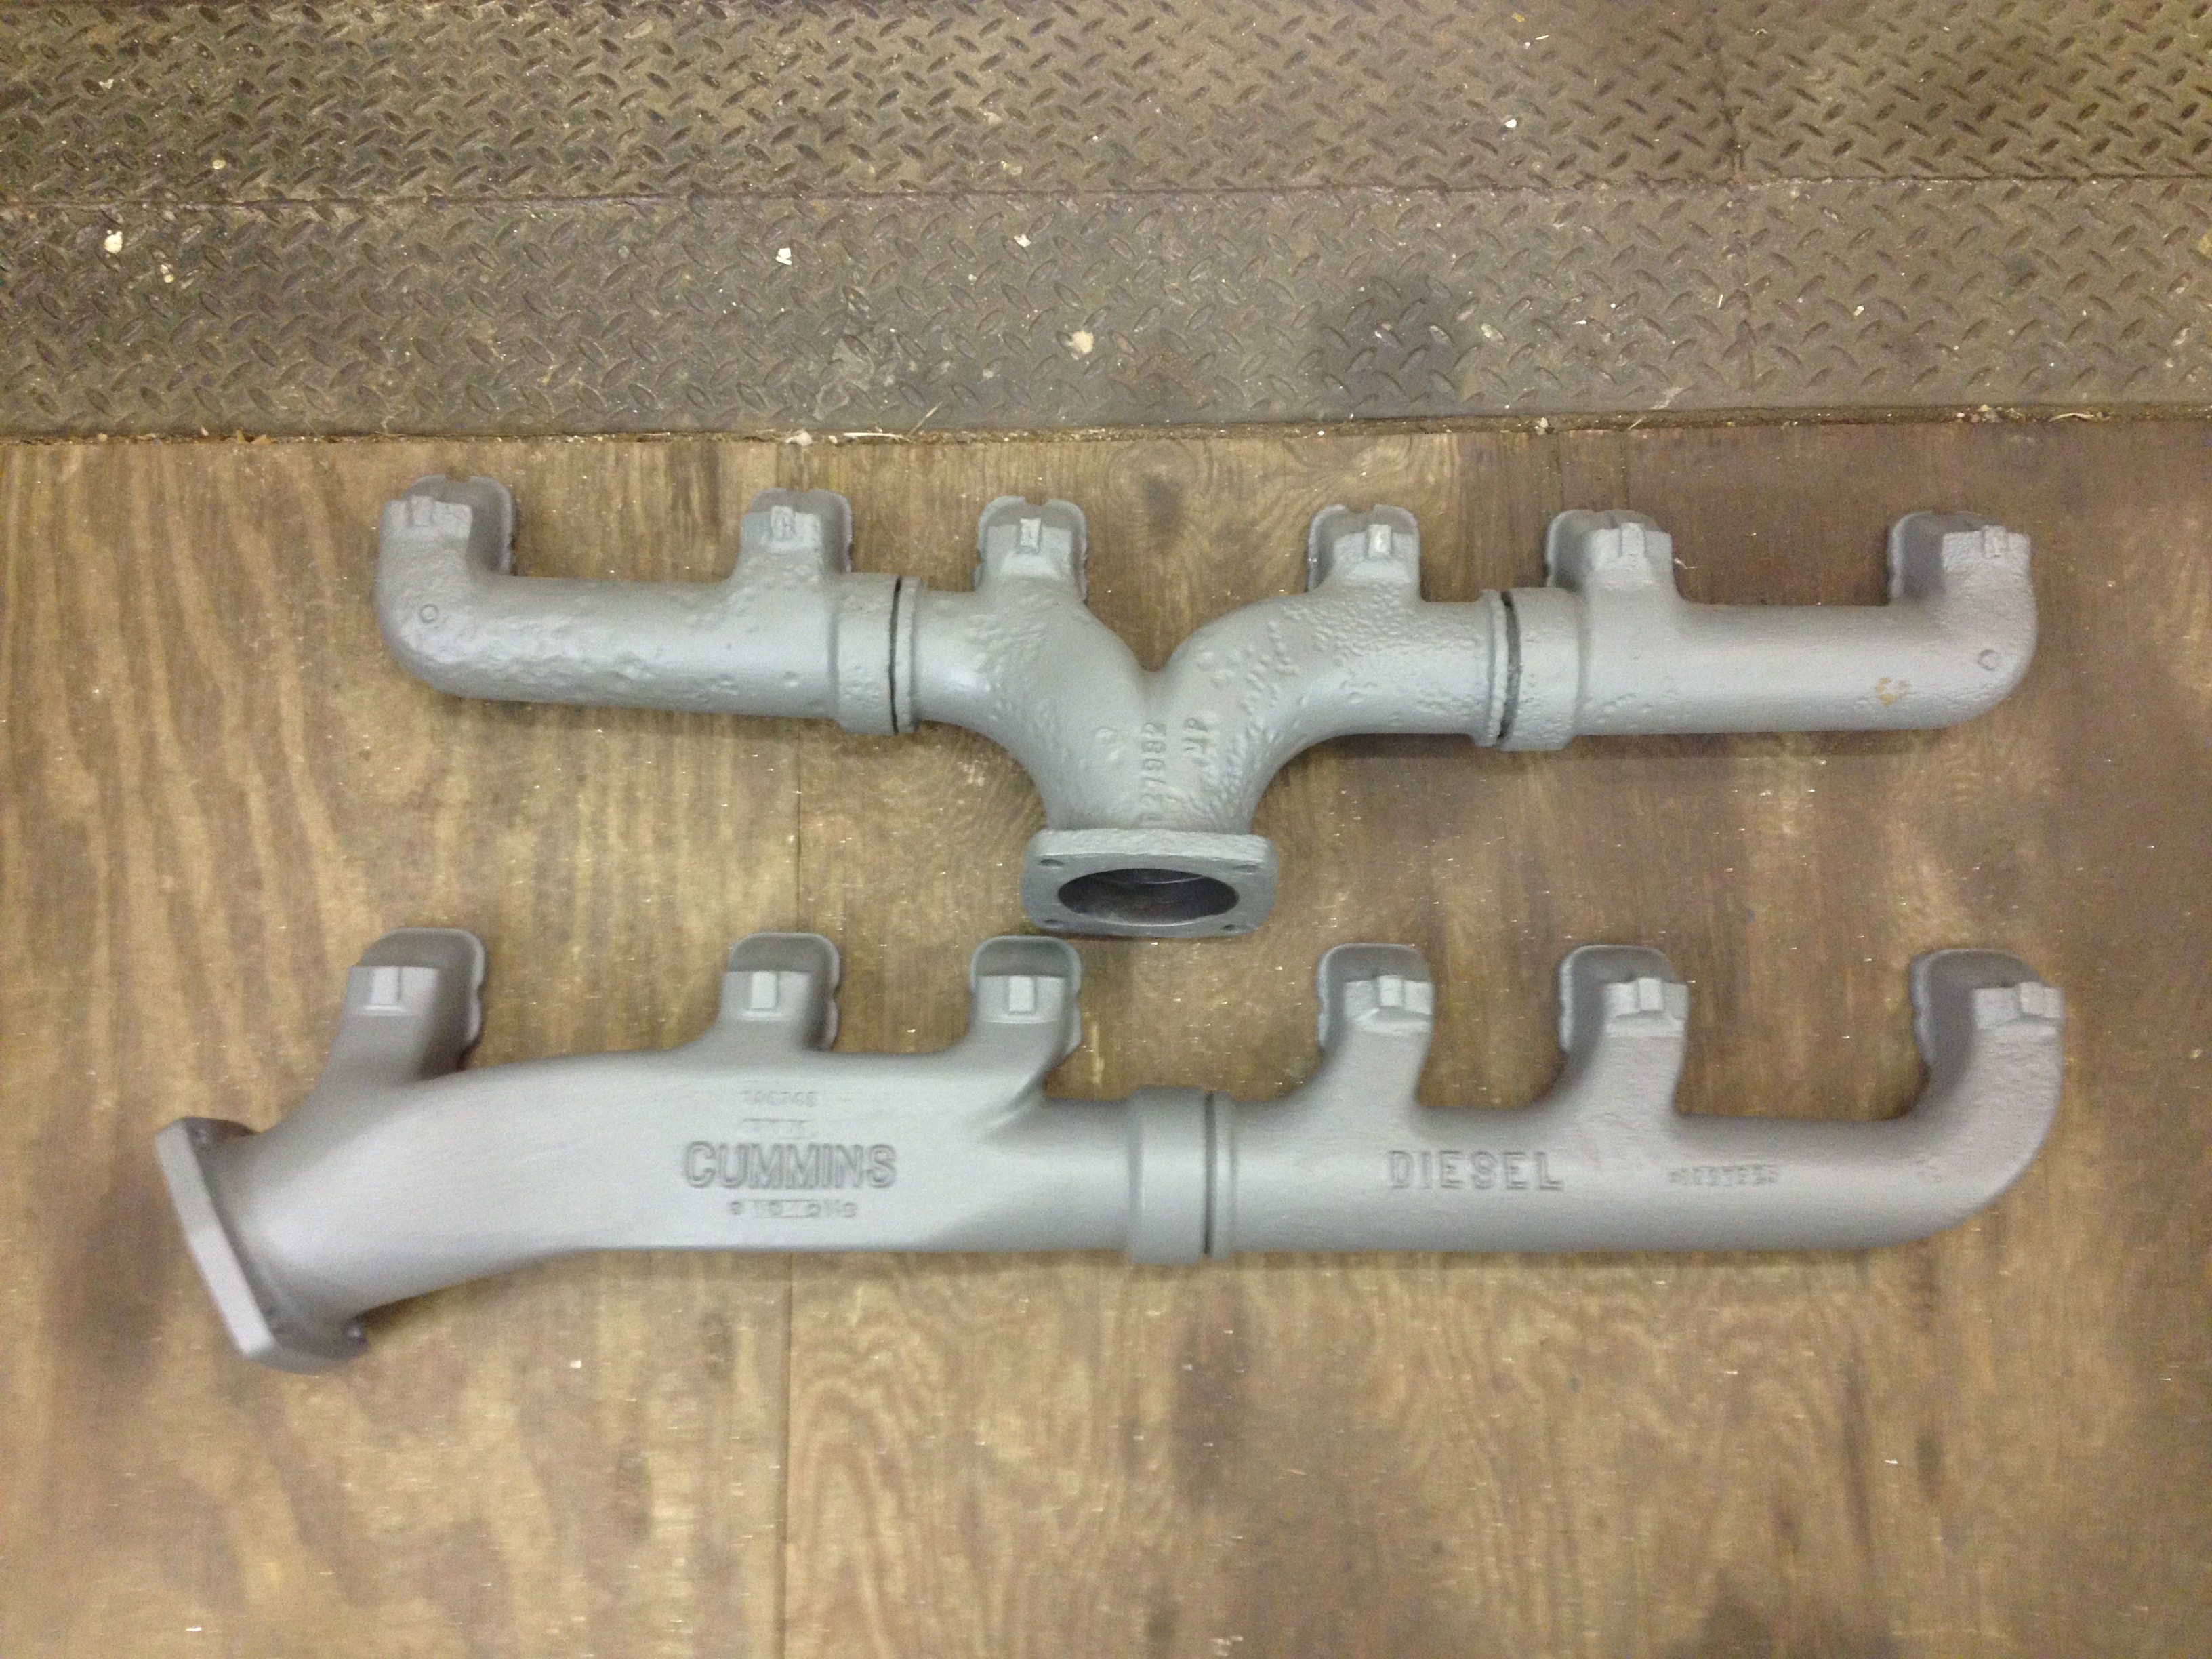
I was wondering on that other manifold, on the tailgate, if you might run the pipe over the frame rail to the outside, then run it back?
-
This is a crappy 35mm pic I took of my truck when I found it. The floorboard has a factory notch on the support that runs across it. I think it’s there to allow an exhaust pipe to run through there above the transmission mount. You can see it if you zoom in on the pic. I’m not sure if there’s enough room to run the pipe downward, after the bell housing. If I run it over the mount, I could wrap it with header wrap to help with the heat.

-
Thank you!! Those are very helpful. I’m thinking about passing my pipe downward, just aft of the bell housings but before the transmission mount. I may need to run it over the transmission mount where it would be closer to the floorboards. That might be a heat issue, though.
-
Could you post a picture from the transmission looking forward to the manifold? Or maybe downward showing the manifold, bell housing and transmission mount? Looking to see where the exhaust pipe might pass through and down.
-
B-73 Restoration
mattb73lt replied to mattb73lt's topic in Antique and Classic Mack Trucks General Discussion
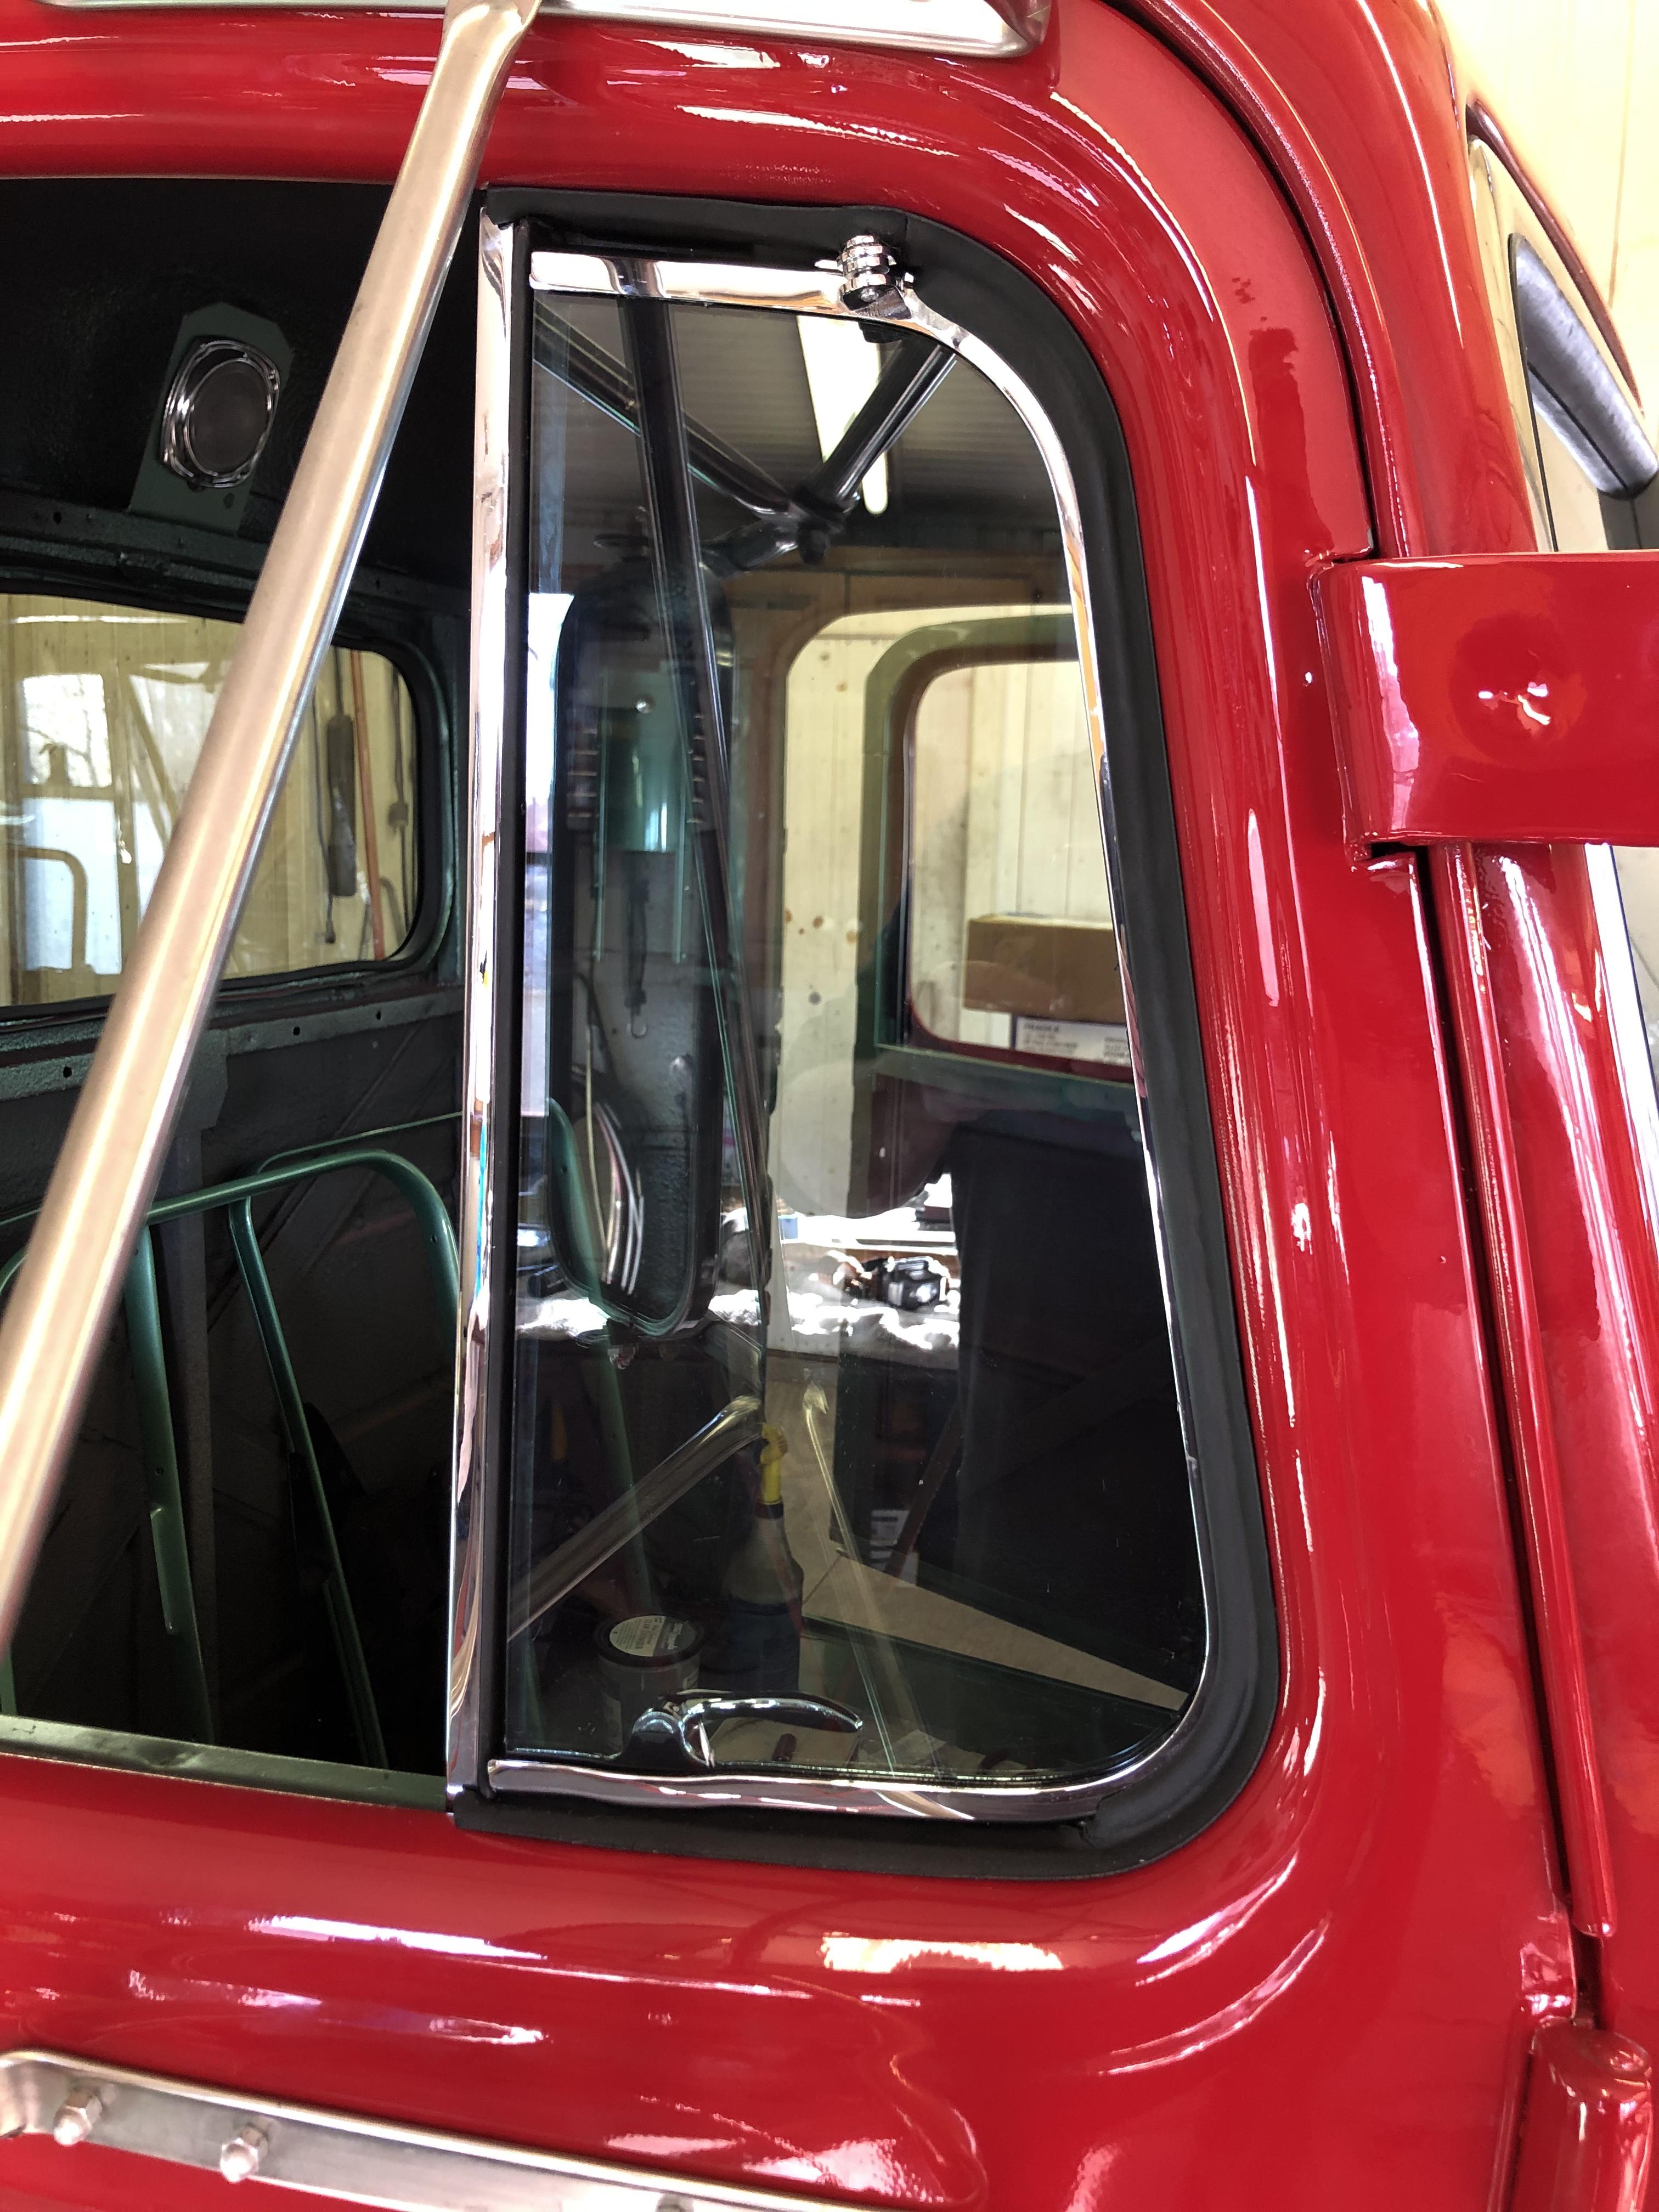
I was able to replace everything but the molded vent window seals. I carefully removed them and ran them through my glass bead cabinet. Being careful and reducing the air pressure. They cleaned up very well, removing paint, grime and a little rubber where they were dried out. They weren't too bad to start with. I've seen some really bad ones. -
B-73 Restoration
mattb73lt replied to mattb73lt's topic in Antique and Classic Mack Trucks General Discussion
Re-chromed, rebuilt and now reinstalled vent windows!! The chrome shop did an amazing job bringing the shine back to all the pieces I sent them. Not cheap, but not doing so would detract from my other efforts. A minor pain riveting them back together with the tiny hollow rivets.The cab is starting to “pop” a lot more as the shiny pieces go back on. Closing up on my winter goal of having the cab ready to move to the upholsterer by the beginning of April. Two more pieces of glass to go and it’ll have all new widows.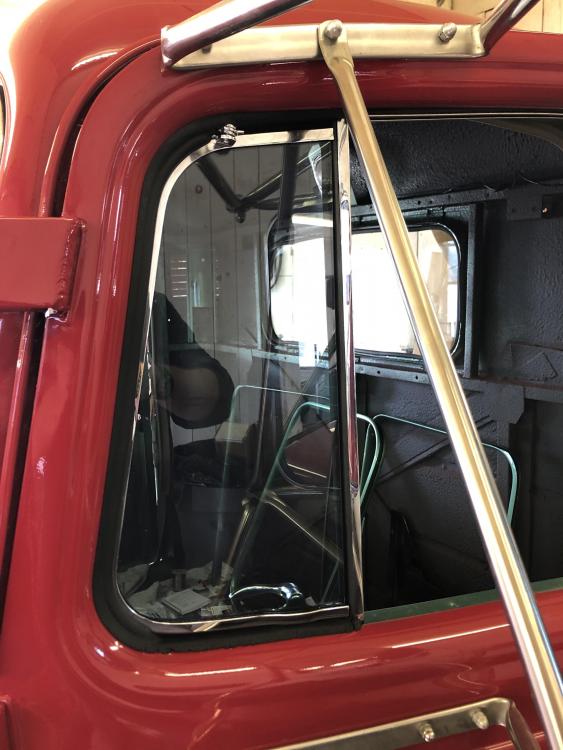

-
I'm doing the same to a 220, but in a L cab B-73. I have the same clearance concerns as the truck is far from assembled. I also have the lower one, with the baffle. The upper one is interesting, and may be easier to install.

-
B-73 Restoration
mattb73lt replied to mattb73lt's topic in Antique and Classic Mack Trucks General Discussion
The Ford System you're working on, is that a single motor system? If it is there is an identical controller for single motor systems available from Marinco. -
B-73 Restoration
mattb73lt replied to mattb73lt's topic in Antique and Classic Mack Trucks General Discussion
You'd probably have to figure out what each wire does. The Wexco motors have three wires each, low, high and park. They match the ones on the controller, the others are for power, ground, wash and one for the switch. -
B-73 Restoration
mattb73lt replied to mattb73lt's topic in Antique and Classic Mack Trucks General Discussion
BTW, if you're just looking for the controller on the wipers? I found it on Amazon for about $60 less than other suppliers. -
B-73 Restoration
mattb73lt replied to mattb73lt's topic in Antique and Classic Mack Trucks General Discussion
It is old, probably 1920's, but still accurate. -
B-73 Restoration
mattb73lt replied to mattb73lt's topic in Antique and Classic Mack Trucks General Discussion
That's great!! I hope it helps. Just trying to put out what I'm doing and finding. If it helps someone in their work, even better. -
B-73 Restoration
mattb73lt replied to mattb73lt's topic in Antique and Classic Mack Trucks General Discussion
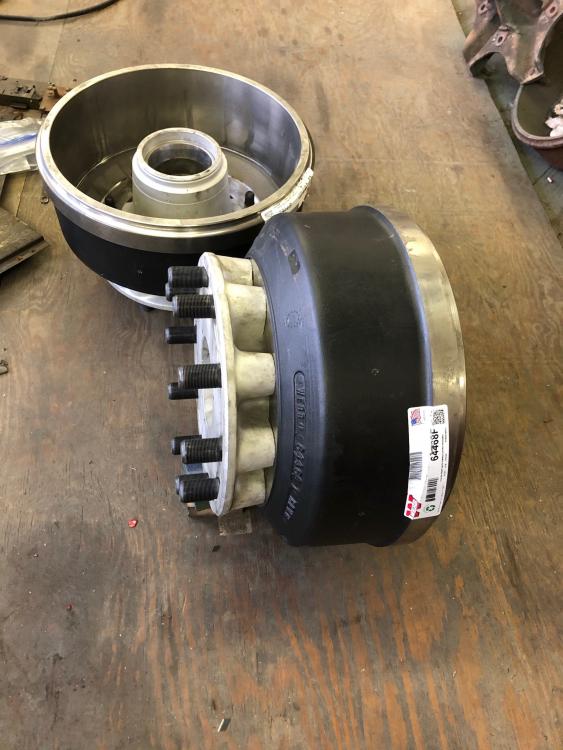
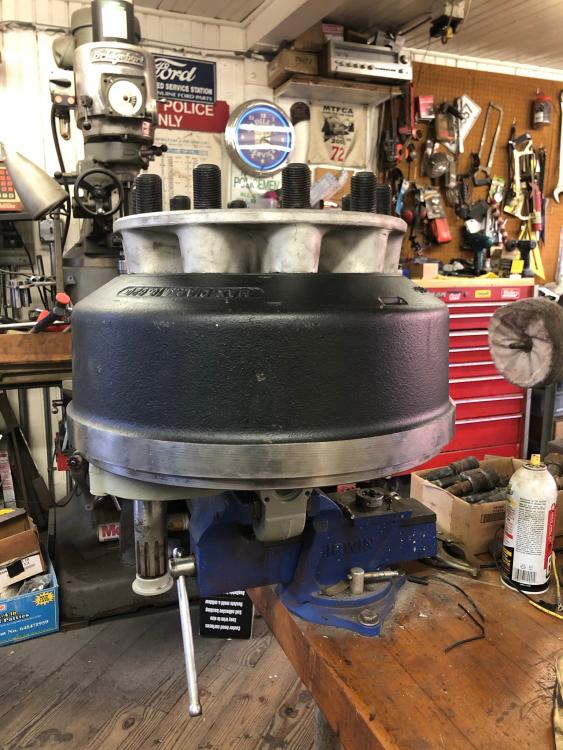
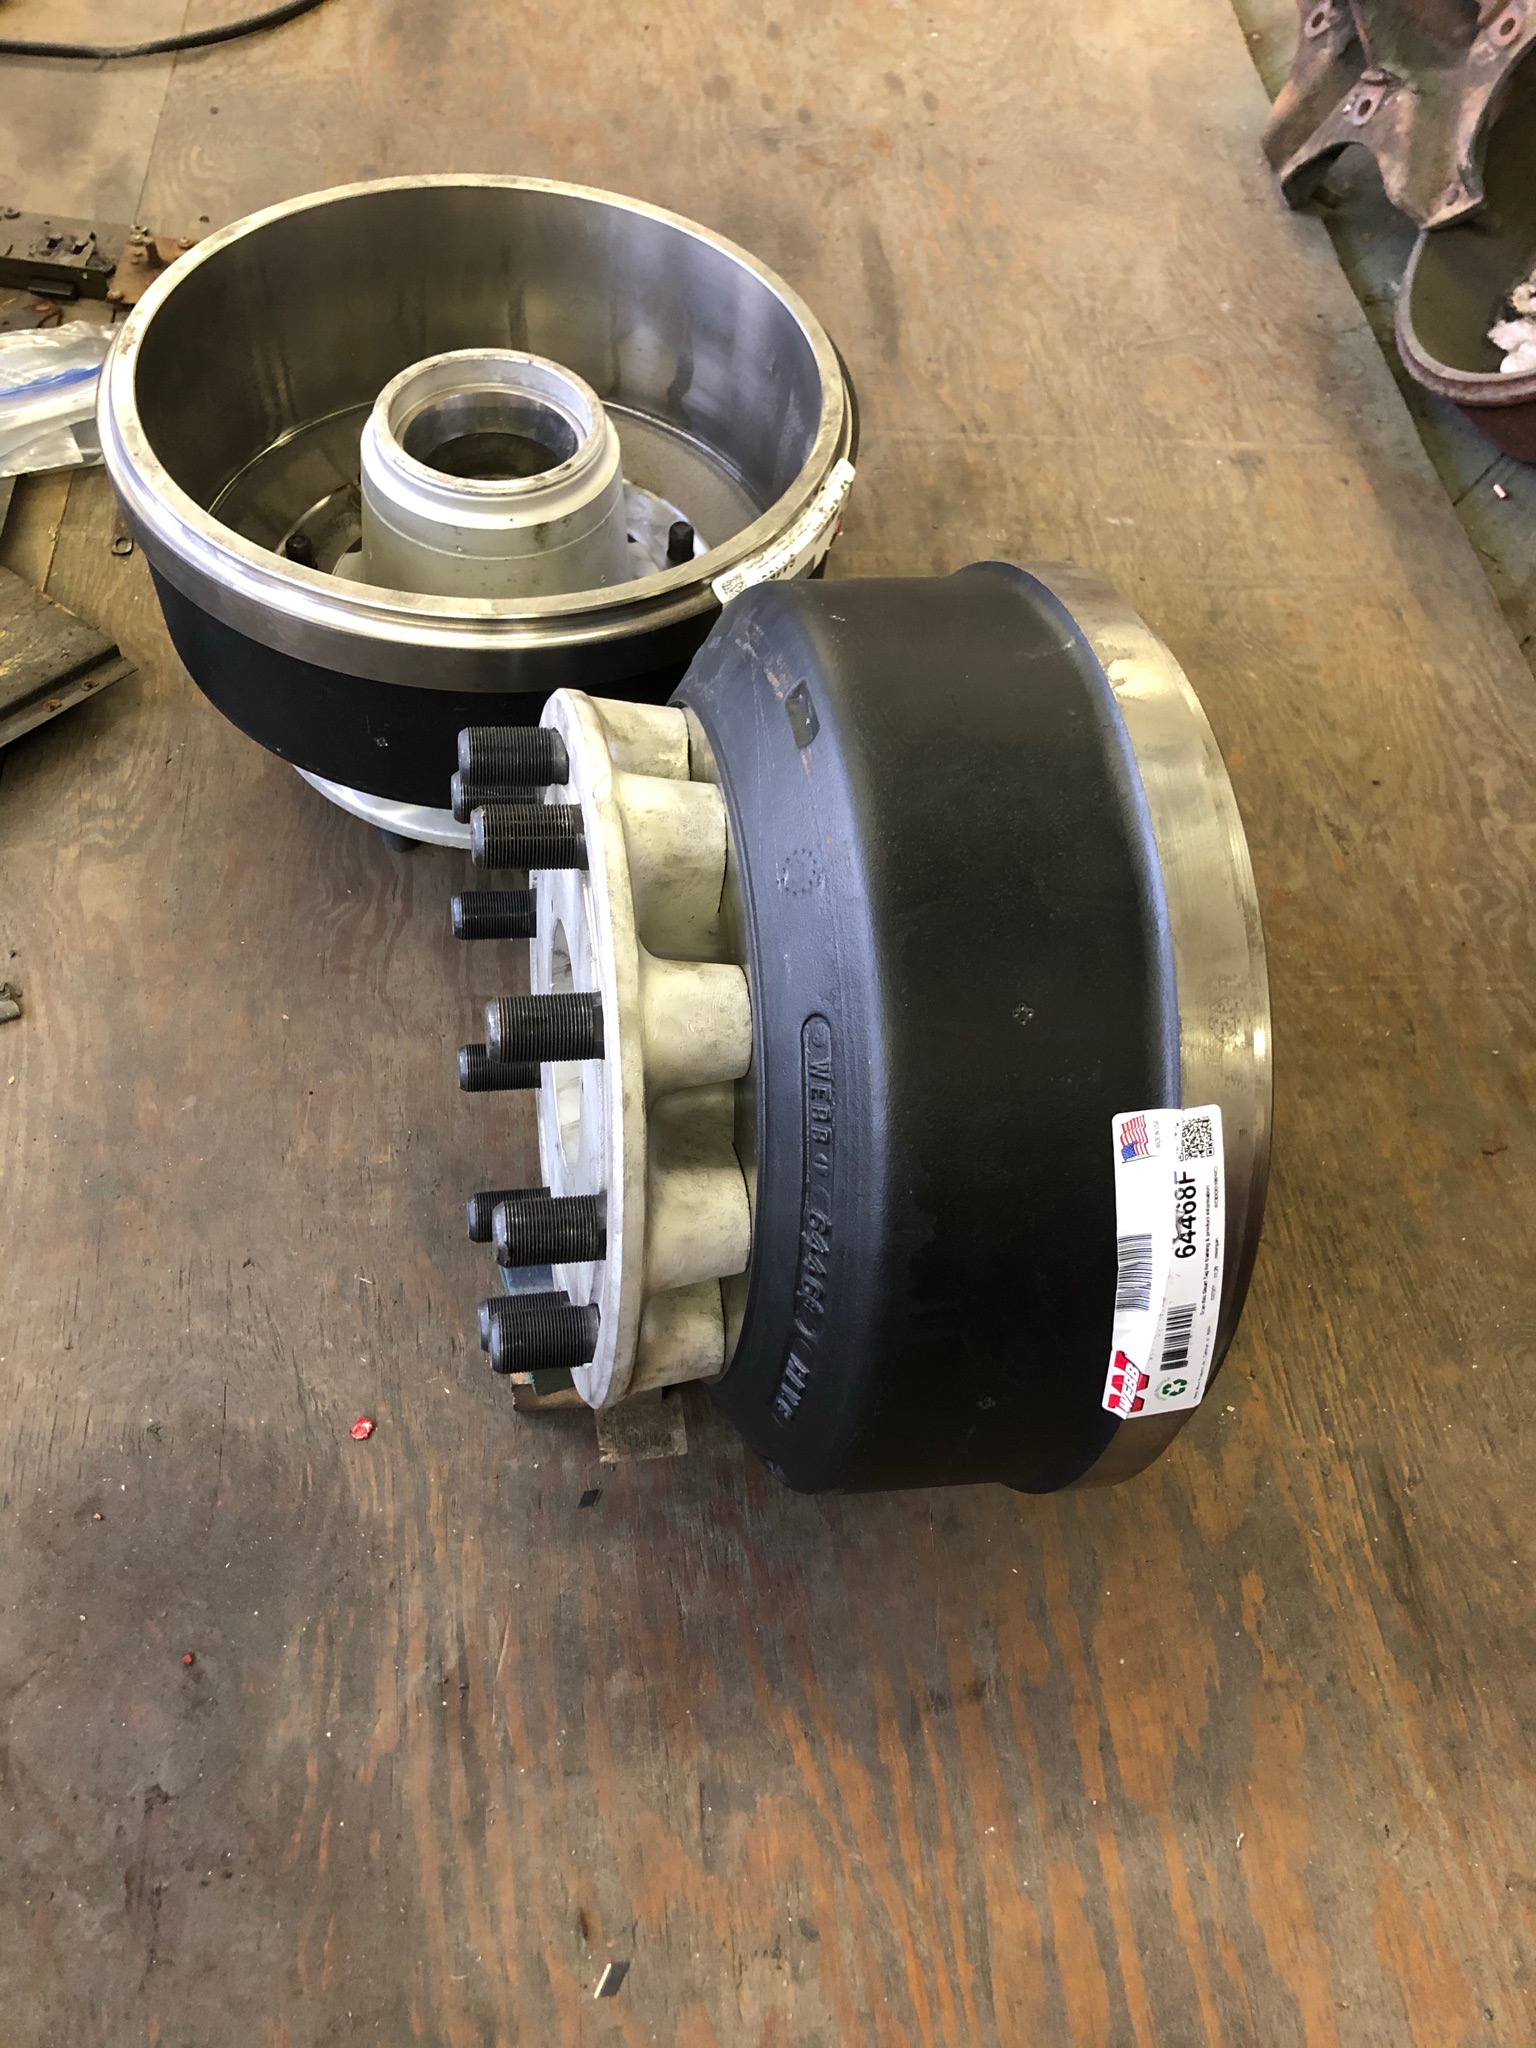
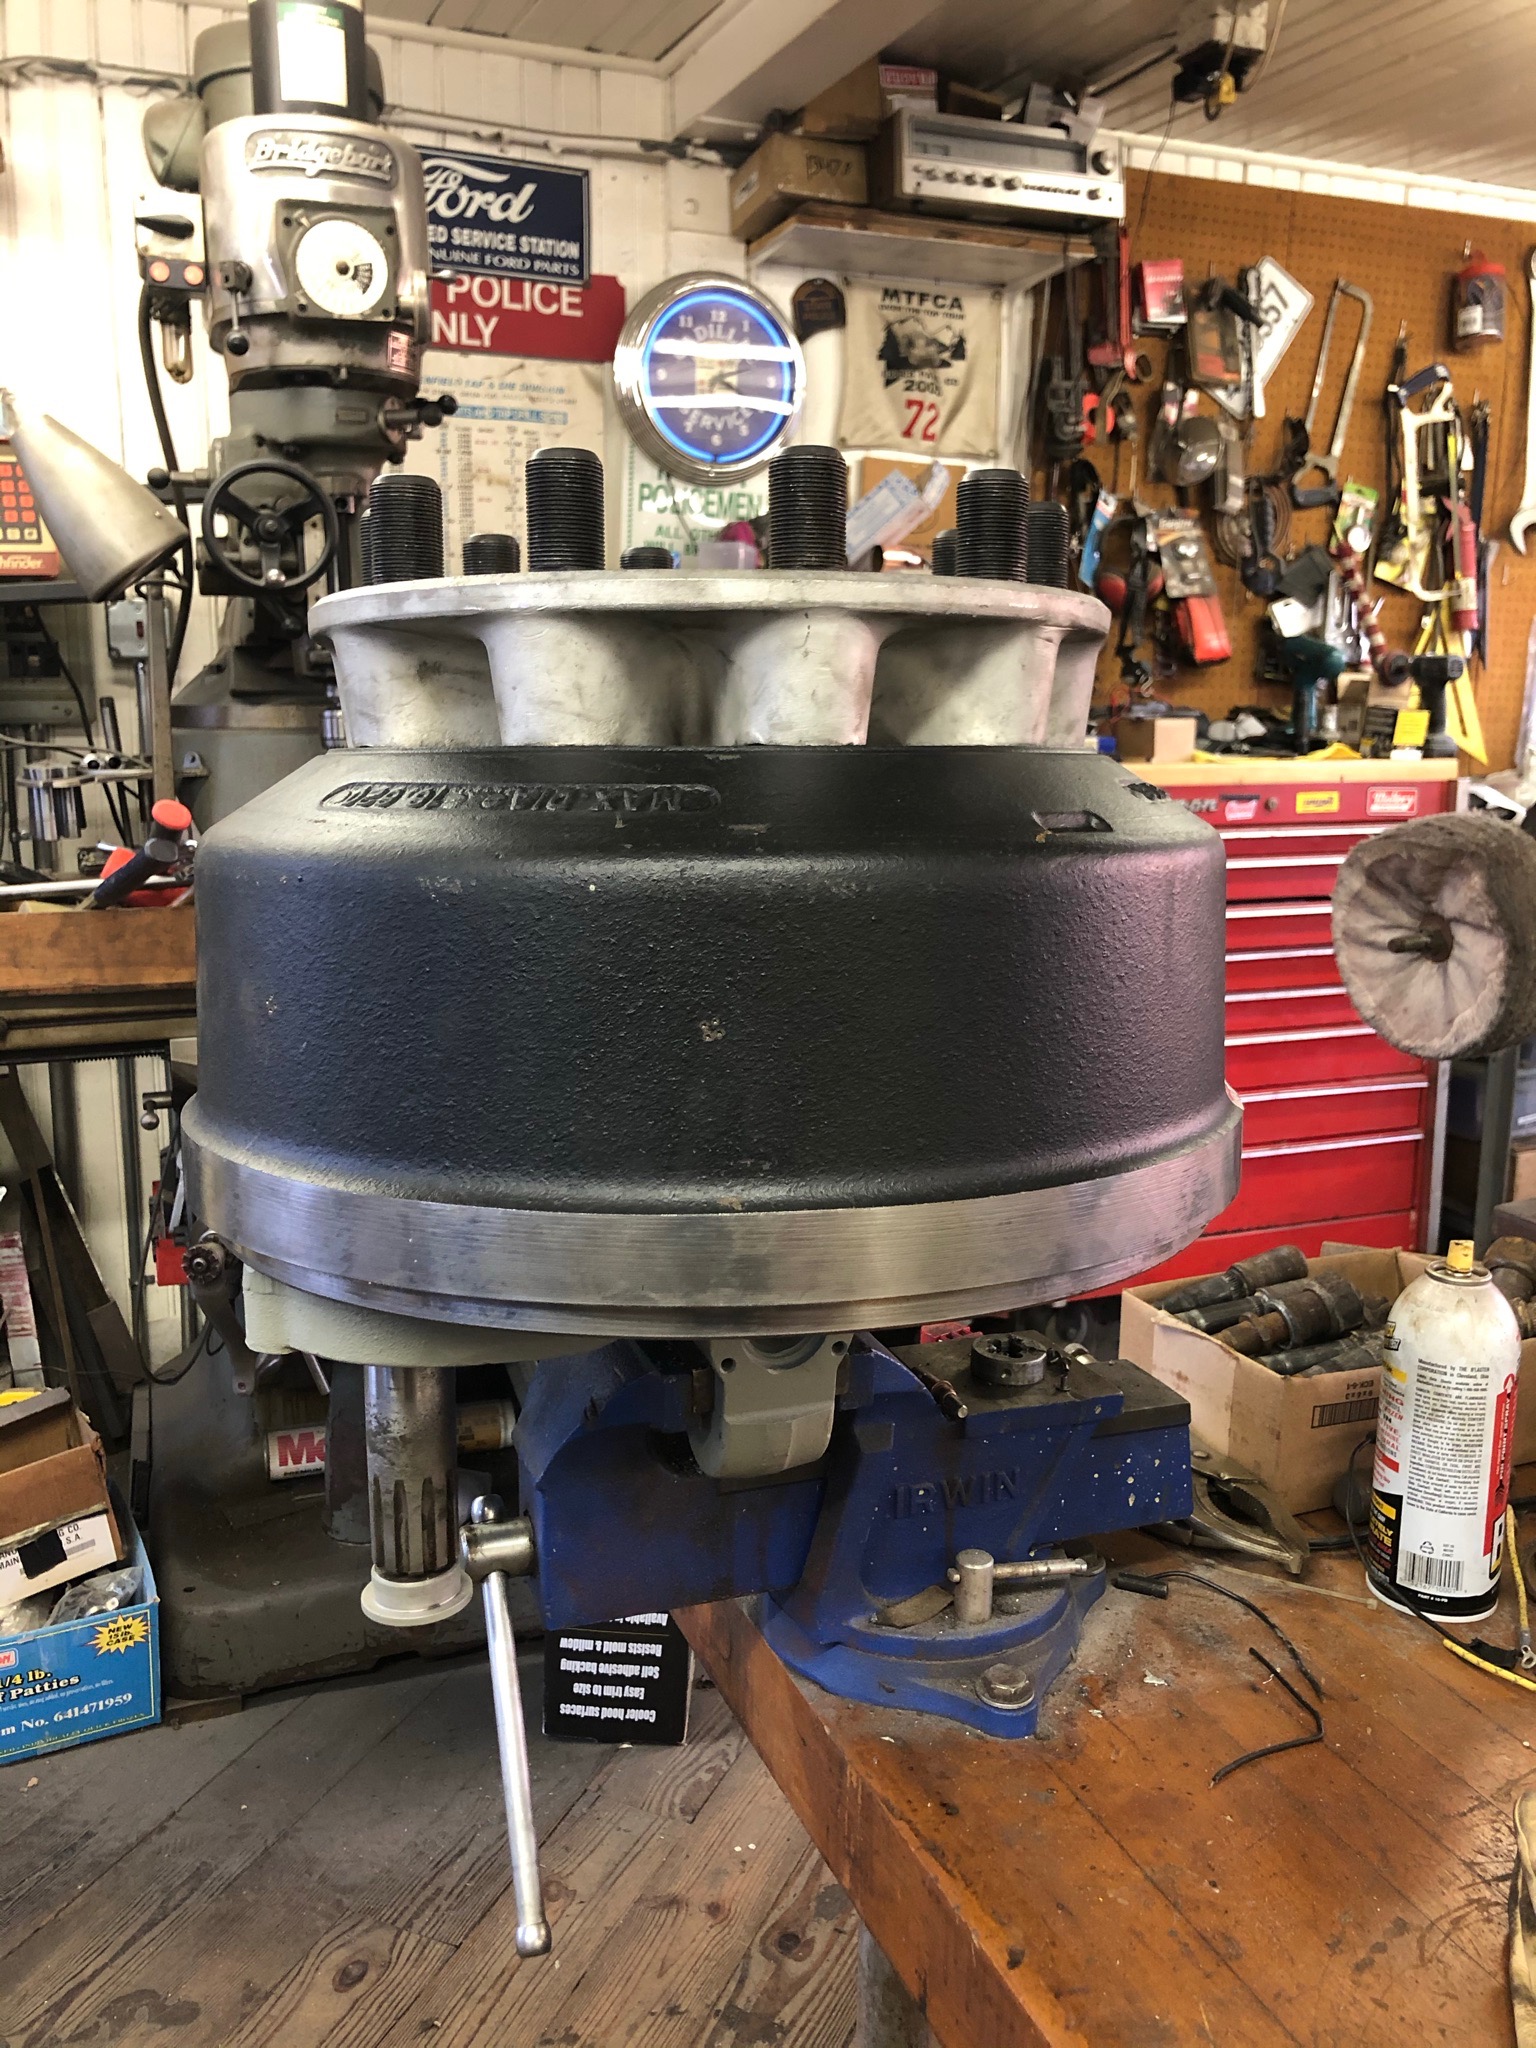
Another side project done. Converting to Budd hubs all the way around with polished Alcoa rims. I bought the hubs a few years ago, but they came off a burnt up B-73 without front brakes. At first I thought they wouldn't accept brake drums and having nothing to work with, as to what size the drum was, it was a lengthy search and a lot of questions. But, I dug through it and sourced longer front studs and all the other hardware I needed for the new wheels. After working out the dimensions I needed, I found Webb Wheel and they had a very user friendly site I could plug my measurements in and it would give you what drums would fit. Took my measurements several times to refine them and make sure I was ordering what was the closest fit. I also didn't want to waste time and money, the drums were not cheap!! I ordered them through Fleetpride, (the counter guy was very helpful!!)and picked them up today. They weren't quite drop in as I was hoping, but after boring both pilot holes out .060" they did. Assembled the hubs and drums and stacked up a spindle and no issues. A while back I almost gave up on this conversion, but I got it done. I used my 100 year old lathe to bore the holes. A simple operation, but i had to raise the headstock with a spacer that came with it and then true up the drum on a large faceplate. The set up was the most time consuming part, as I spent at least four hours getting everything together after getting the headstock apart and cleaned up. Quite the task spinning a 18 1/2", 80+ pound drum. It just barely fit the lathe, when all set up.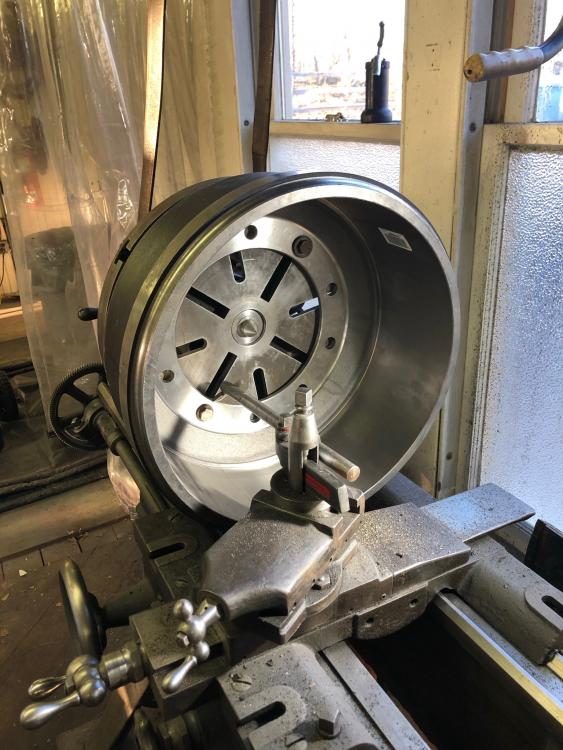
-
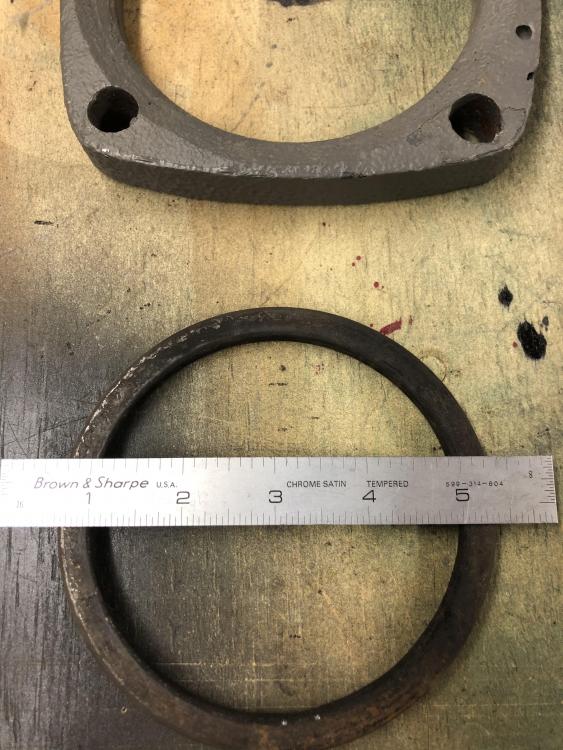
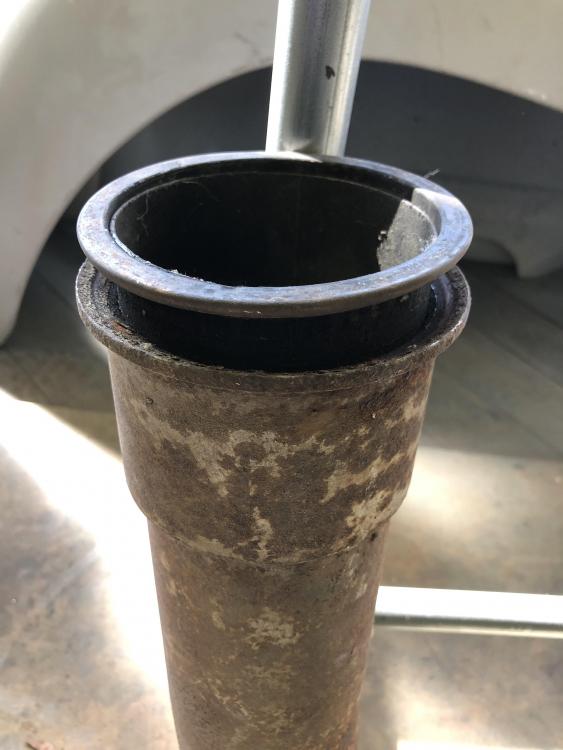
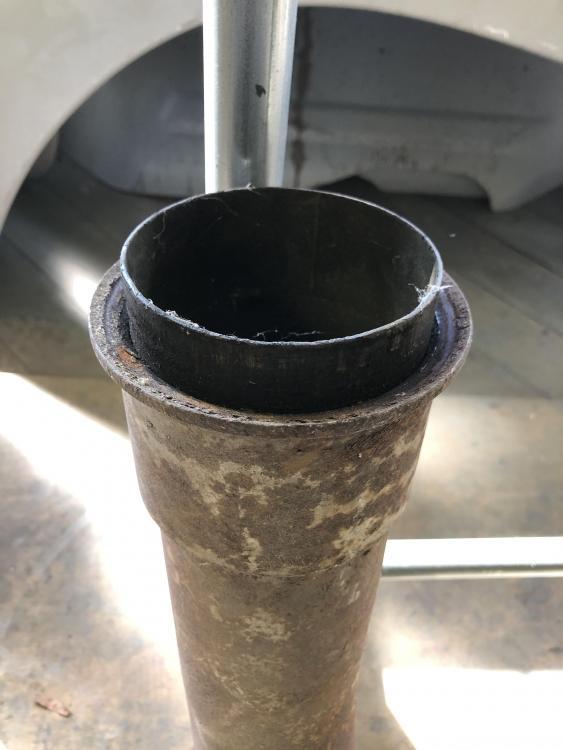
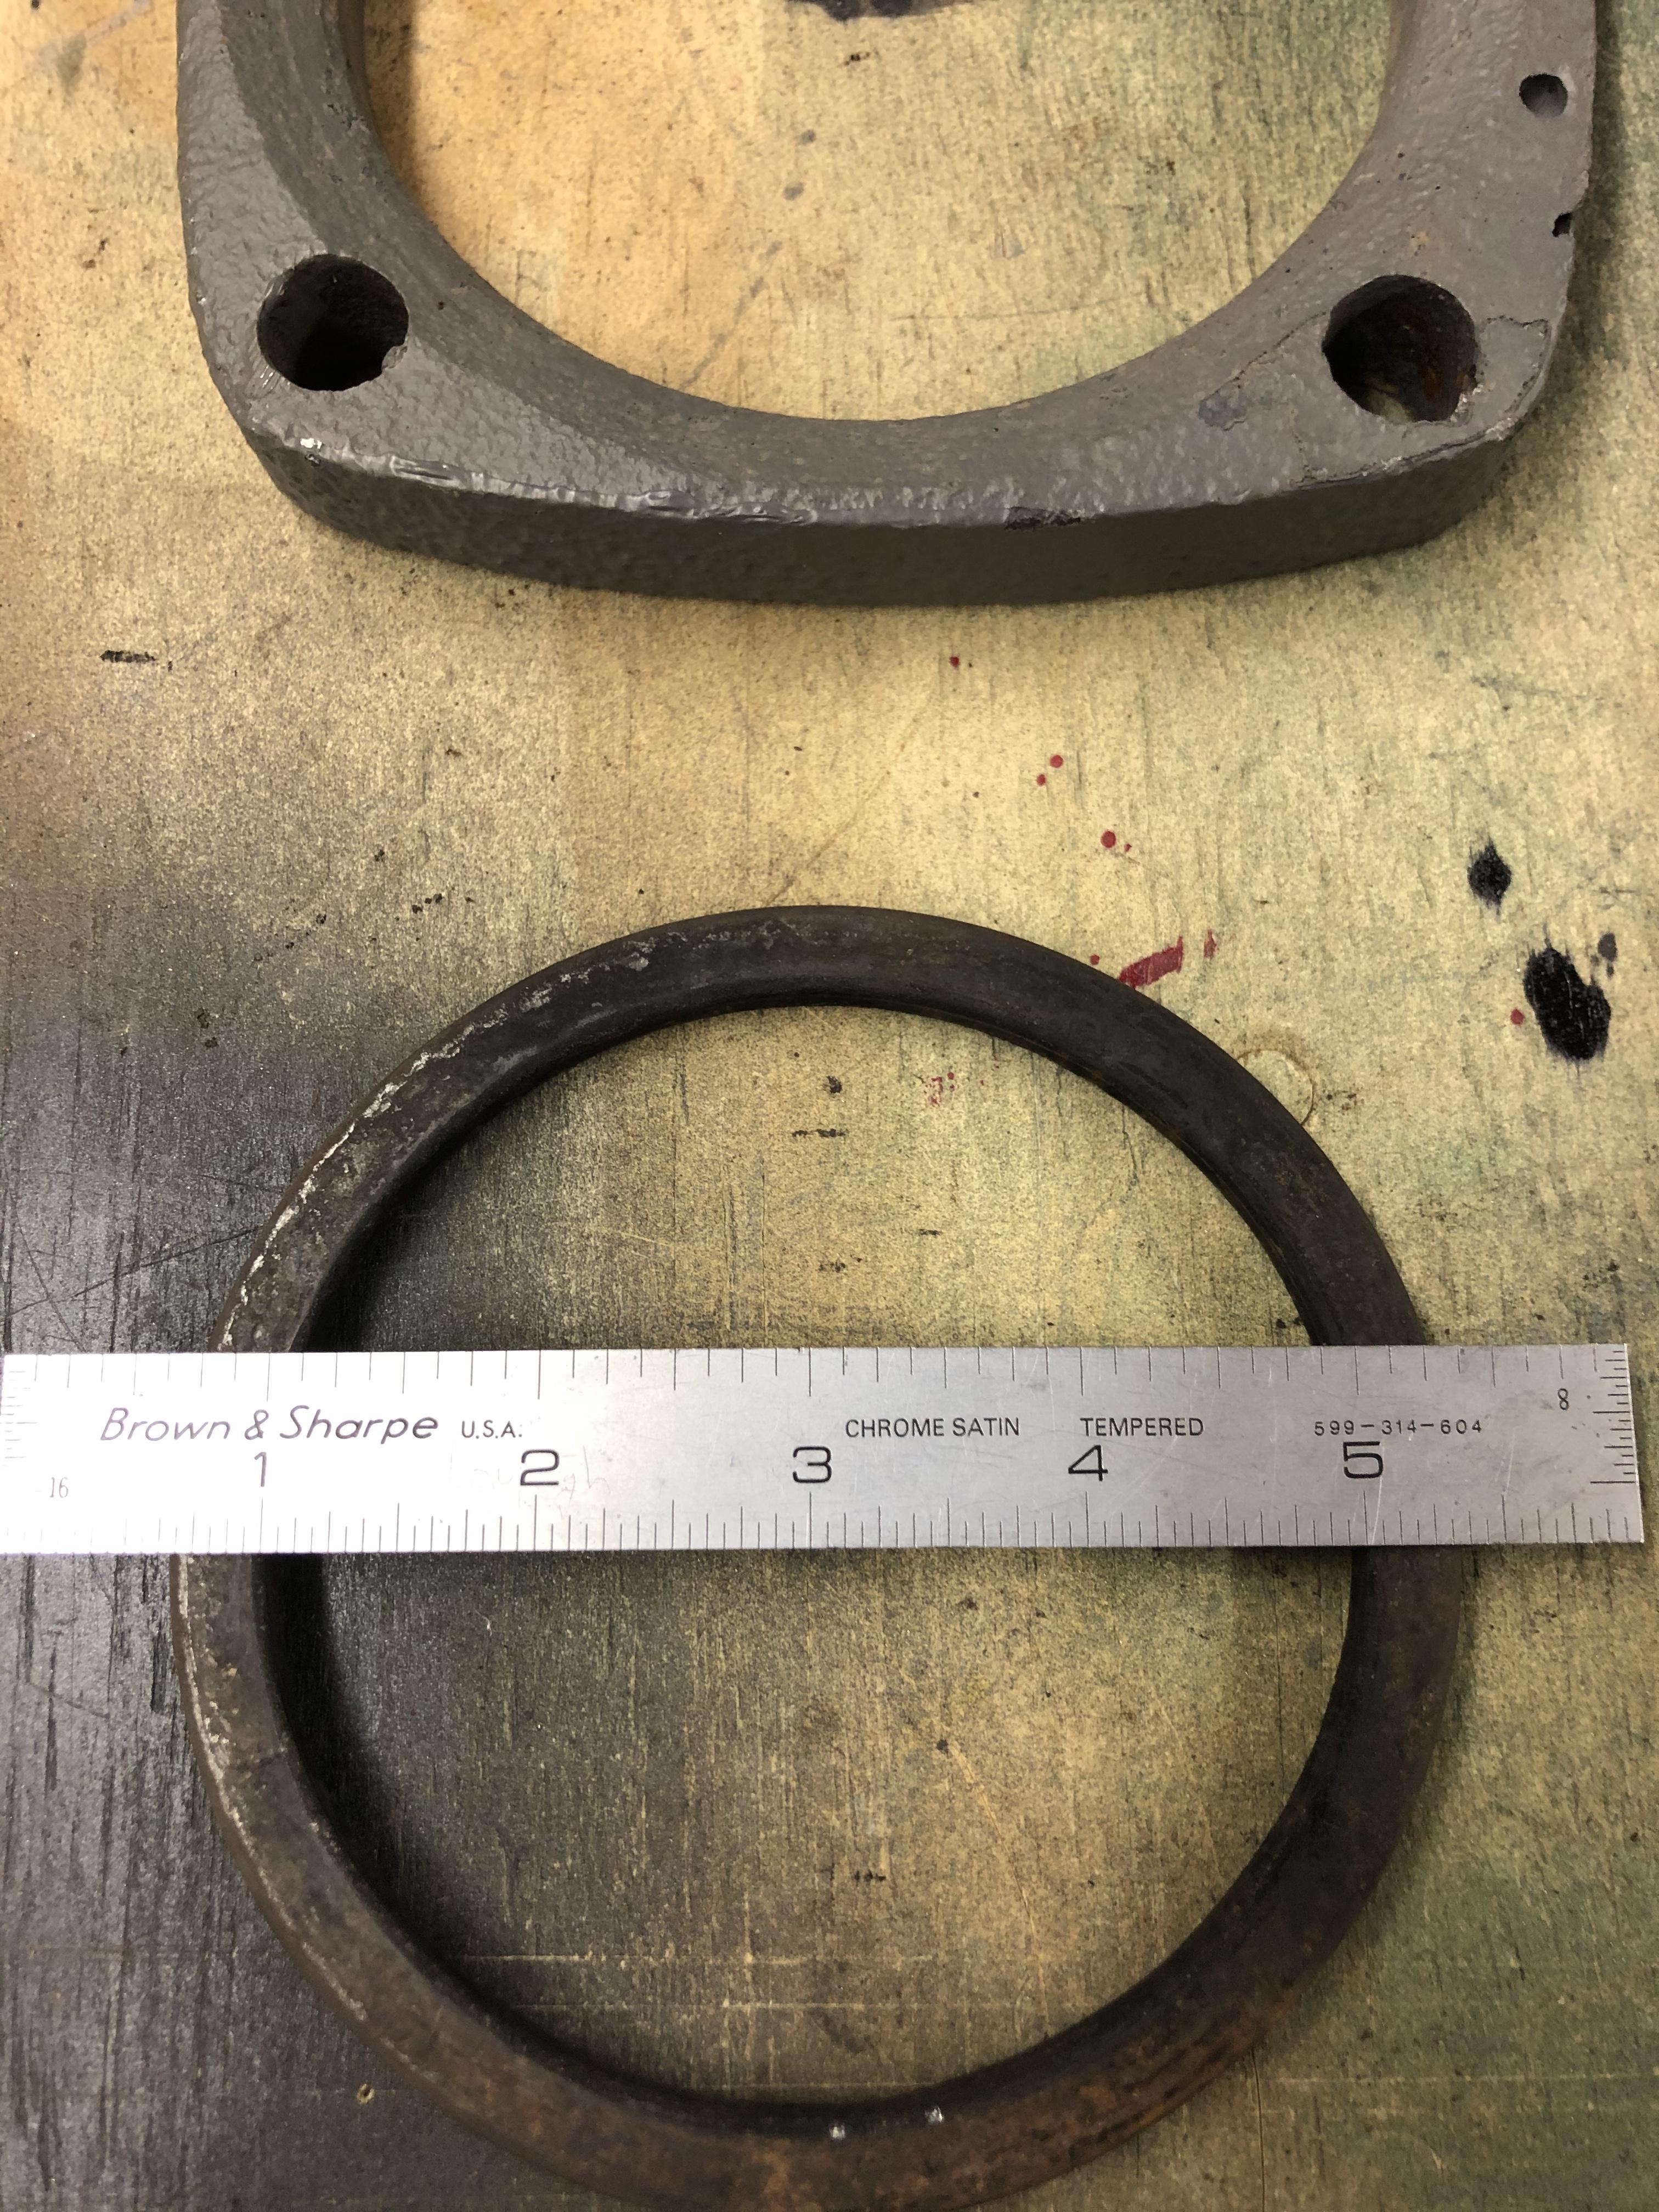
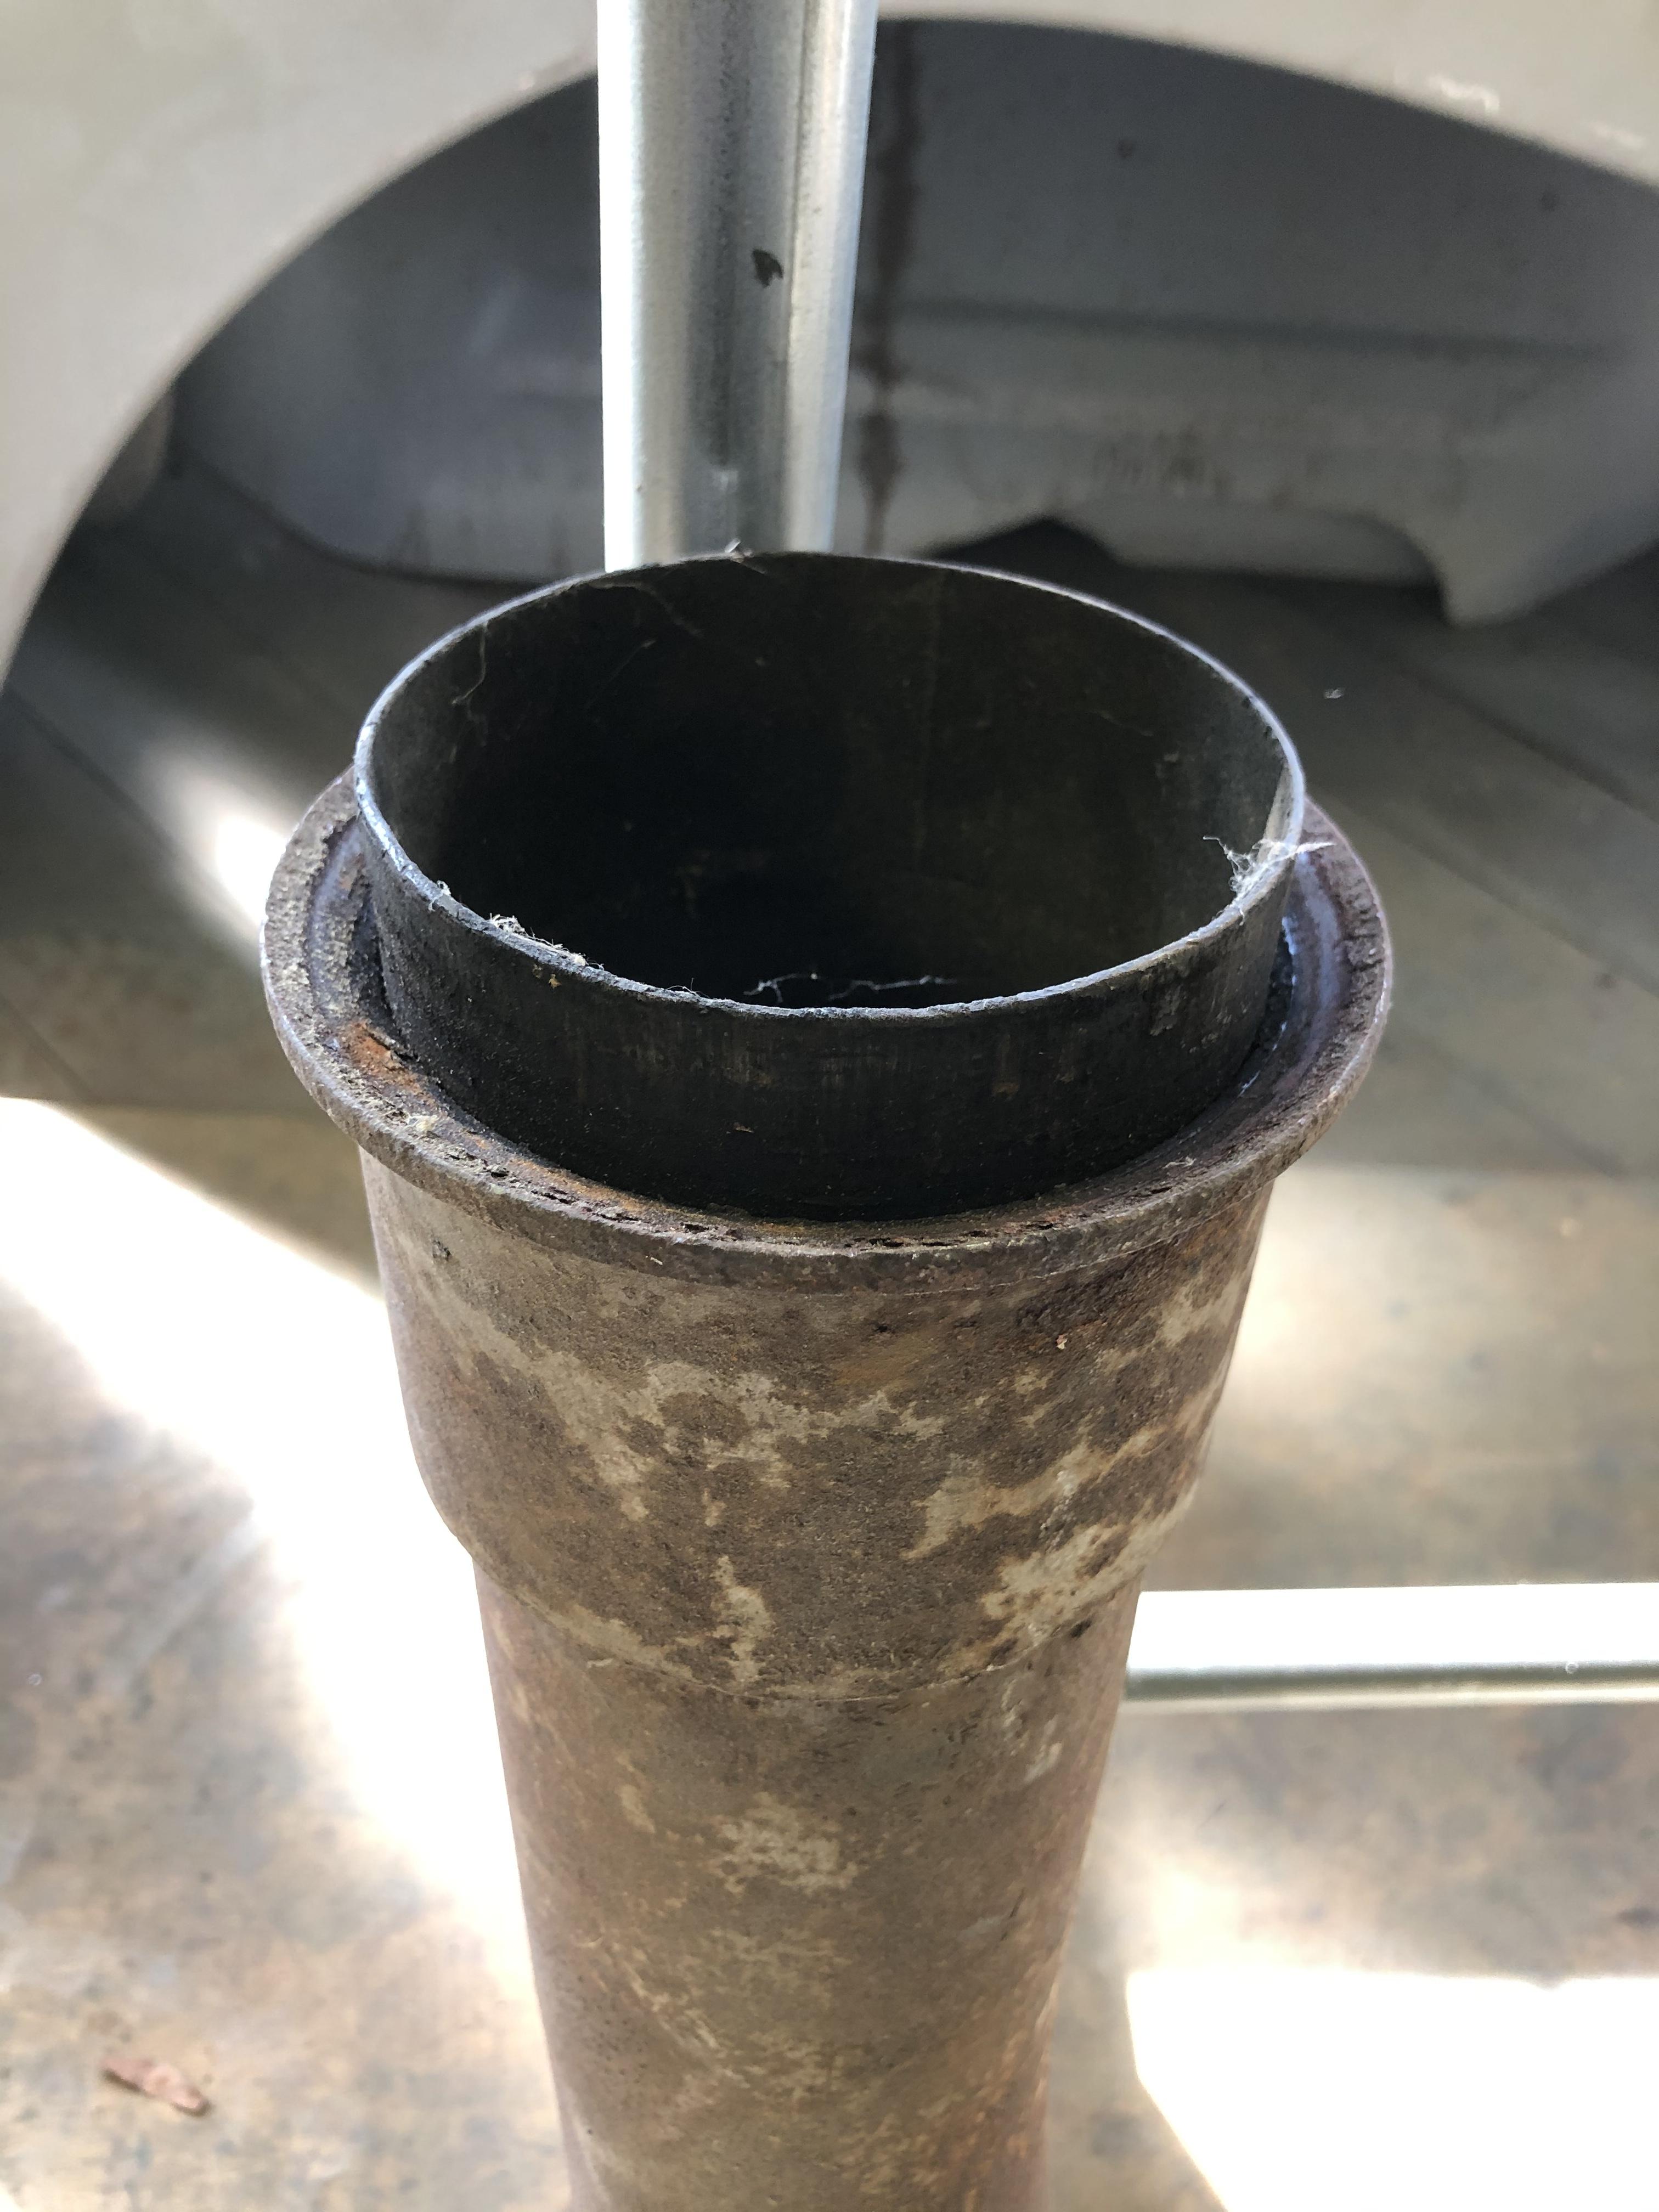
That’s a thought. I was toying with the idea of stacking the gaskets than I can still get, but that’s not really the best solution and may leak or blow out.
-
Anyone have a source for this ring seal for a NH220? It has a 4” ID and round, before it’s compressed into the flange. I’m not having any luck sourcing it through Cummins or my usual go to’s.
-
B-73 Restoration
mattb73lt replied to mattb73lt's topic in Antique and Classic Mack Trucks General Discussion
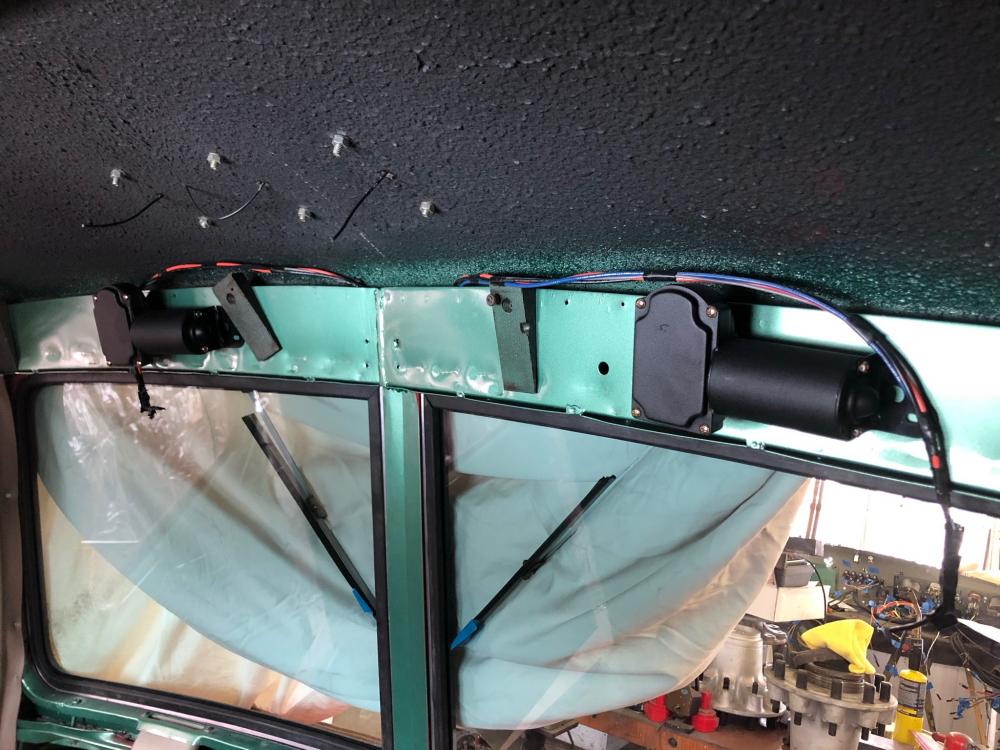
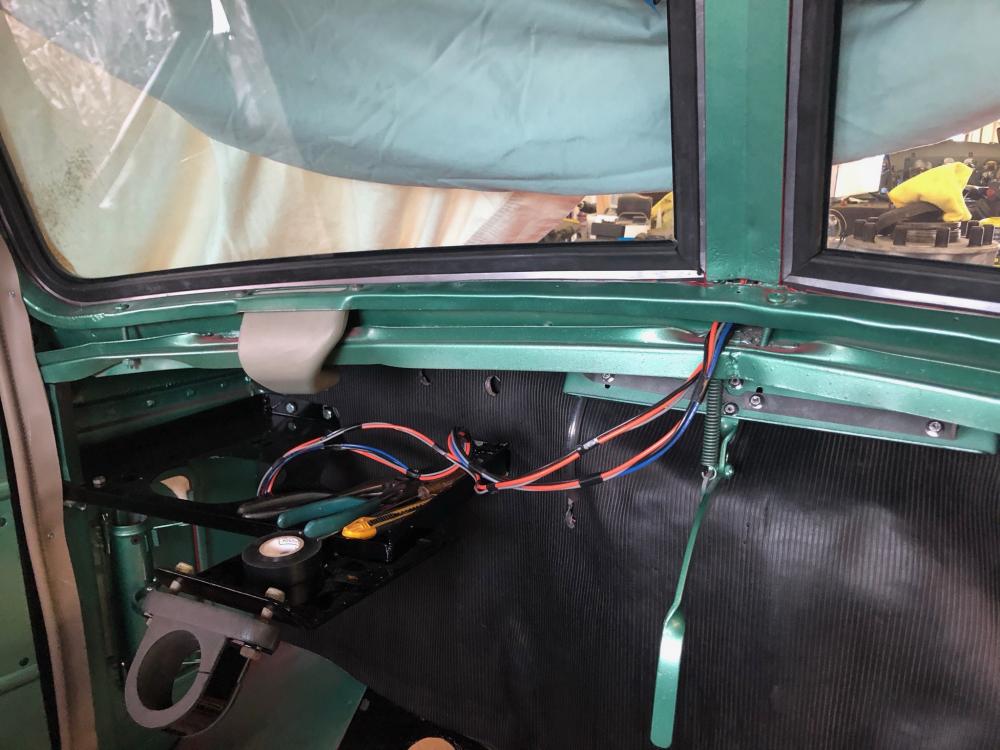
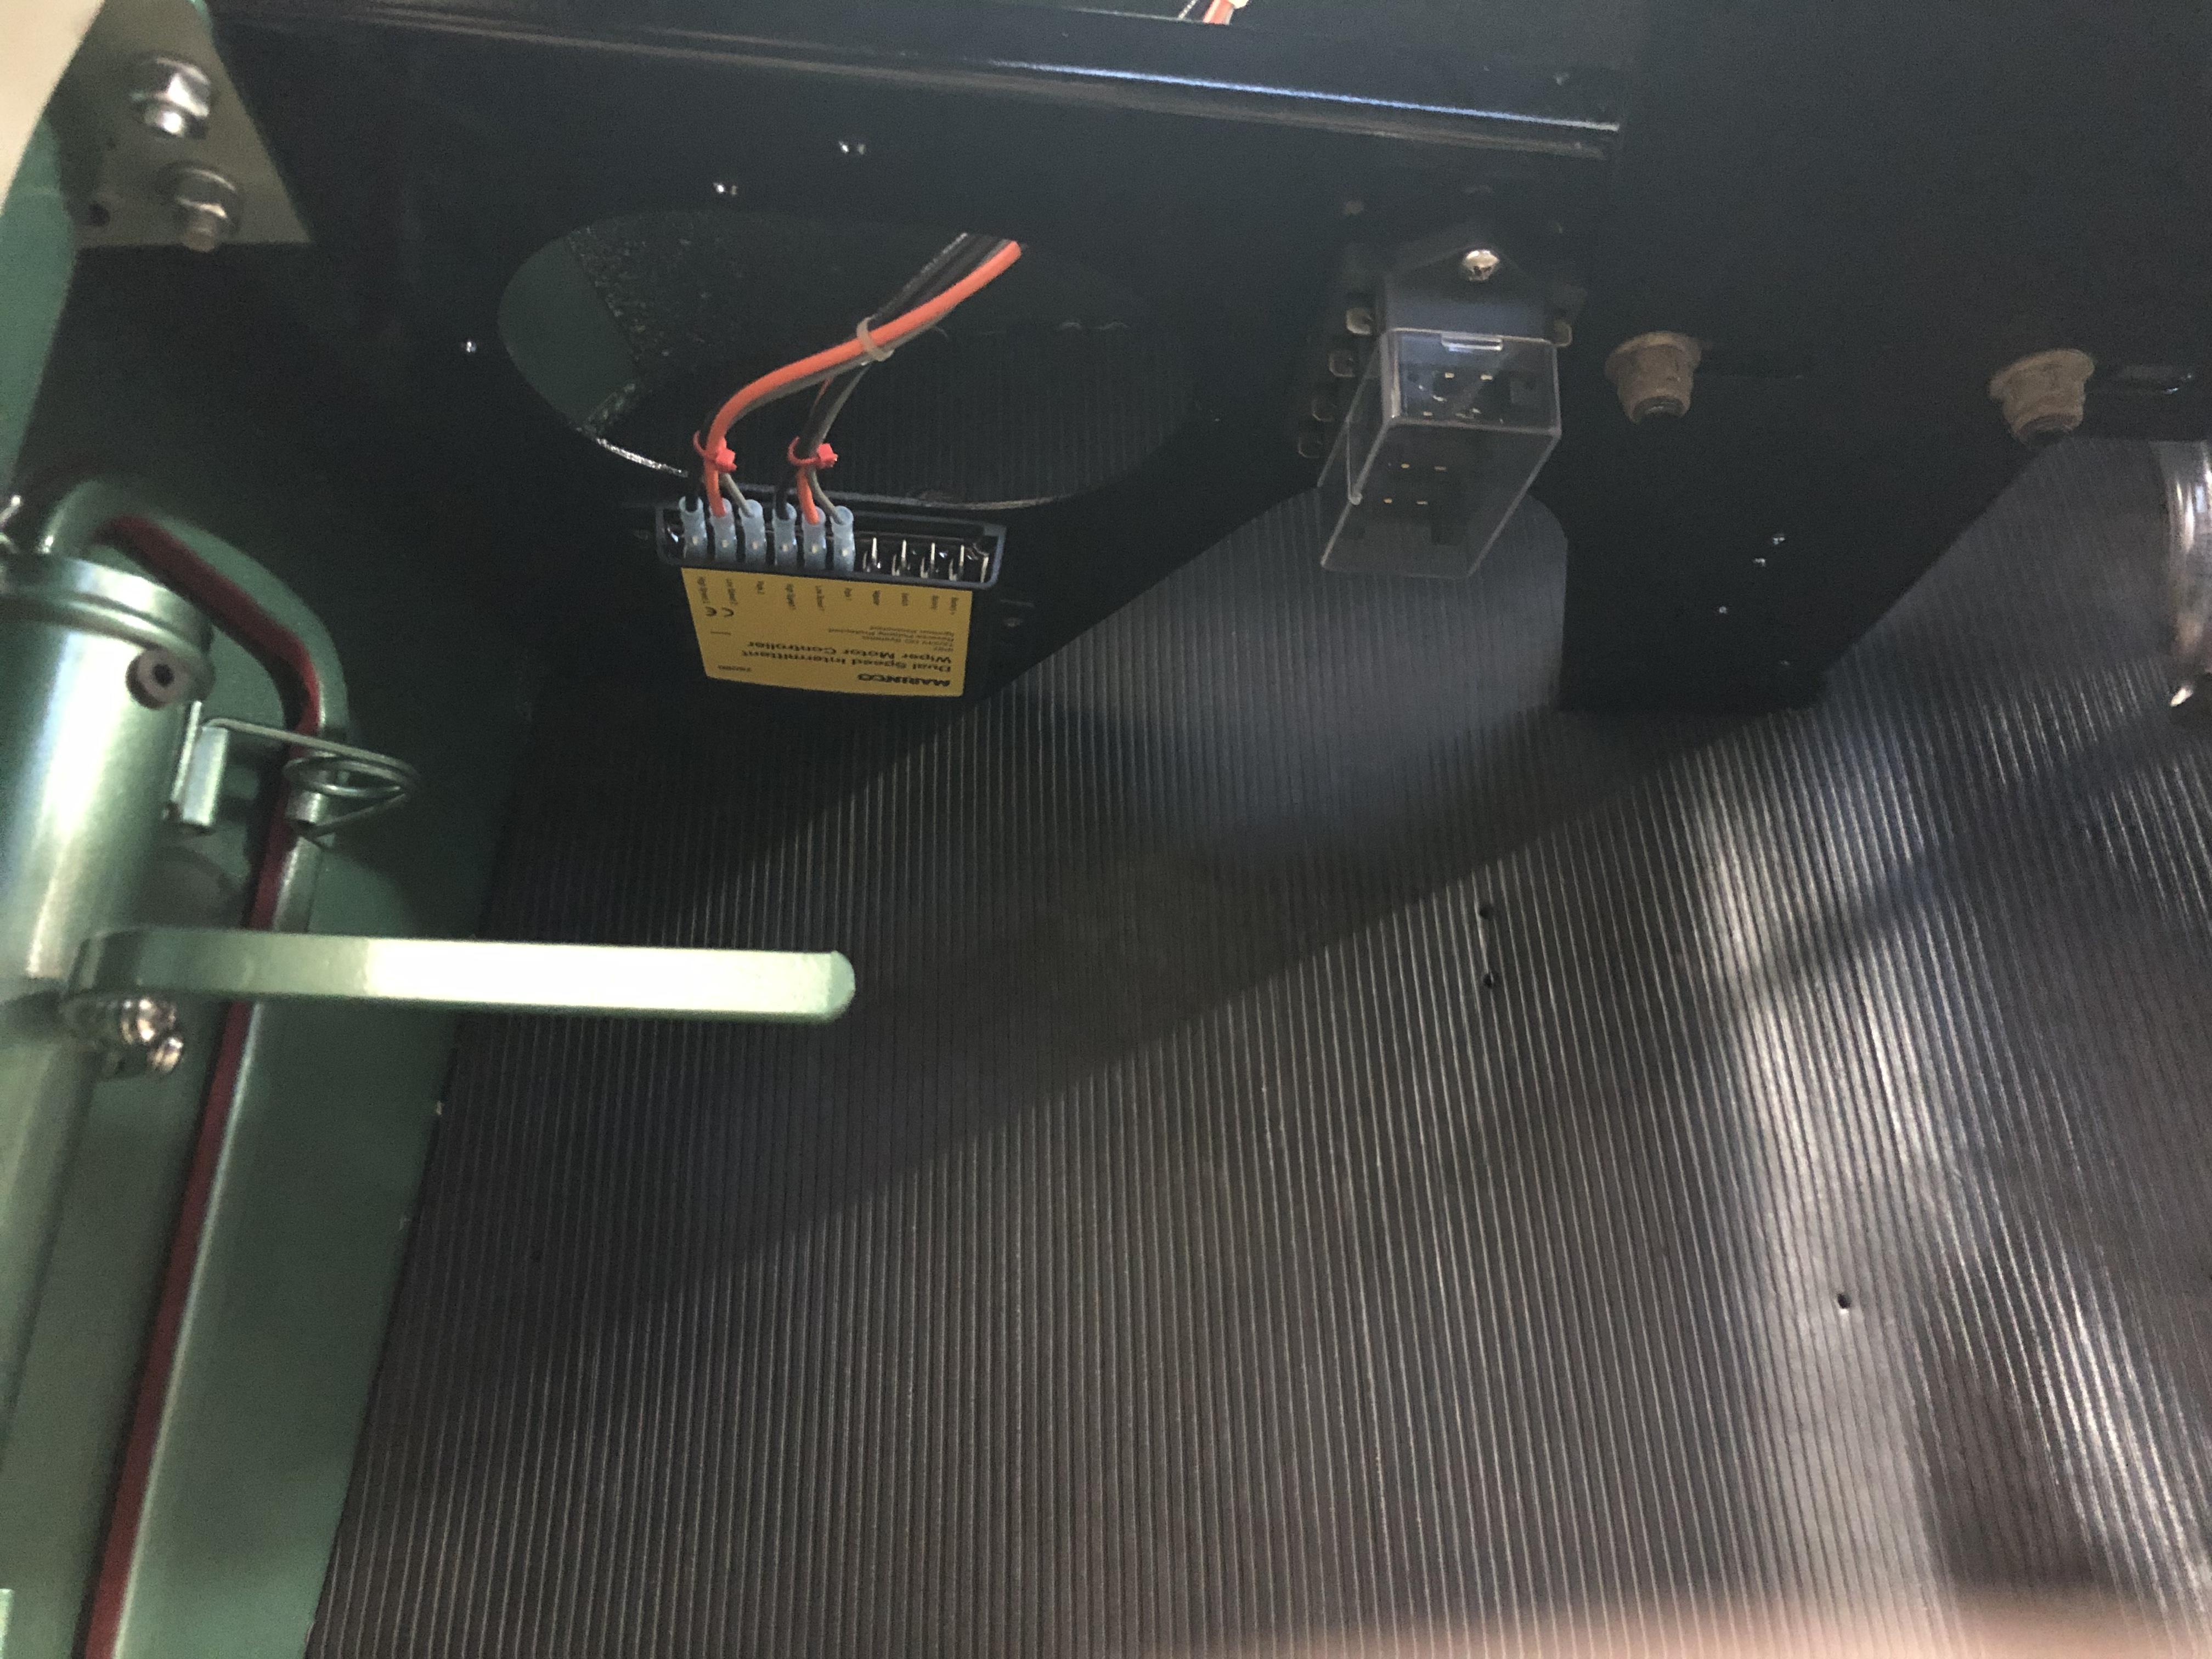
I mounted the controller and a 4 circuit fuse block to the underside of the steering column support.
-
B-73 Restoration
mattb73lt replied to mattb73lt's topic in Antique and Classic Mack Trucks General Discussion
Yeah, they’re very common. I see them in a lot of applications. It was kinda where the idea formed. Finding the controller was a big plus. I searched around for a while, looking at rotary type switches, but this one won out due to the synchronizing feature. -
B-73 Restoration
mattb73lt replied to mattb73lt's topic in Antique and Classic Mack Trucks General Discussion
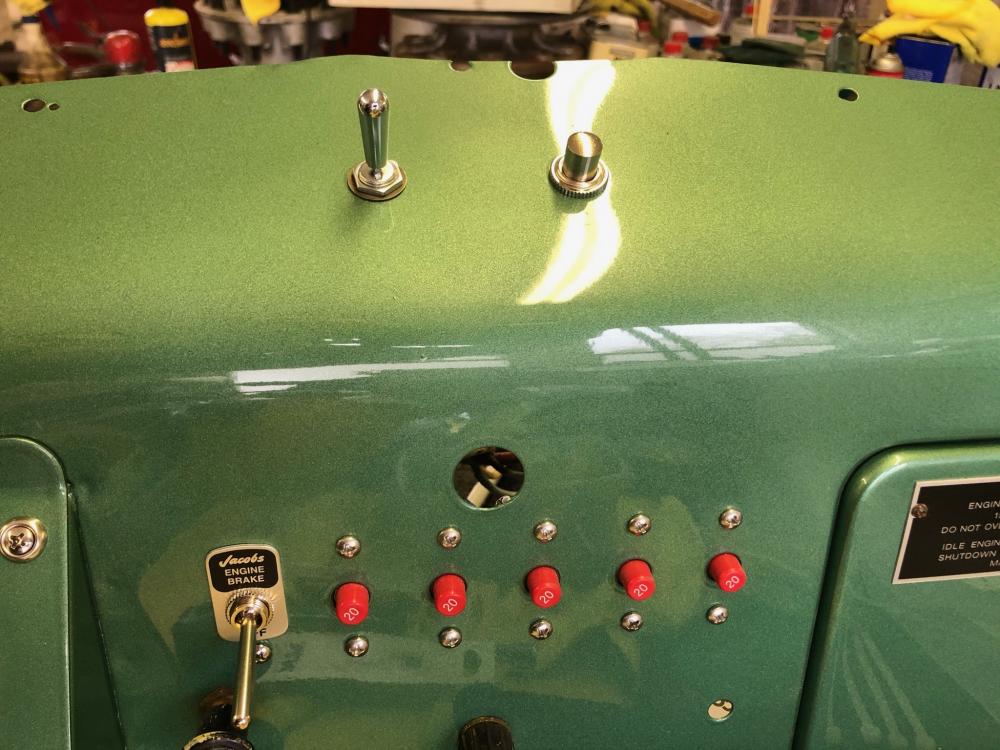
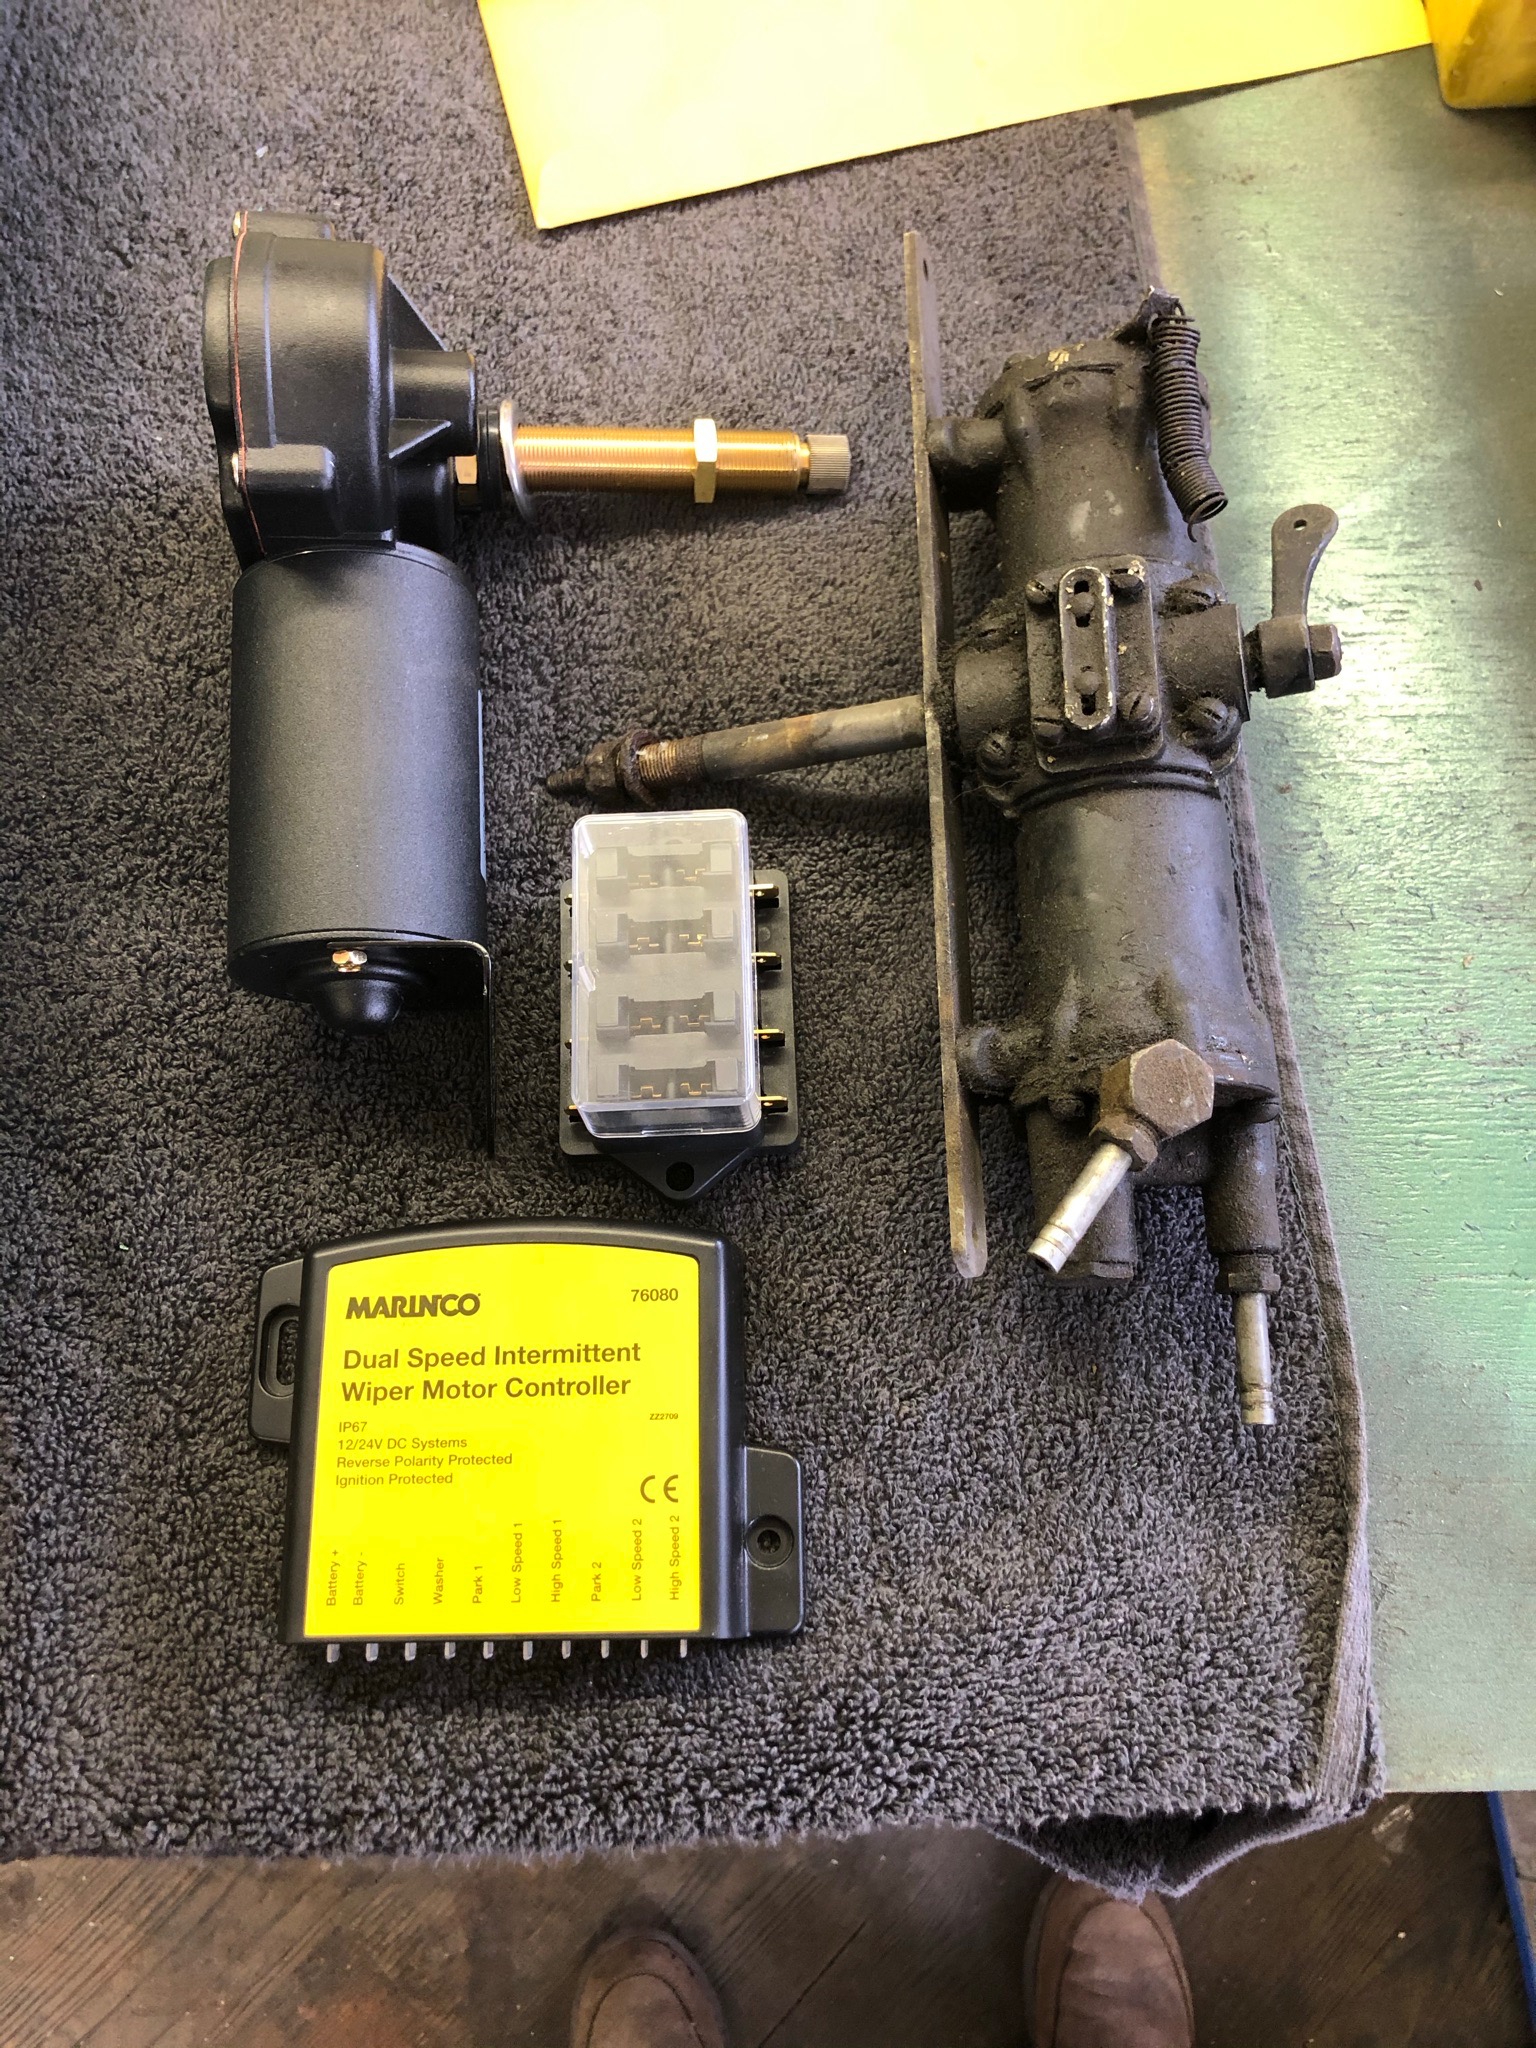
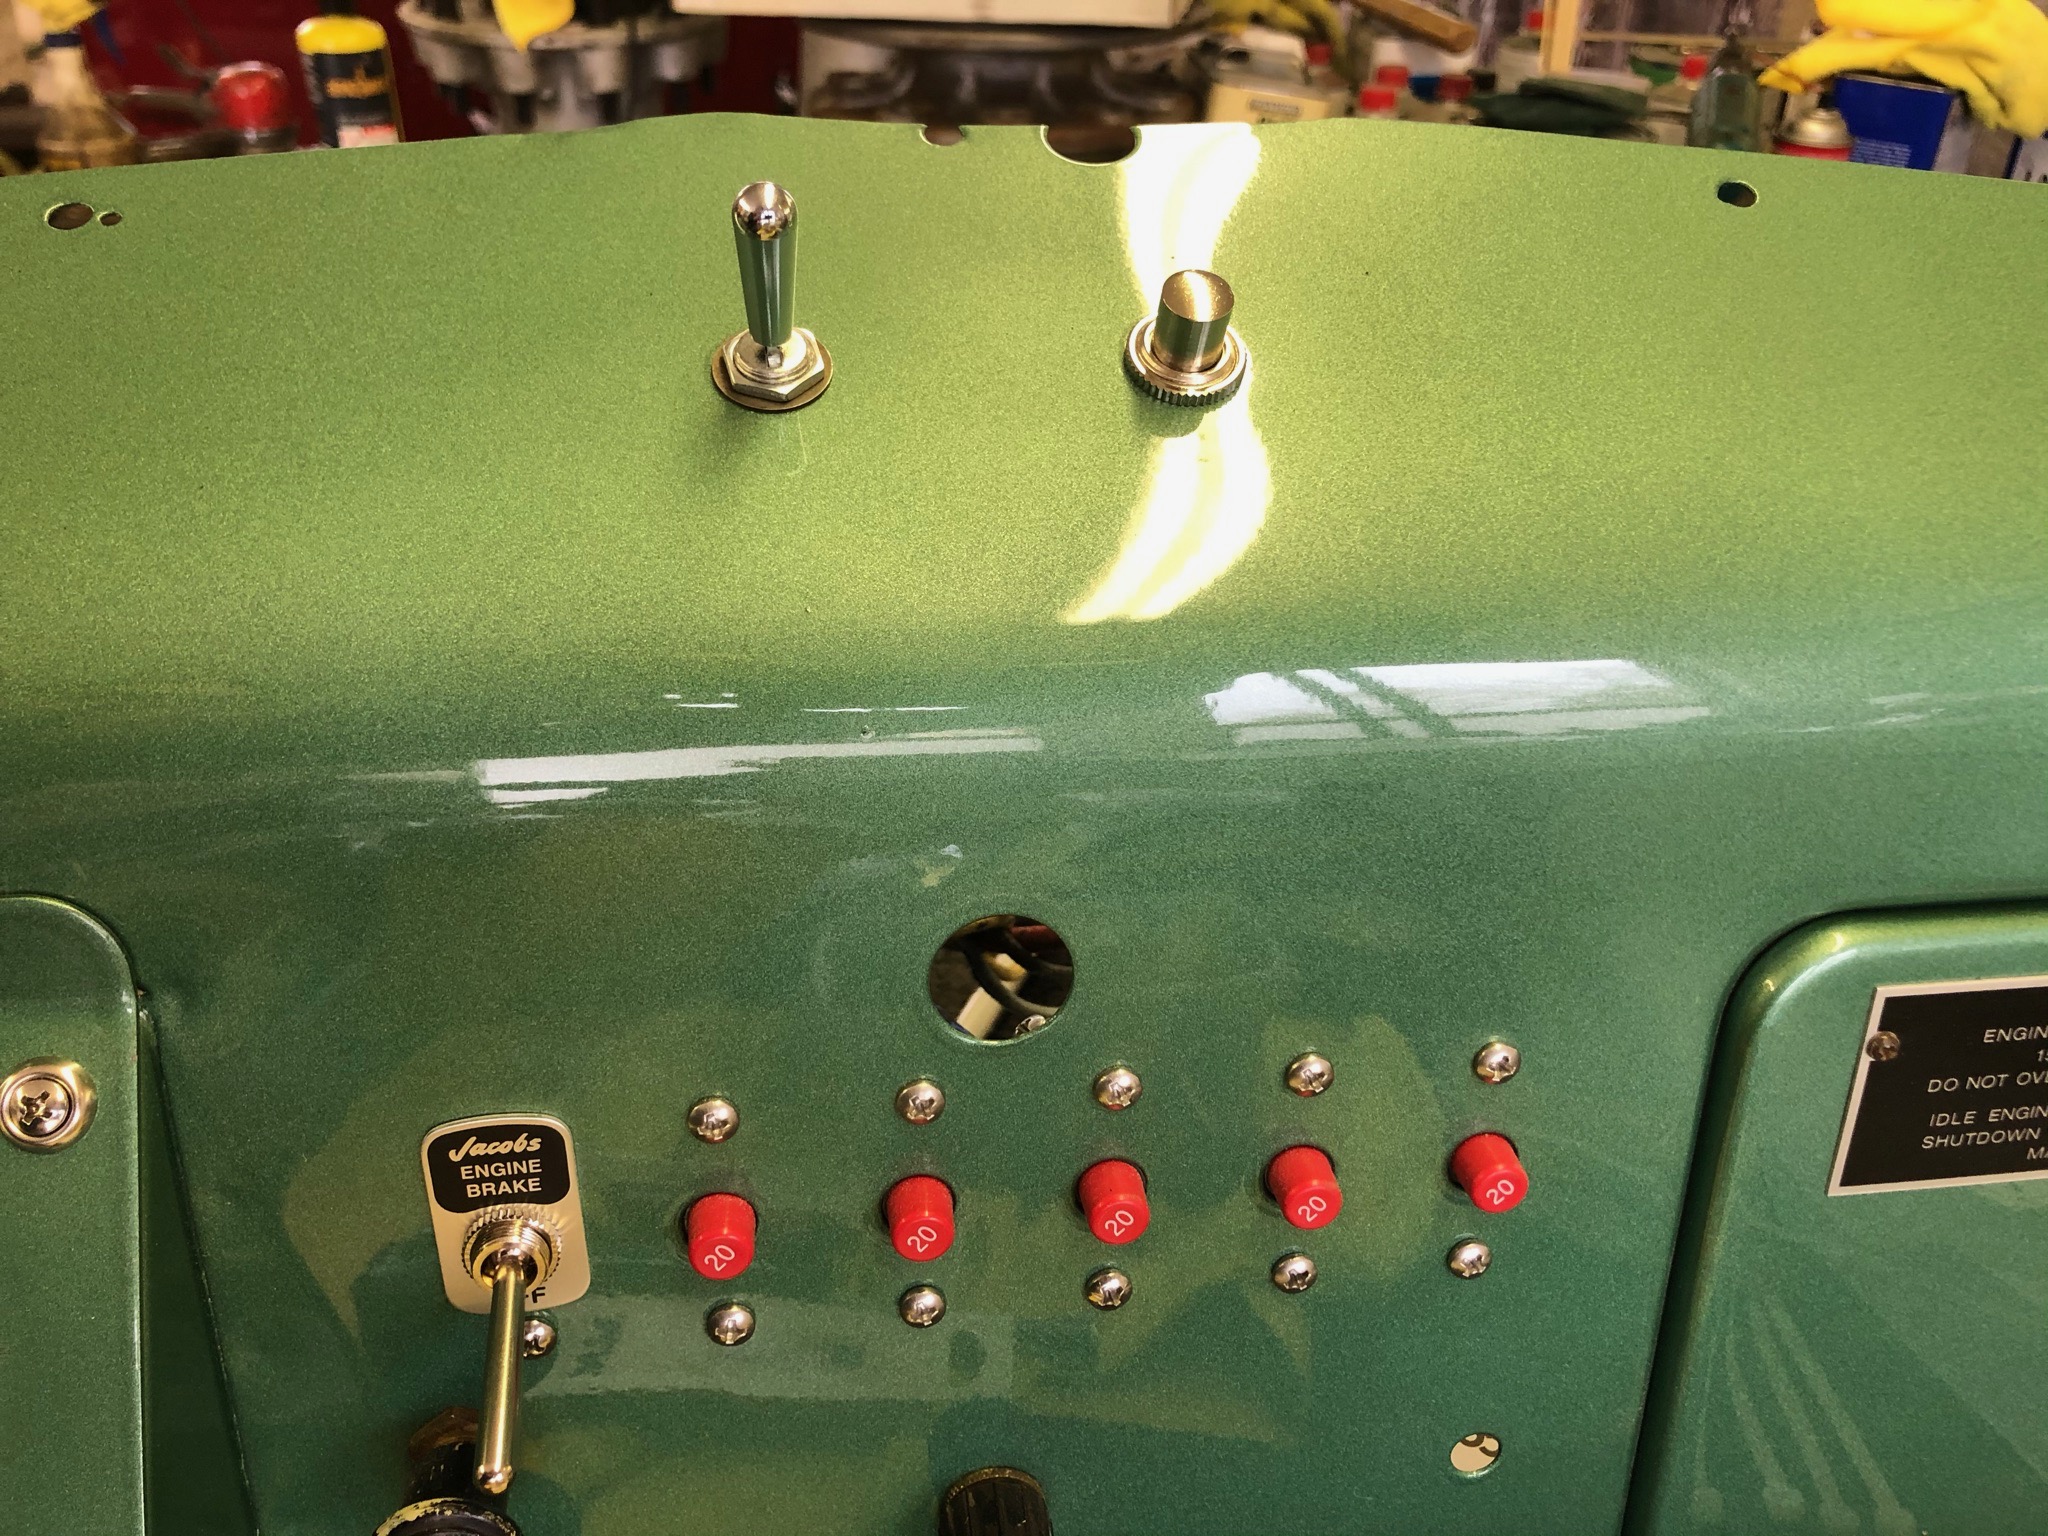
My new wiper system. I never really liked the L model wiper system. The standard B I thought was much better and was certainly more refined. You can throttle it back so it sweeps so slowly, you don't need a intermittent. Plus, the arms park and stay parked when not in use. None of that occurs in the L cab. With that in mind, when I cut apart my cab I removed all the air supply lines from the center windshield post. Now that I'm at the point of the rebuild where things are going back together, I needed to figure out what I was going to do. The search took a while, but this is what I came up with. For the parts: 2, 12V Wexco , 2 speed and positive park motors, with adjustable sweep angle and positive park, with 3 1/2" shafts. P/N 4R3.12.R110D 1, Marinco Dual Speed, Intermittent Wiper Motor Controller P/N 76080 1, HD three position Momentary On Switch (SPDT) 1, Momentary On Push Button Switch Several rolls of 14 & 16 AWG colored wire. Loose hardware and electrical connectors The heart of this is the Marinco Controller. It provides a three step Intermittent Mode (3,5,8 seconds), Hi-Lo speeds and positive park. Additionally, while the motors are running, the unit will synch the motors so that the arms will run together and not independently. It's made by a boat supply company and is a sealed unit, operates on 12 or 24 volts and is not polarity sensitive. It's a very robust unit and waterproof. The motors are standard units, widely available and come in various shaft lengths. I purchased ones with 3 1/2" shafts, same as the original motors. The sweeps are adjustable from 40-110 degrees and parks can be set left or right. So, you can set them both left, right, inboard or outboard. The only thing needed to mount them is to open the original shafts holes to 5/8" and add an anchor screw to the end bracket for torque. I bundled and chased seven wires through the center post to provide power, six for the motors and one for the cab fan. The controller comes with a three position plastic rocker switch. I'm deleting it and adding a three position toggle switch and a separate button switch for wash mode. These will reside where the air valve knobs were in the center of the dash. I'm not done with the installation yet, but getting close with all the wiring for the cab. It would be much easier to do this with the dash removed, luckily mine is. It seems like a pretty cool installation and shortly I'll know. I have some pictures of where I am with it, but ask if you have any questions.
-
Wow, those look pretty good compared to what you started with. Nothing wrong with a little patina, these were work trucks not show queens!!
-
B-73 Restoration
mattb73lt replied to mattb73lt's topic in Antique and Classic Mack Trucks General Discussion
The L cab uses two separate motors. I like the standard B wiper system a lot better. The one I put together should be a big improvement!! -
1939 Mack Bus Restore
mattb73lt replied to MattP's topic in Antique and Classic Mack Trucks General Discussion
I'd start by requesting the build records using the VIN, from the Mack Museum, if you haven't already. Then research the company that built the body. Make some connections with groups that collect/restore buses. Internet searches can be very helpful for photographs, technical info and other connections. In time, you'll built those contacts and sources to get the info and input to get the restoration done.


BMT Forum Logo
