


mattb73lt
-
Posts
1,426 -
Joined
-
Last visited
-
Days Won
146
Content Type
Profiles
Forums
Gallery
Events
Blogs
BMT Wiki
Collections
Store
Everything posted by mattb73lt
-
 I think you have a heavier shaft. That B-42 shaft only measures1.00” max over it’s length. So your’s is heavier like the B-73. Well at least we know it won’t fit. Sad part for me is that I was saving a really nice, crack free, 22” steering wheel from my B-42 for the B-73. I only recently took the steering column apart for paint and now I know it won’t fit, so back to the cracked one. Crap. Let me ask around to see if I can find you one.
 -
I'm thinking it's keyed and pressed on. I'll dig into the box tomorrow to see. I'm not going to use the box again and I thought this might work.
-
I wonder how the worm gear is secured to the shaft? I was thinking about pulling that B-42 box apart to get the shaft out. If the worm can be removed and swapped and all the other measurements are the same, this could be a pretty easy repair.
-
Yeah, I was thinking the steering shaft might work for you. The box is for a FA 505 axle. I thought yours, last time I saw it, had a heavy front axle and would have a bigger box. So, I wasn’t sure if the shaft would or could be swapped. Someone may know. I have it if you want to try? I can open this one up and see what it looks like, too?
-
WOW! Lucky that didn’t happen when you were driving!! Might be easiest to drop it down than trying to pull it up through the cab. Sourcing a new shaft shouldn’t be too hard.
-
B-73 Restoration
mattb73lt replied to mattb73lt's topic in Antique and Classic Mack Trucks General Discussion
The paint code for Mack “Fleet Red” is DCC 75674 (PPG#). Same color for frame and cab. That should cross to other Co #’s. -
B-73 Restoration
mattb73lt replied to mattb73lt's topic in Antique and Classic Mack Trucks General Discussion
It is expensive. I bought a gallon of PPG Concept, with all the additives and hardener it was over $900. Red is one of the most expensive colors due to the pigments. I heard pearlescent paint was even more expensive. -
B-73 Restoration
mattb73lt replied to mattb73lt's topic in Antique and Classic Mack Trucks General Discussion
I was going to go back to the original Mack “Fleet Red”. I already painted the bottom of the cab.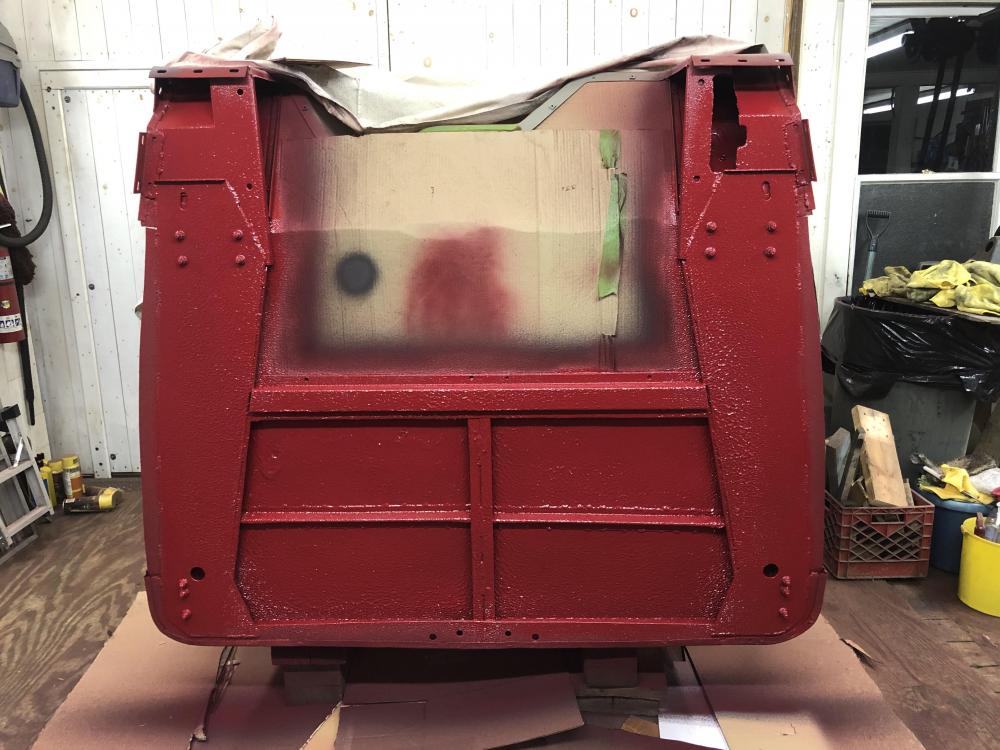
-
B-73 Restoration
mattb73lt replied to mattb73lt's topic in Antique and Classic Mack Trucks General Discussion
It’s moving along pretty quickly. Can’t wait to get this part done and get some color on it. -
B-73 Restoration
mattb73lt replied to mattb73lt's topic in Antique and Classic Mack Trucks General Discussion
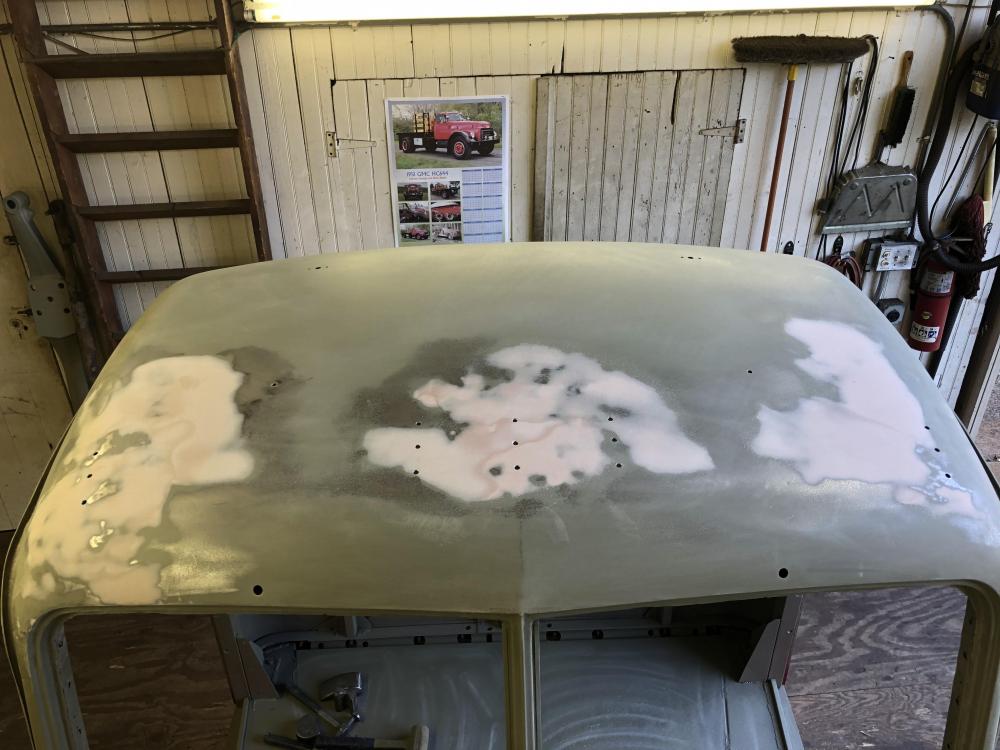
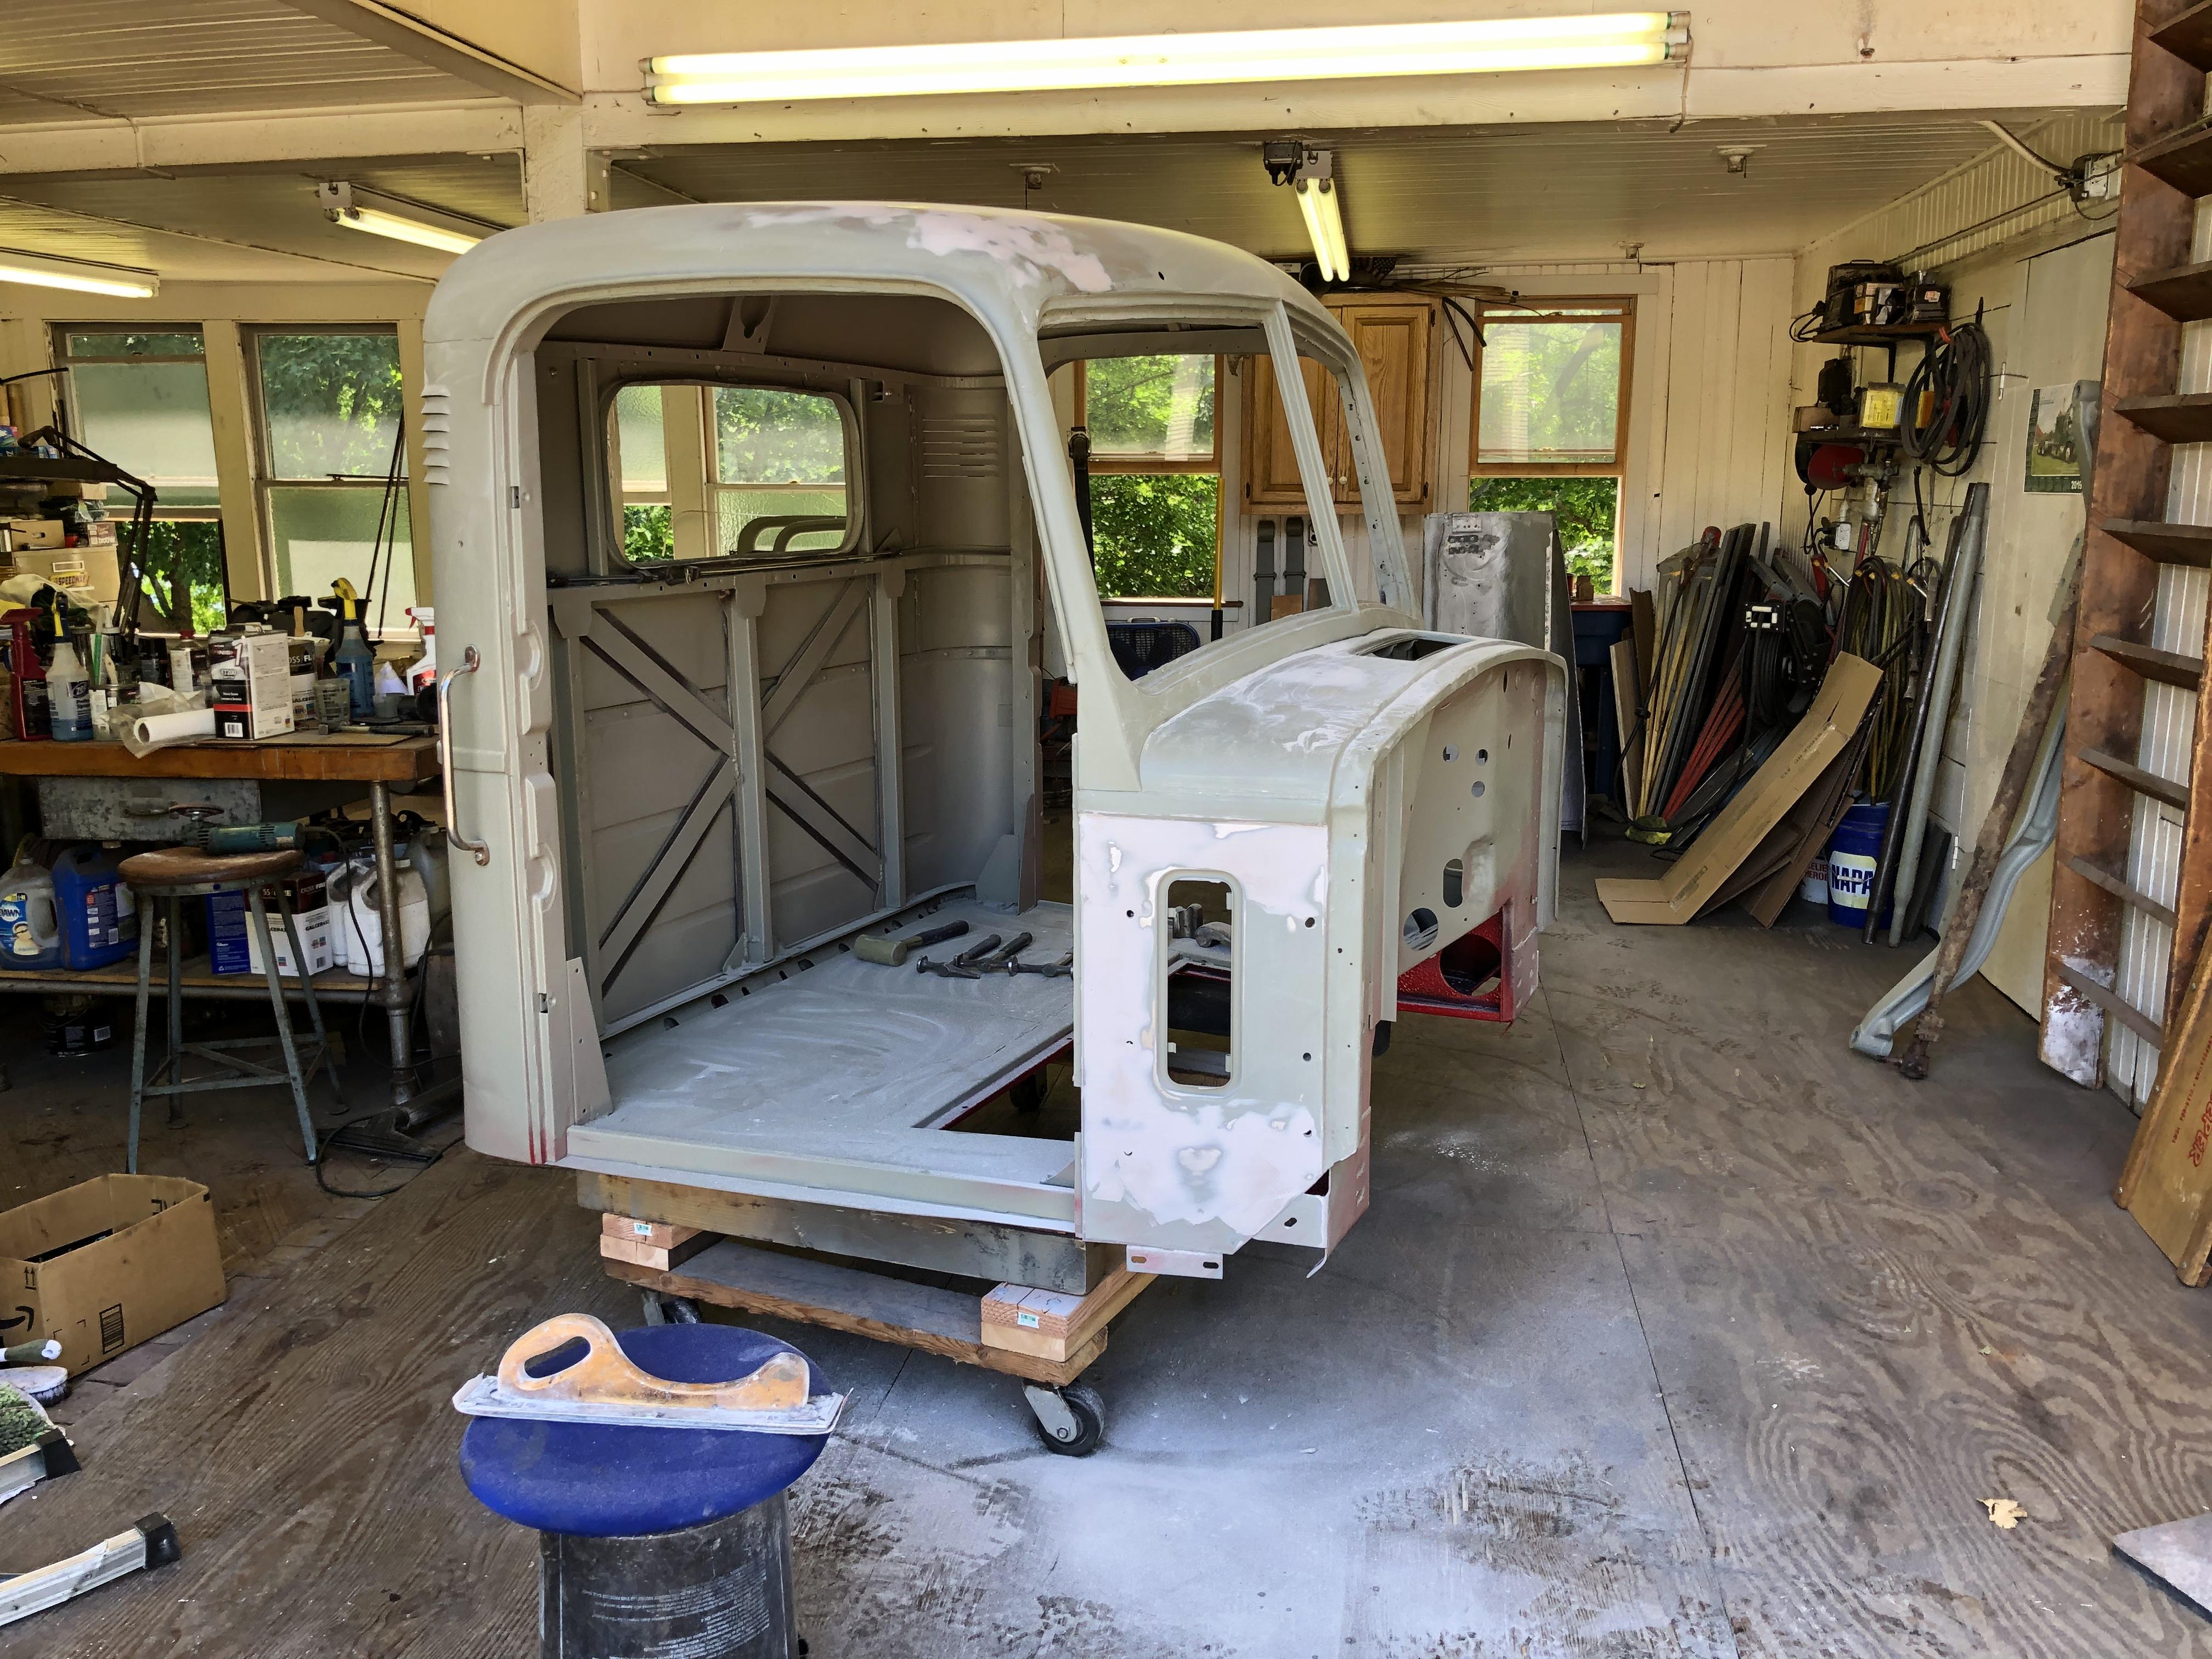
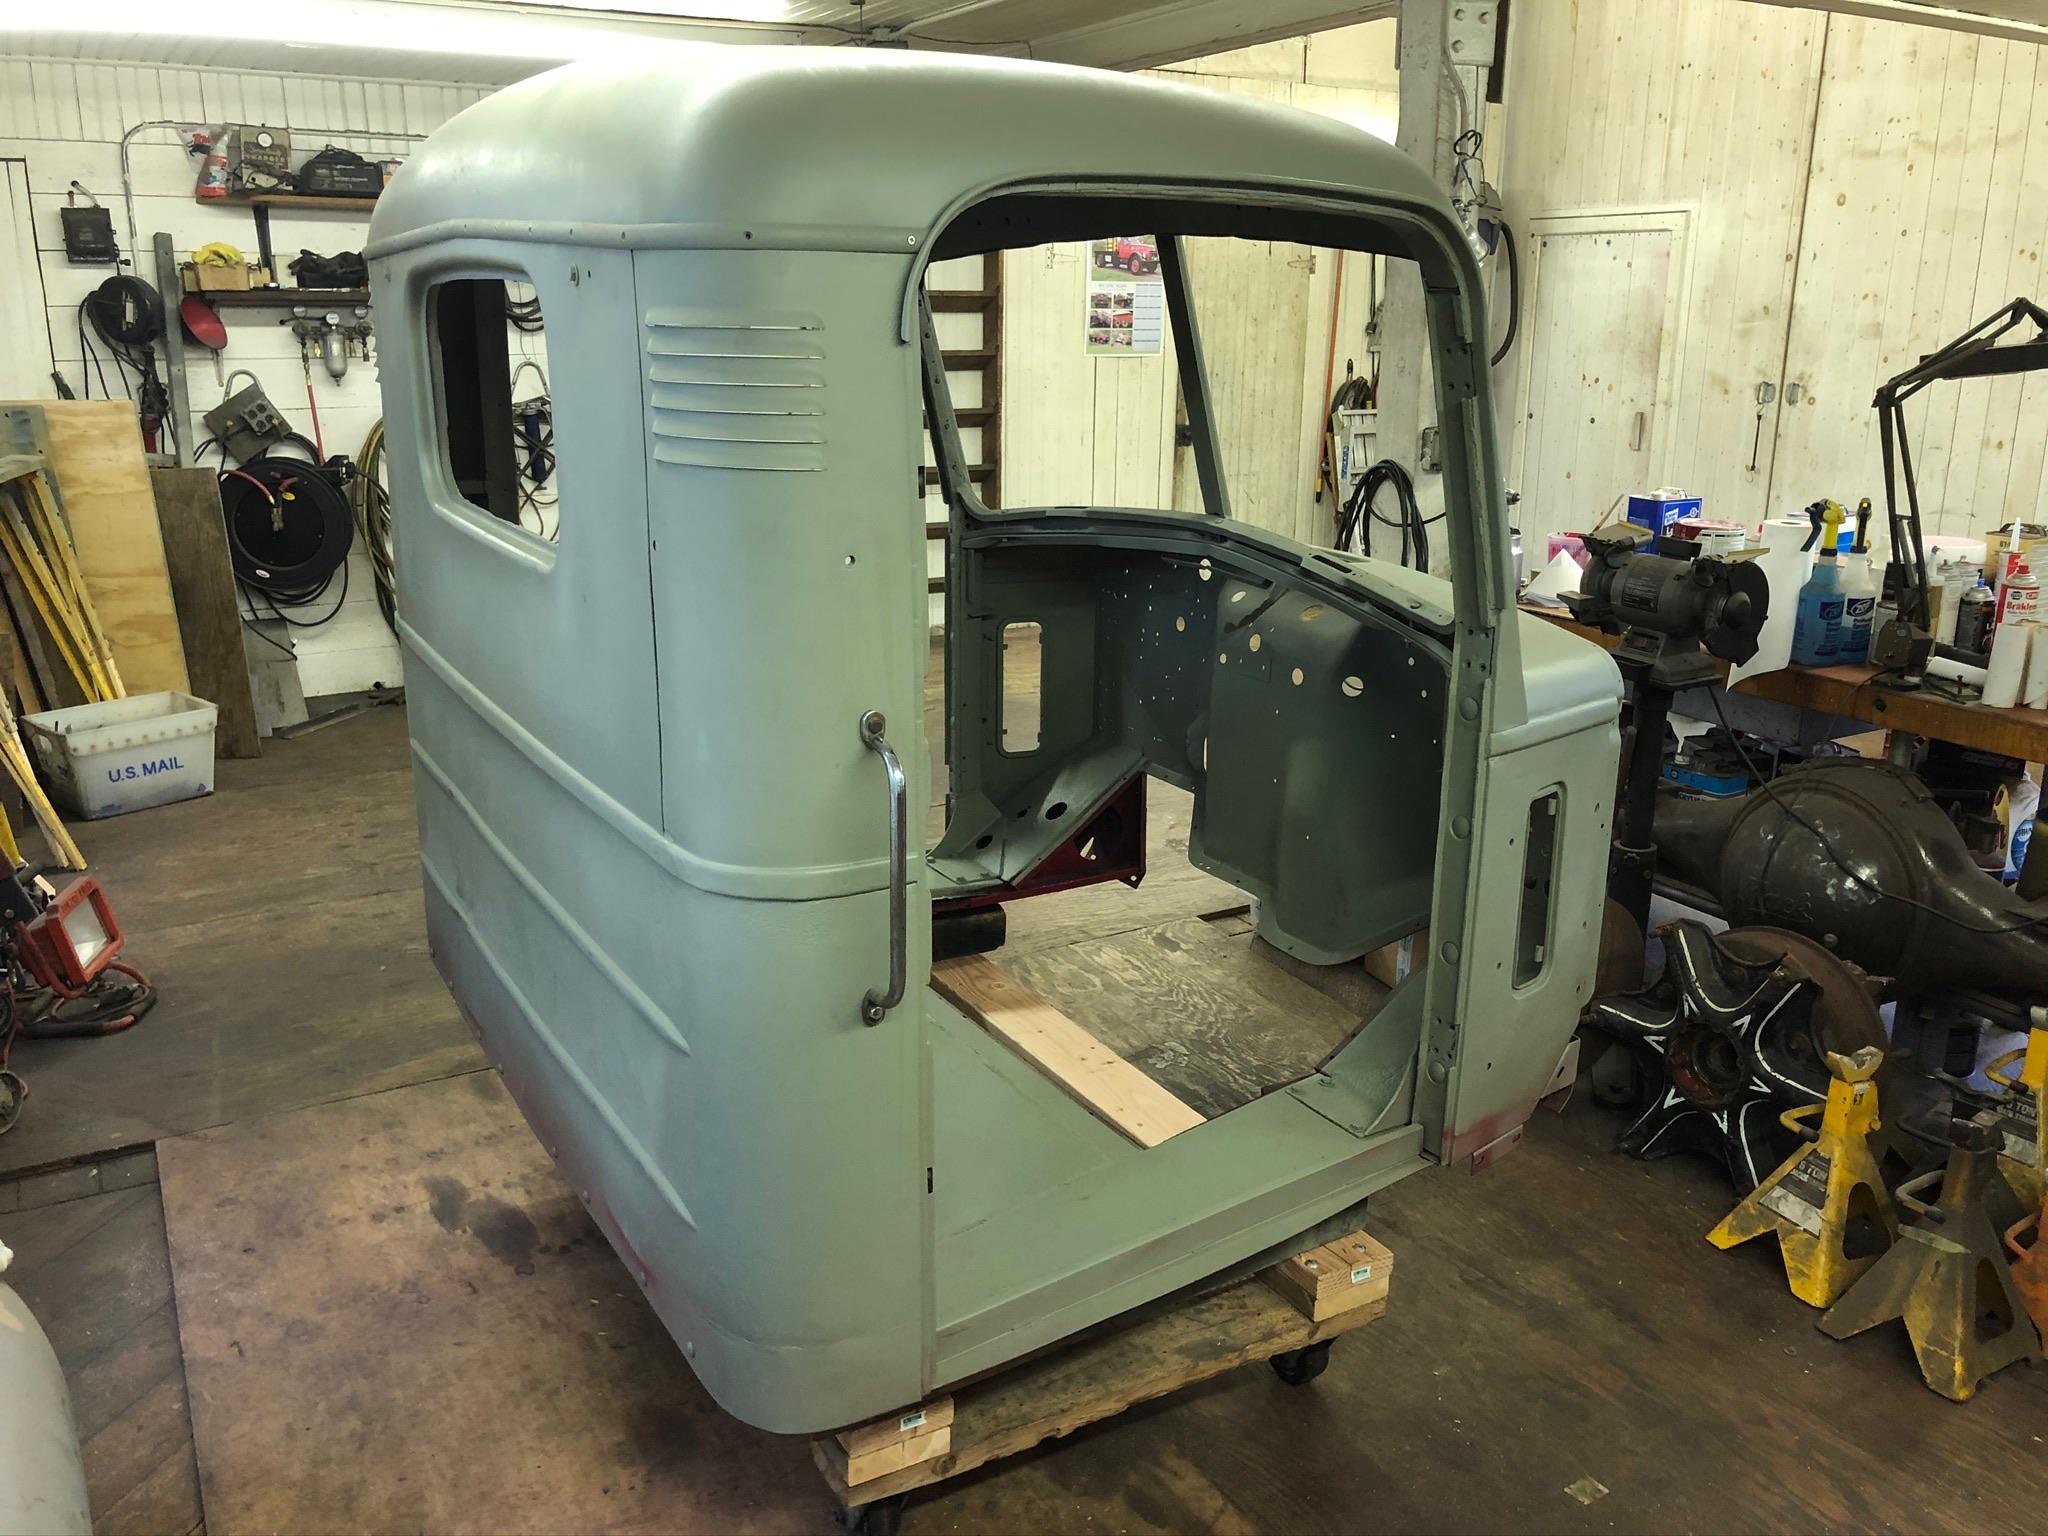
About 2/3 of the way done smoothing out the panels. Just taking light skim coats to do it. Still more sanding, priming and wet sanding to go.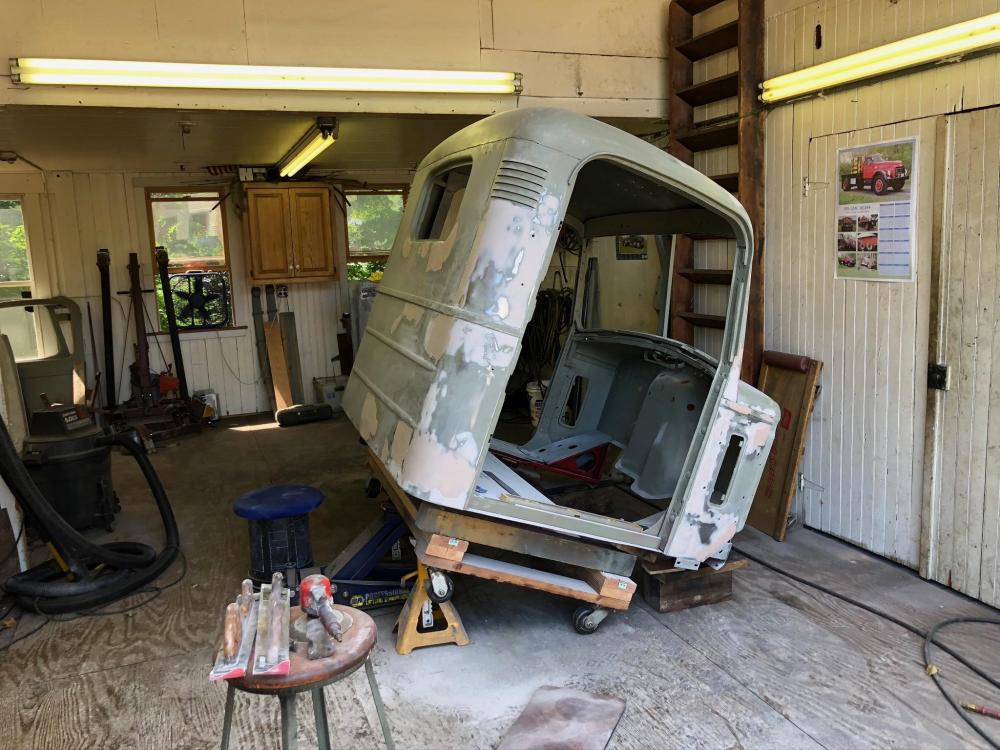

-
To buy or not to buy...
mattb73lt replied to TripleTreeThomas's topic in Antique and Classic Mack Trucks General Discussion
It's a duplex. -
To buy or not to buy...
mattb73lt replied to TripleTreeThomas's topic in Antique and Classic Mack Trucks General Discussion
Ok, but don’t fall in love with a headache. You’ve listed a lot of issues in your last few posts. As I’ve said, you’re the one who will work on it and expend your hard earned money to make it what you want. From what you’re posting it starting to add up to a lot of work. I would proceed with caution and I would be looking for a little less to purchase. -
To buy or not to buy...
mattb73lt replied to TripleTreeThomas's topic in Antique and Classic Mack Trucks General Discussion
From what you found, $6500 doesn’t seem too bad. The cab sounds like it has some issues. But, if you think it’s within your capabilities and you have the ability, you should be ok. -
To buy or not to buy...
mattb73lt replied to TripleTreeThomas's topic in Antique and Classic Mack Trucks General Discussion
When you inspect it, try to determine what has been done to it and modified over the years. Any mods done well and with the right components should be OK. Wiring is not a huge deal, as the electrical system is simple, harnesses available and you can make your own without too much difficulty. Stay within you capabilities for doing things and you should be good. -
To buy or not to buy...
mattb73lt replied to TripleTreeThomas's topic in Antique and Classic Mack Trucks General Discussion
On the cab, check the driver’s side floor area. Both door sills and door bottoms. Check along the cab floor where it meets the back wall of the cab, inside and out. The cab back wall is prone to rust in that area. Fenders can be replaced/repaired. Door jambs and gutters. Windshield and upper cowl areas are other areas to look at. -
AC Hood
mattb73lt replied to paulbrook's topic in Antique and Classic Mack Trucks General Discussion
That really looks good! A Plus on the effort!! -
B-73 Restoration
mattb73lt replied to mattb73lt's topic in Antique and Classic Mack Trucks General Discussion
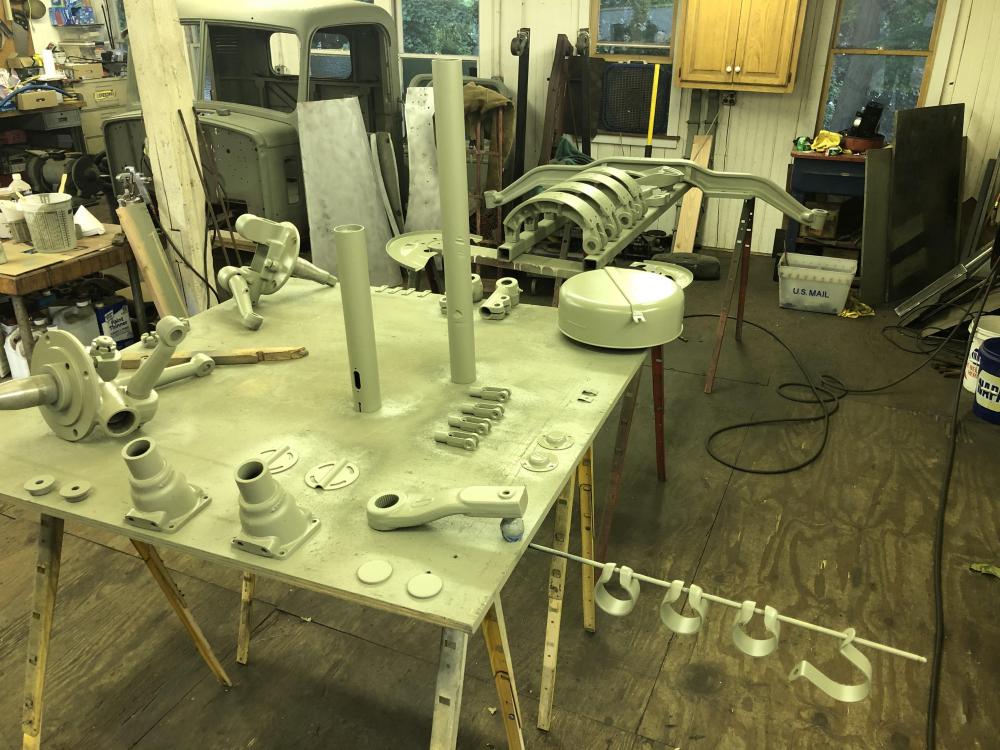
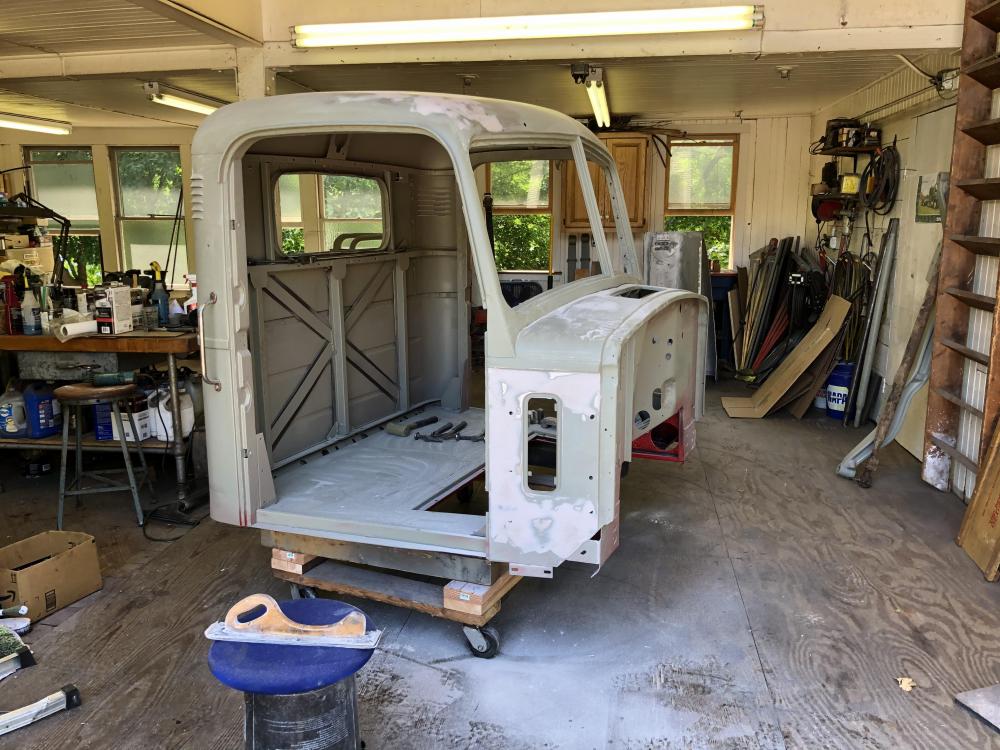
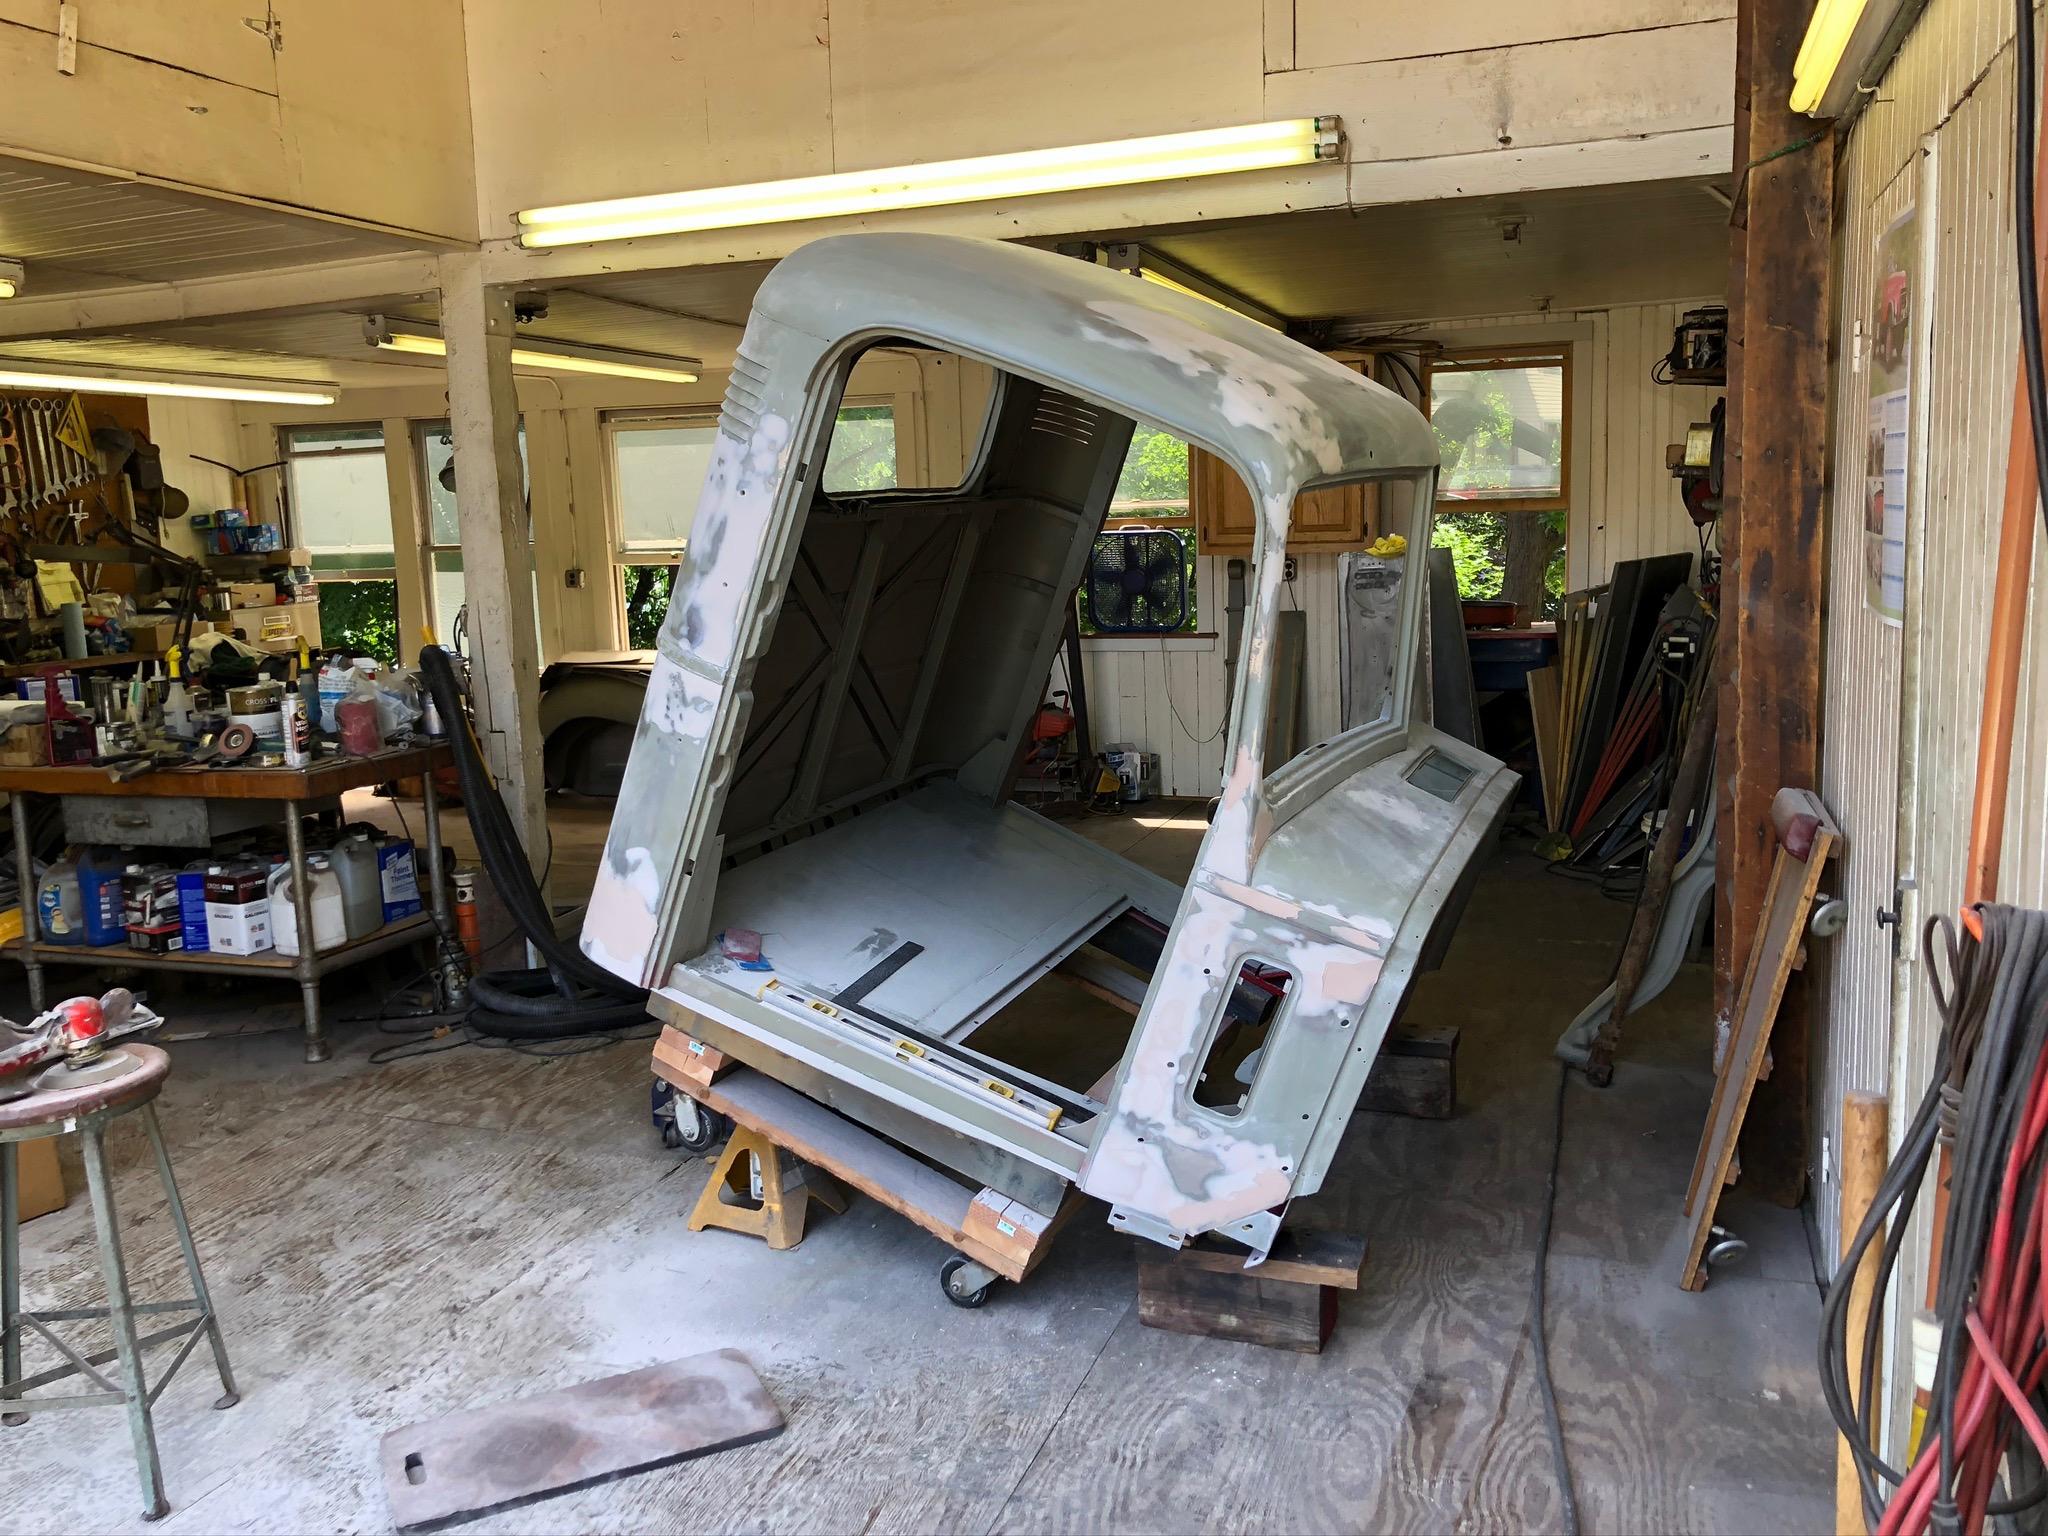
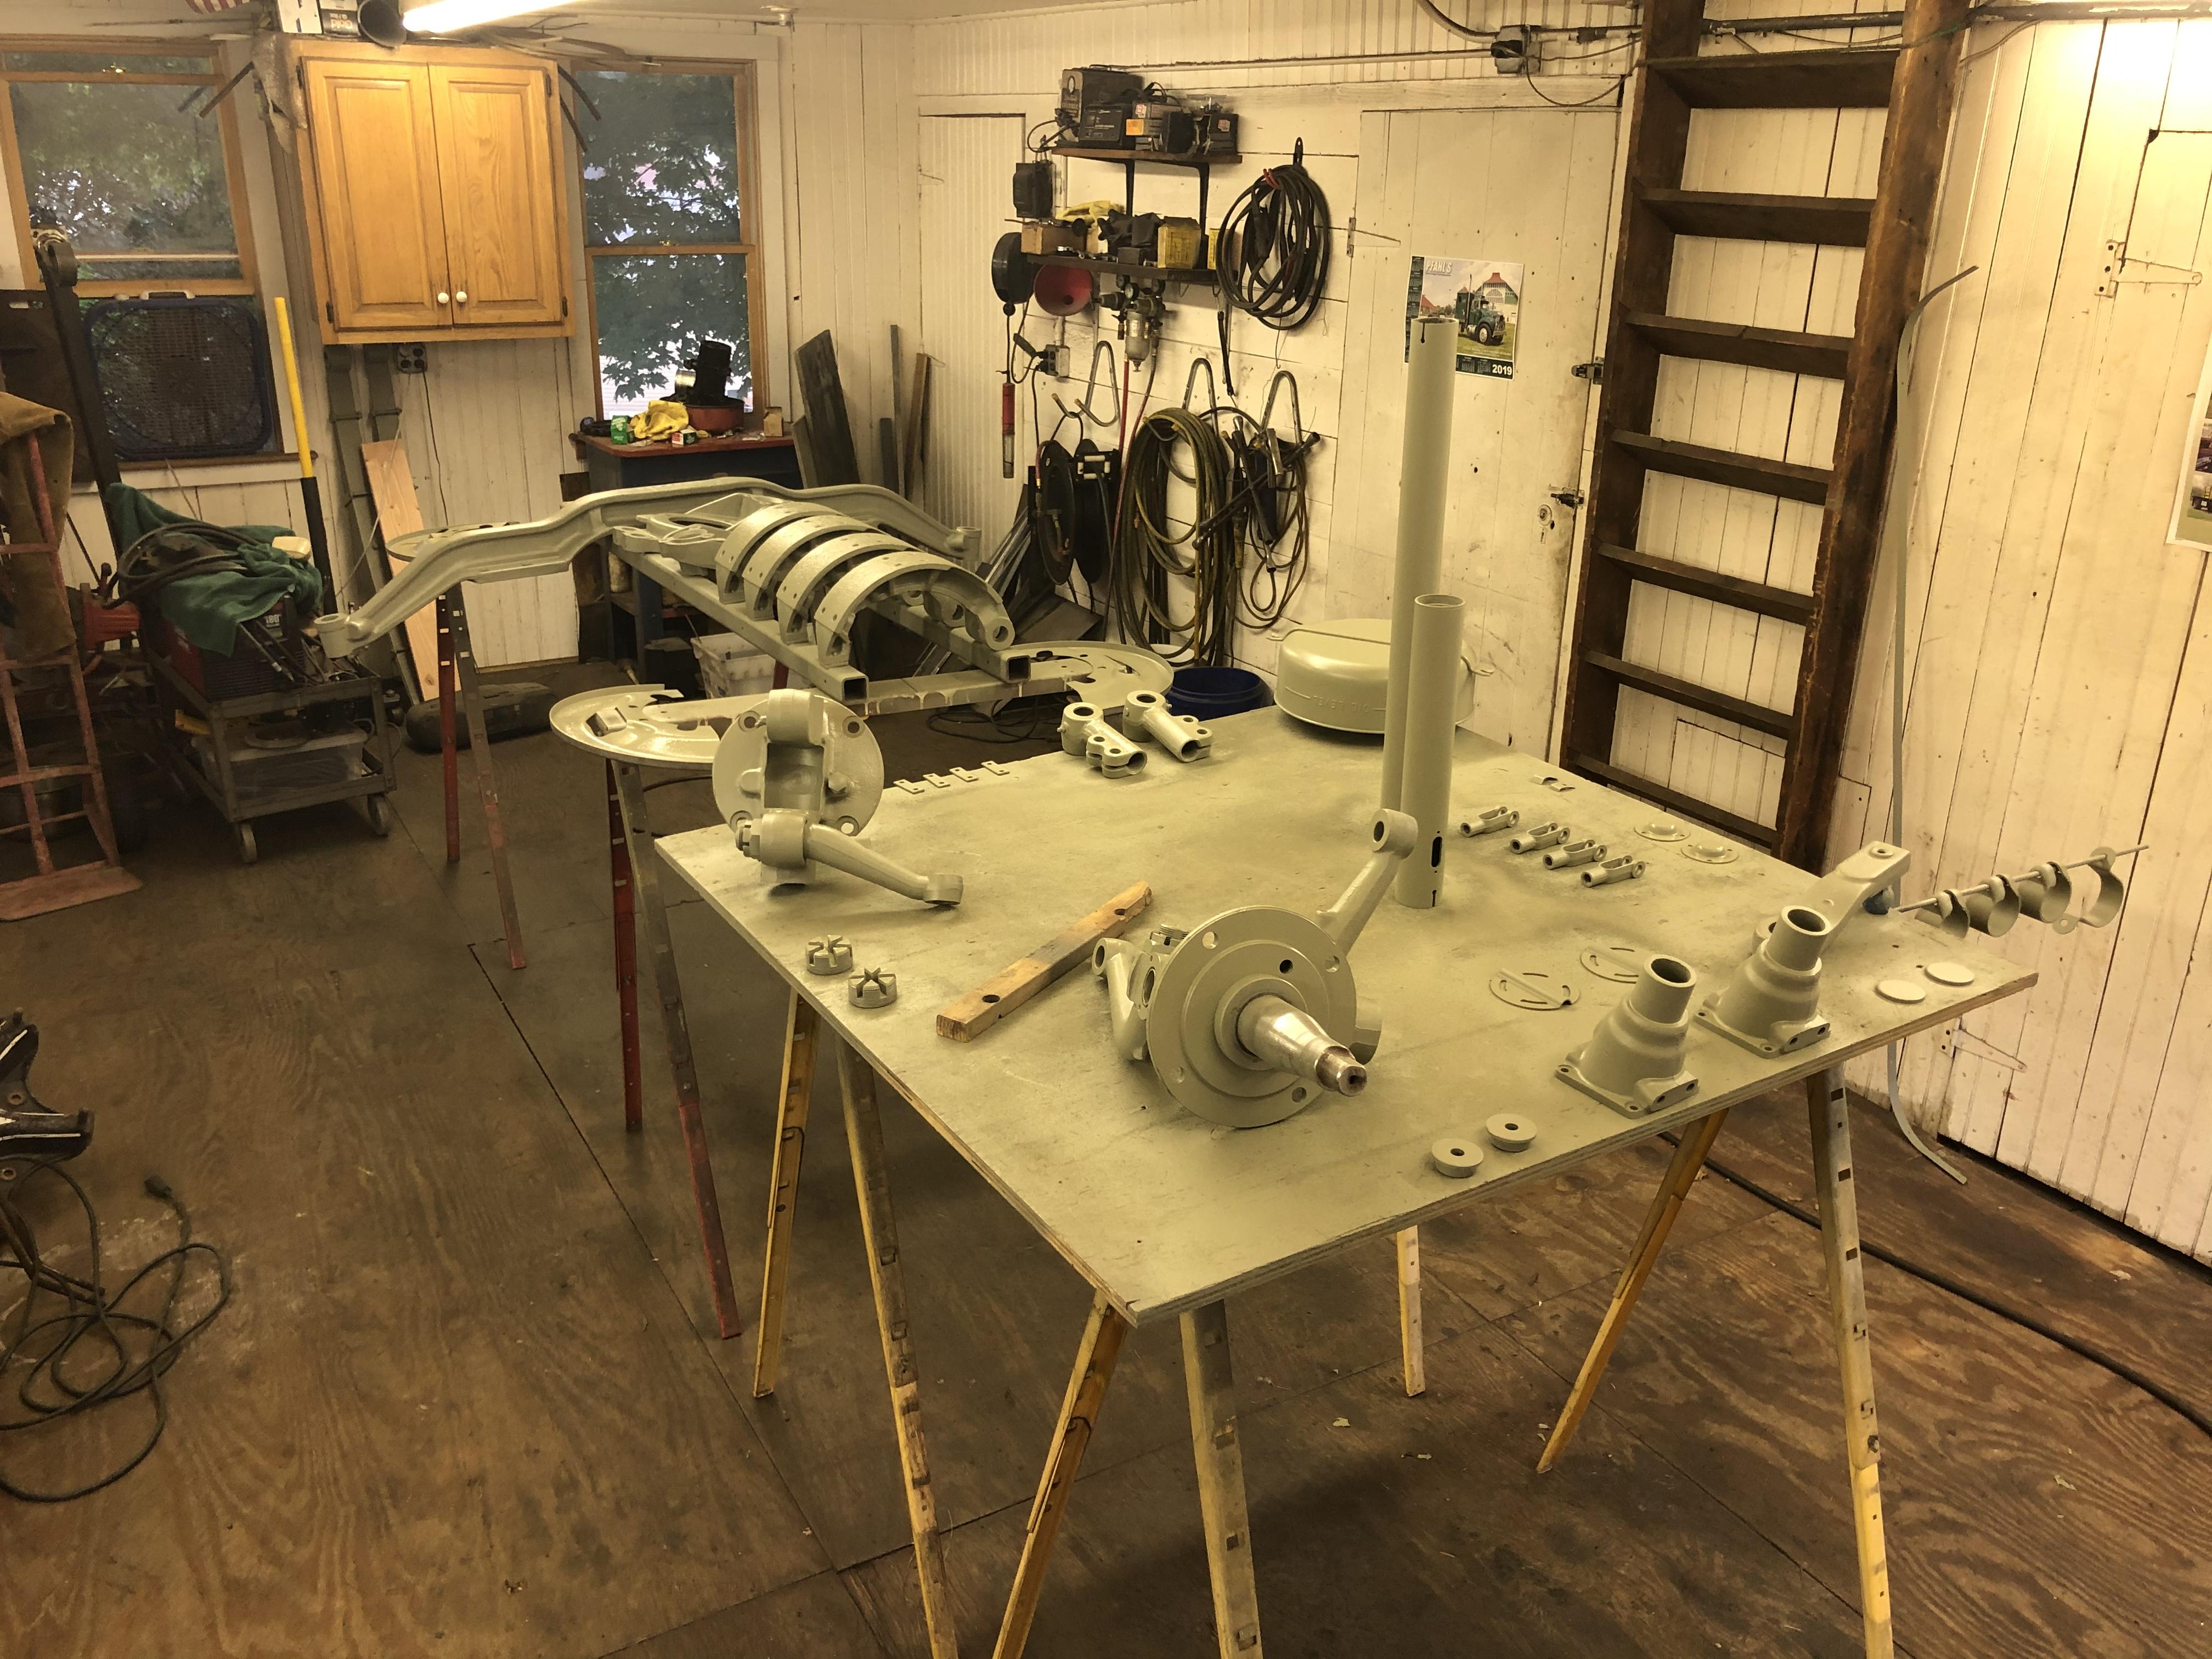
Hump work!! Cleaning, fixing and priming more parts. Sprayed about three gallons of primer so far. I now have five large shelves of parts ready to go in the hayloft. Started smoothing out the cab, amazingly it’s going pretty quick. Roof is done, cowl is just about there. It’s not taking too much effort as the panels were pretty straight going on. The cab back will take some effort. But, moving along.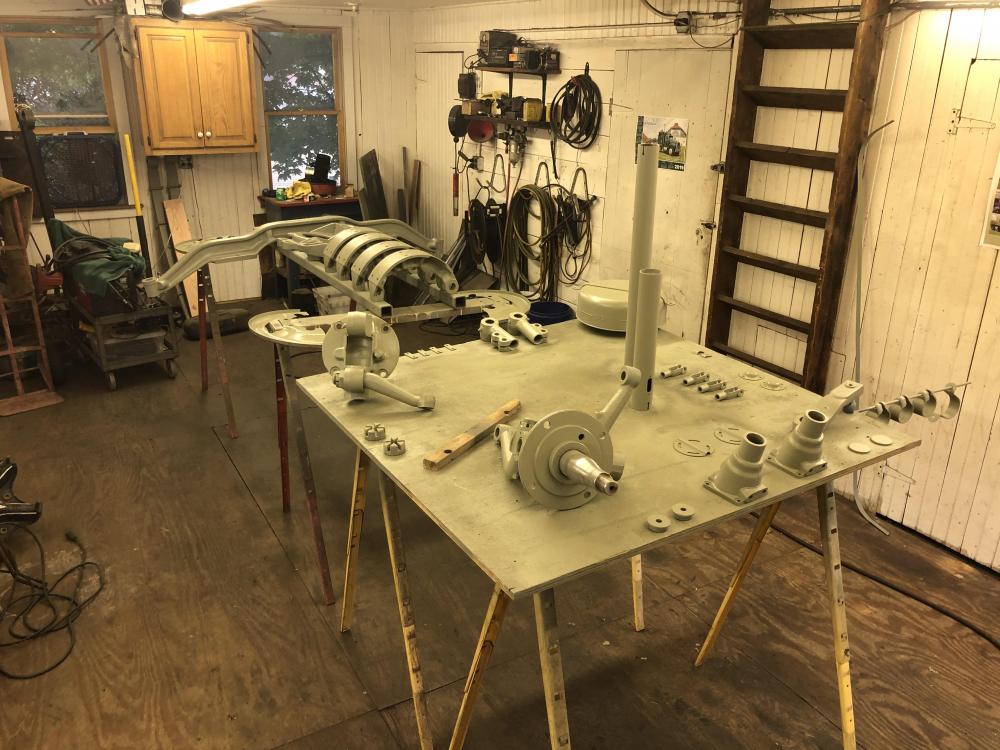
-
B-73 Restoration
mattb73lt replied to mattb73lt's topic in Antique and Classic Mack Trucks General Discussion
I was going to cover the corner vents with a patch of Dynamat, until I found a better solution. I'm not sure if I want to permanently close them off, but still worried about sound coming through. Also, are you saying just use a high fill primer over the LS to smooth out the texture and then paint? I was planning on doing an experimental panel to come up with a smoothing solution before paint. -
B-73 Restoration
mattb73lt replied to mattb73lt's topic in Antique and Classic Mack Trucks General Discussion
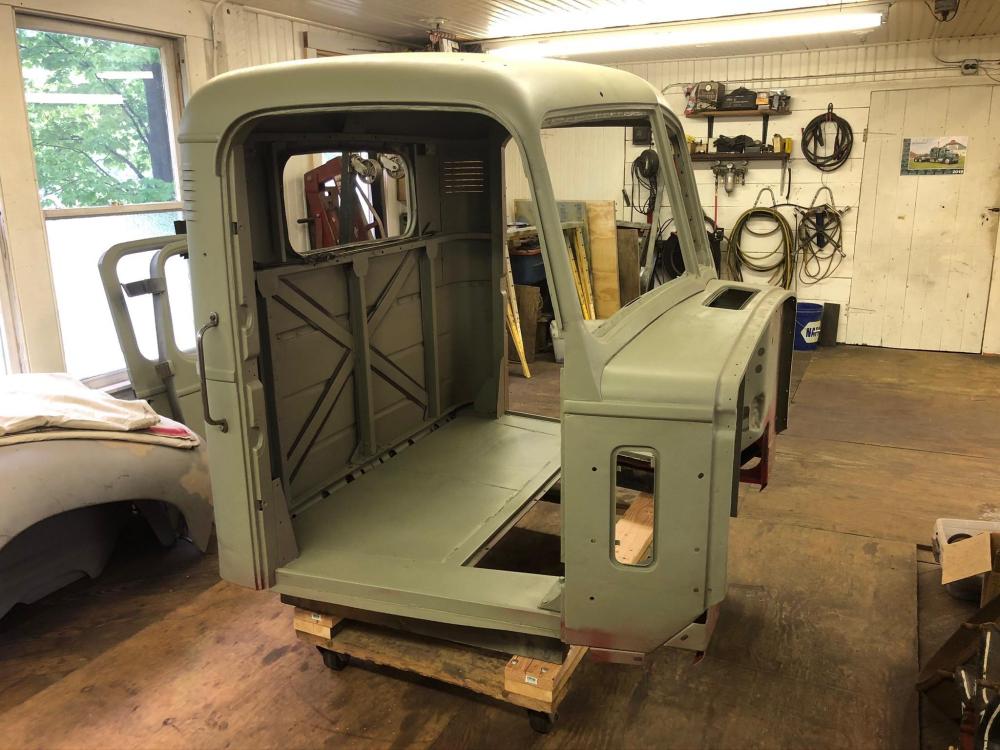
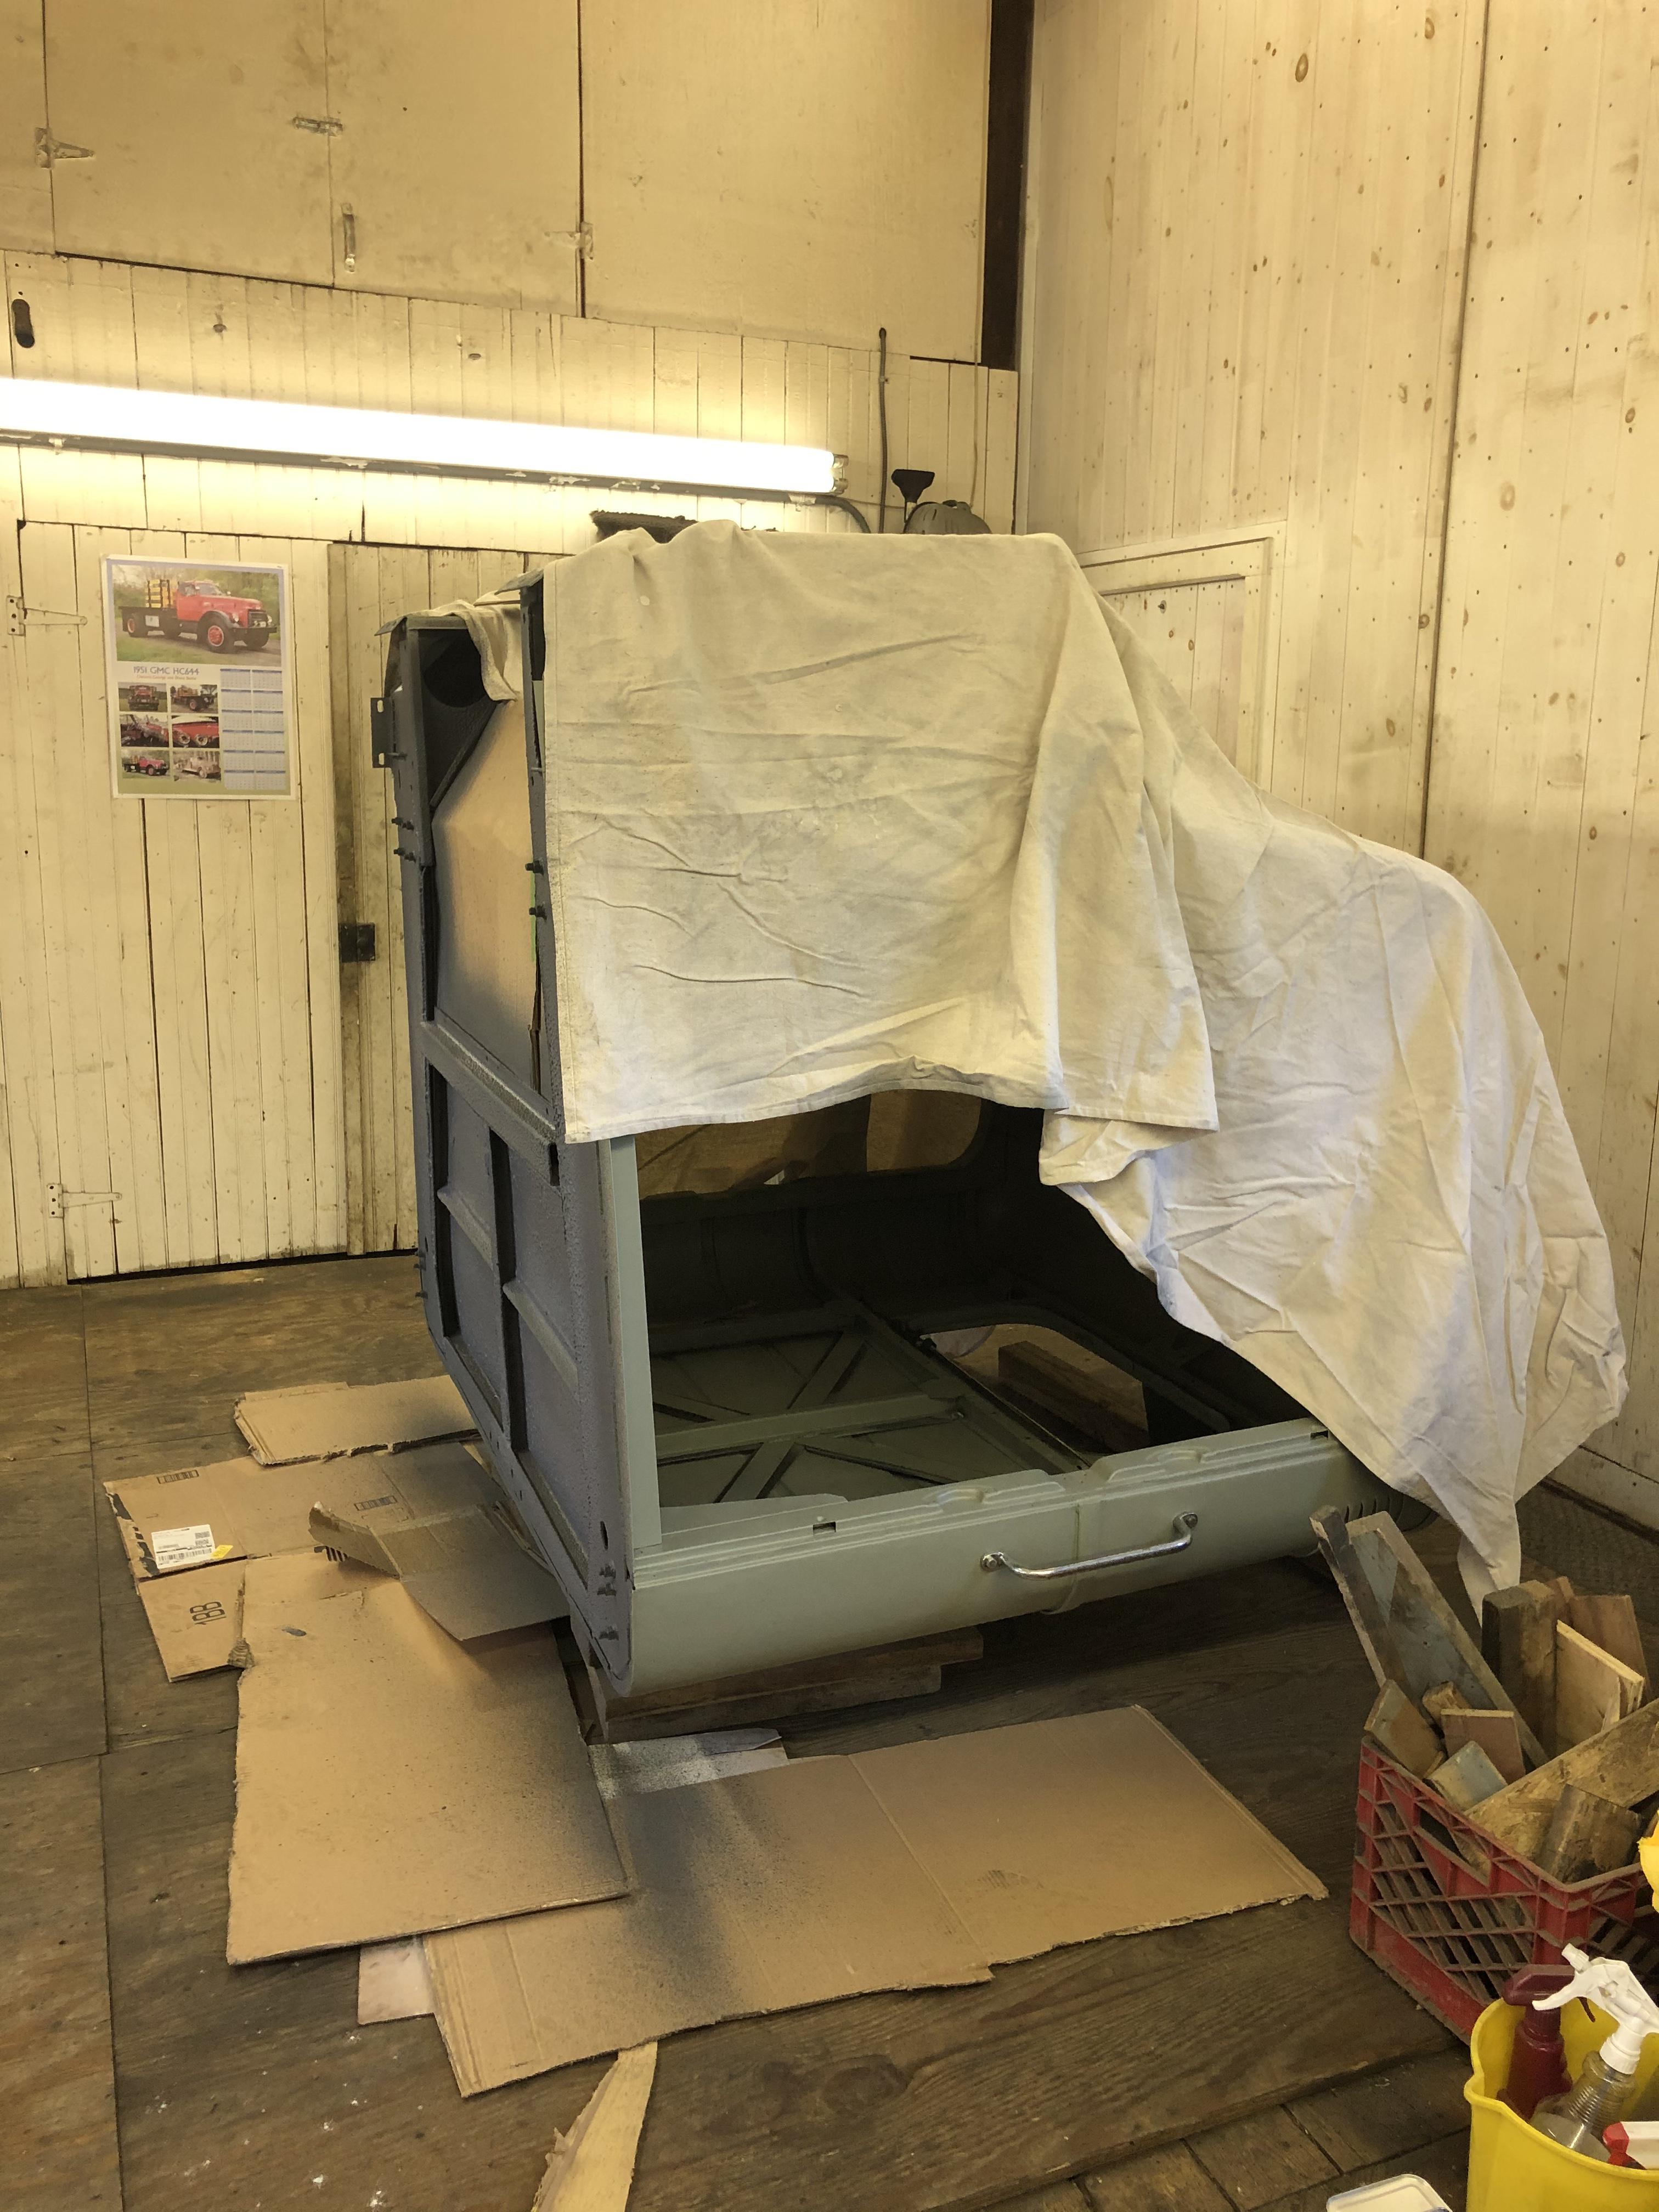
Back on its feet. Rebuilt and shortened my dolly, it was starting to sag and I need it more stable for the work ahead. Man, this cab looks good now.
-
B-73 Restoration
mattb73lt replied to mattb73lt's topic in Antique and Classic Mack Trucks General Discussion
Thanks, I’m really happy how it came out. That’s a lot of reading, never thought this would be such a long story. But it’s getting done. Faster now that the cab is done. Matt -
B-73 Restoration
mattb73lt replied to mattb73lt's topic in Antique and Classic Mack Trucks General Discussion
harrybarbon, Yes, I spent a lot of time getting into all the nooks and crannies, making sure everything was well coated. I got a little overzealous in one area and started a sag by going too quickly. For the firewall, I’m going to do the inside and cover it with the firewall mat. My thought there was to use it to cover up all the unused holes and to better seal it. There’s a lot that gets mounted to the engine side an I wanted a cleaner look. I’m also going to coat the underside of the cowl, back wall, roof and door inners. So far it seems like a good product. I’ll need more to finish, as I was surprised how much I used on the bottom of the cab. Regardless, it’ll still have more soundproofing than the factory. Now, do I straight pipe it or put a muffler on it to defeat all of what I’m trying to do? -
B-73 Restoration
mattb73lt replied to mattb73lt's topic in Antique and Classic Mack Trucks General Discussion
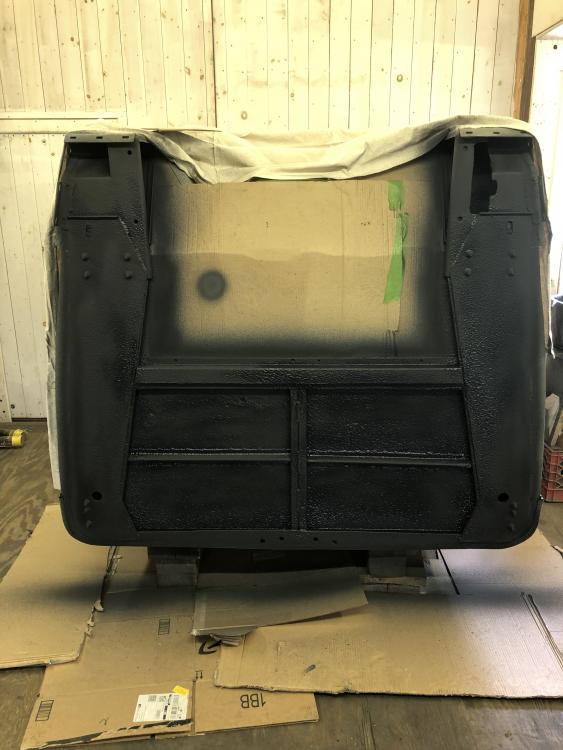
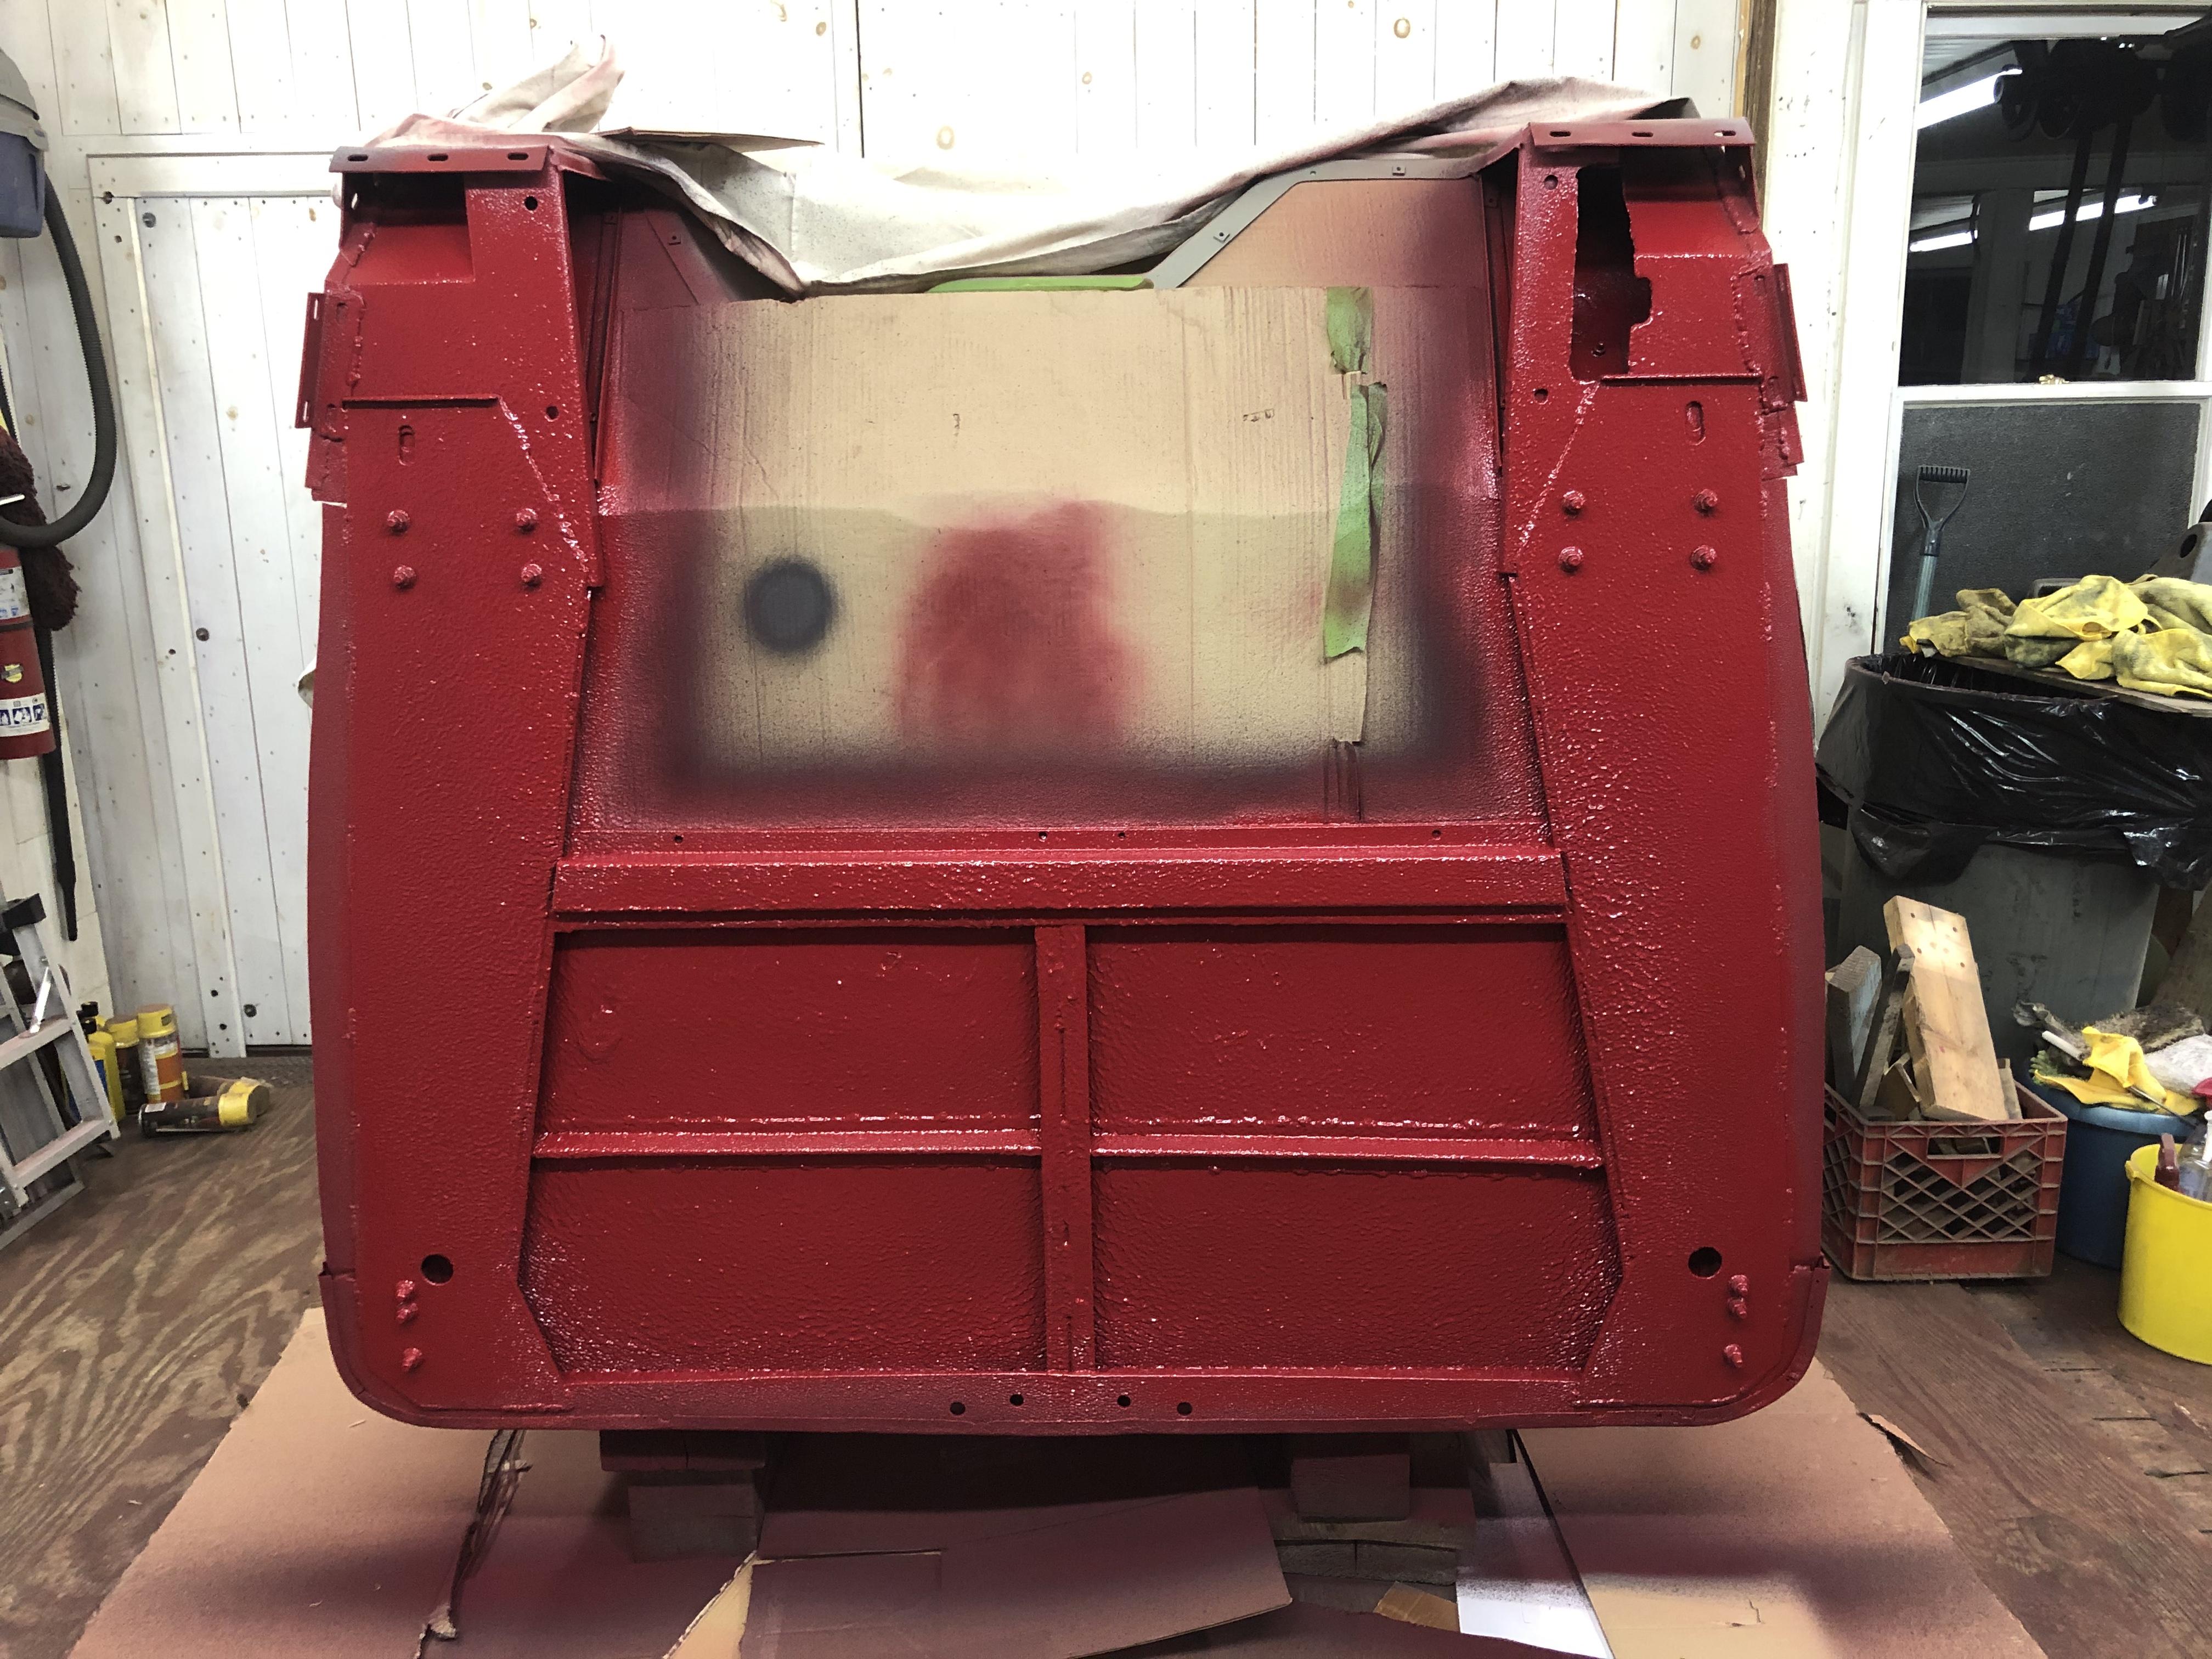
And then there was COLOR!!! Big bright RED!! Thanks to my Australian contributors, fully coated with Lizard Skin for sound and heat. This should be the last time the cab is on its back!! I’ll let it sit for a few days before righting it. Then on to bodywork and more RED!!

-
AC Hood
mattb73lt replied to paulbrook's topic in Antique and Classic Mack Trucks General Discussion
Wow, that’s looking really good. Great effort and will look beautiful when you’re done. -
That is really sharp!! Very nice.
-
Assembly Begun
mattb73lt replied to h67st's topic in Antique and Classic Mack Trucks General Discussion
Nice, those are some big, heavy parts!!


BMT Forum Logo
