


mattb73lt
-
Posts
1,426 -
Joined
-
Last visited
-
Days Won
146
Content Type
Profiles
Forums
Gallery
Events
Blogs
BMT Wiki
Collections
Store
Everything posted by mattb73lt
-
I would say very tough to come by. Once in a while you'll see some pieces come up, a radiator shell, hood. I haven't seen fenders in a while. Cabs are tough, there was one (it was complete) on Ebay last year in Canada. Cabs can be rebuilt and parts fabricated, but it's slow and costly. I'm rebuilding a L cab for my B-73, it's hard and takes a lot of patience. But, keep hunting, you'll stumble on stuff.
-

B-73 Restoration
mattb73lt replied to mattb73lt's topic in Antique and Classic Mack Trucks General Discussion
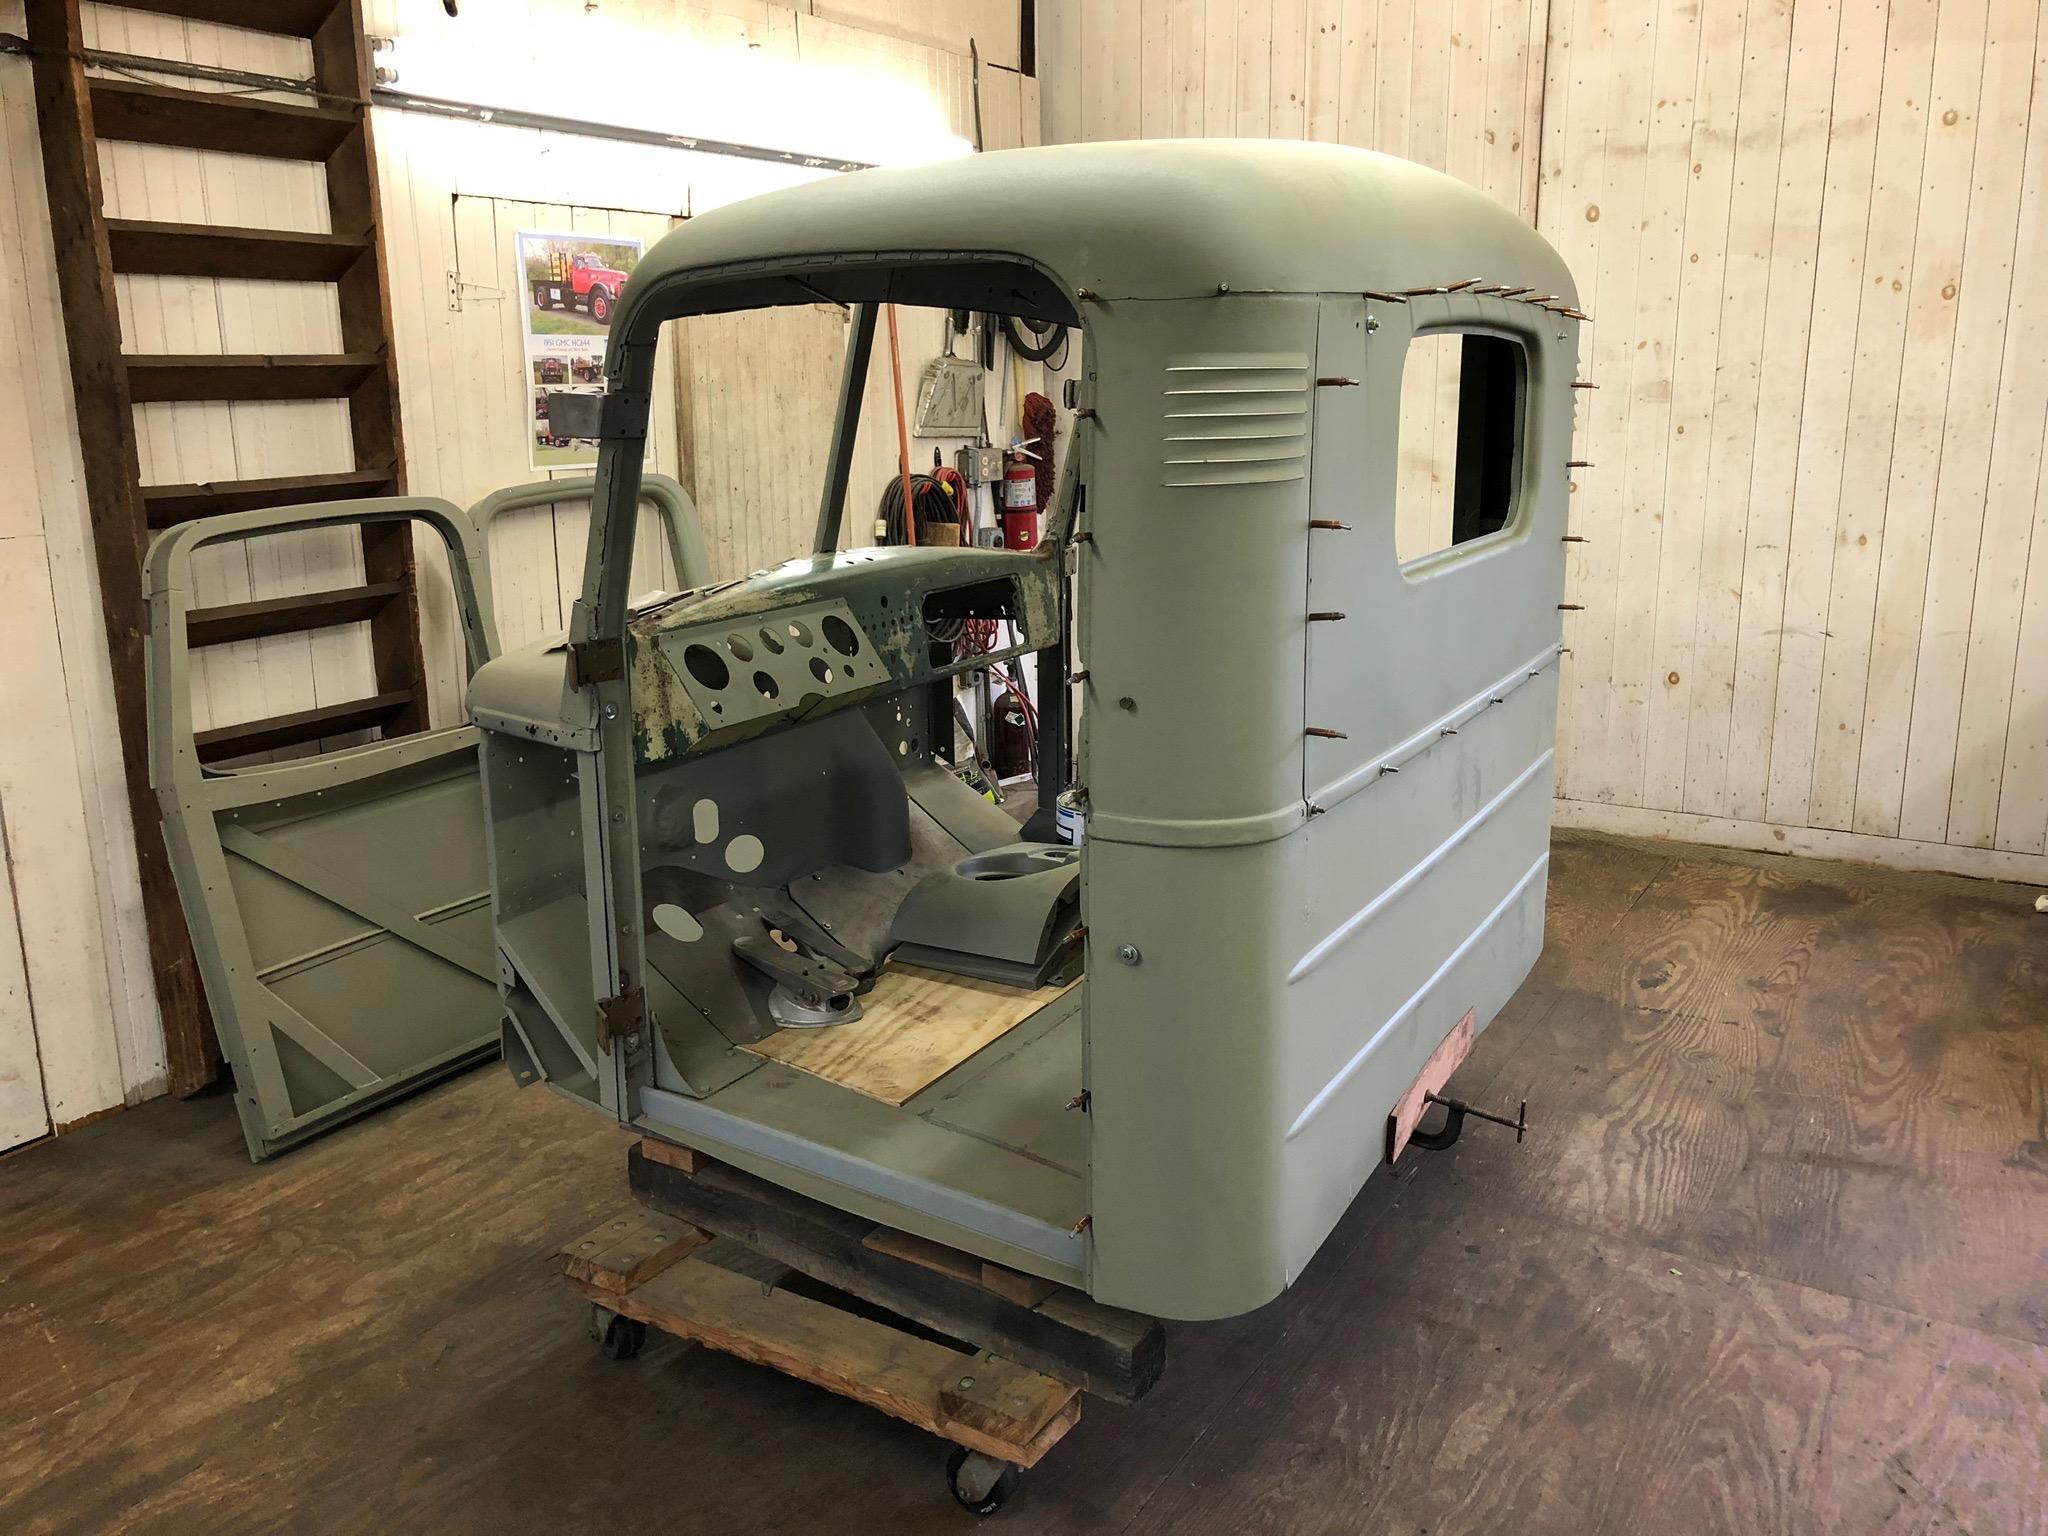
Neither can I. Never thought I'd go this far into it. I always liked this cab on the B. I think what saved it and allowed me to go this route was the shoddy repair that was done after the original owner crashed into his trailer after missing the fifth wheel. It was literally pop riveted back together and the two replacement panels were falling off. They did a lot of damage too, as they chiseled the spot welds apart instead of using a cutter. Like i said, I can't wait to get this part done. -
B-73 Restoration
mattb73lt replied to mattb73lt's topic in Antique and Classic Mack Trucks General Discussion
I’m pretty well equipped, but once in a while I come up short. It would be nice to have a shear and a brake for fabrication, but I don’t usually get this deep into a vehicle. -
B-73 Restoration
mattb73lt replied to mattb73lt's topic in Antique and Classic Mack Trucks General Discussion
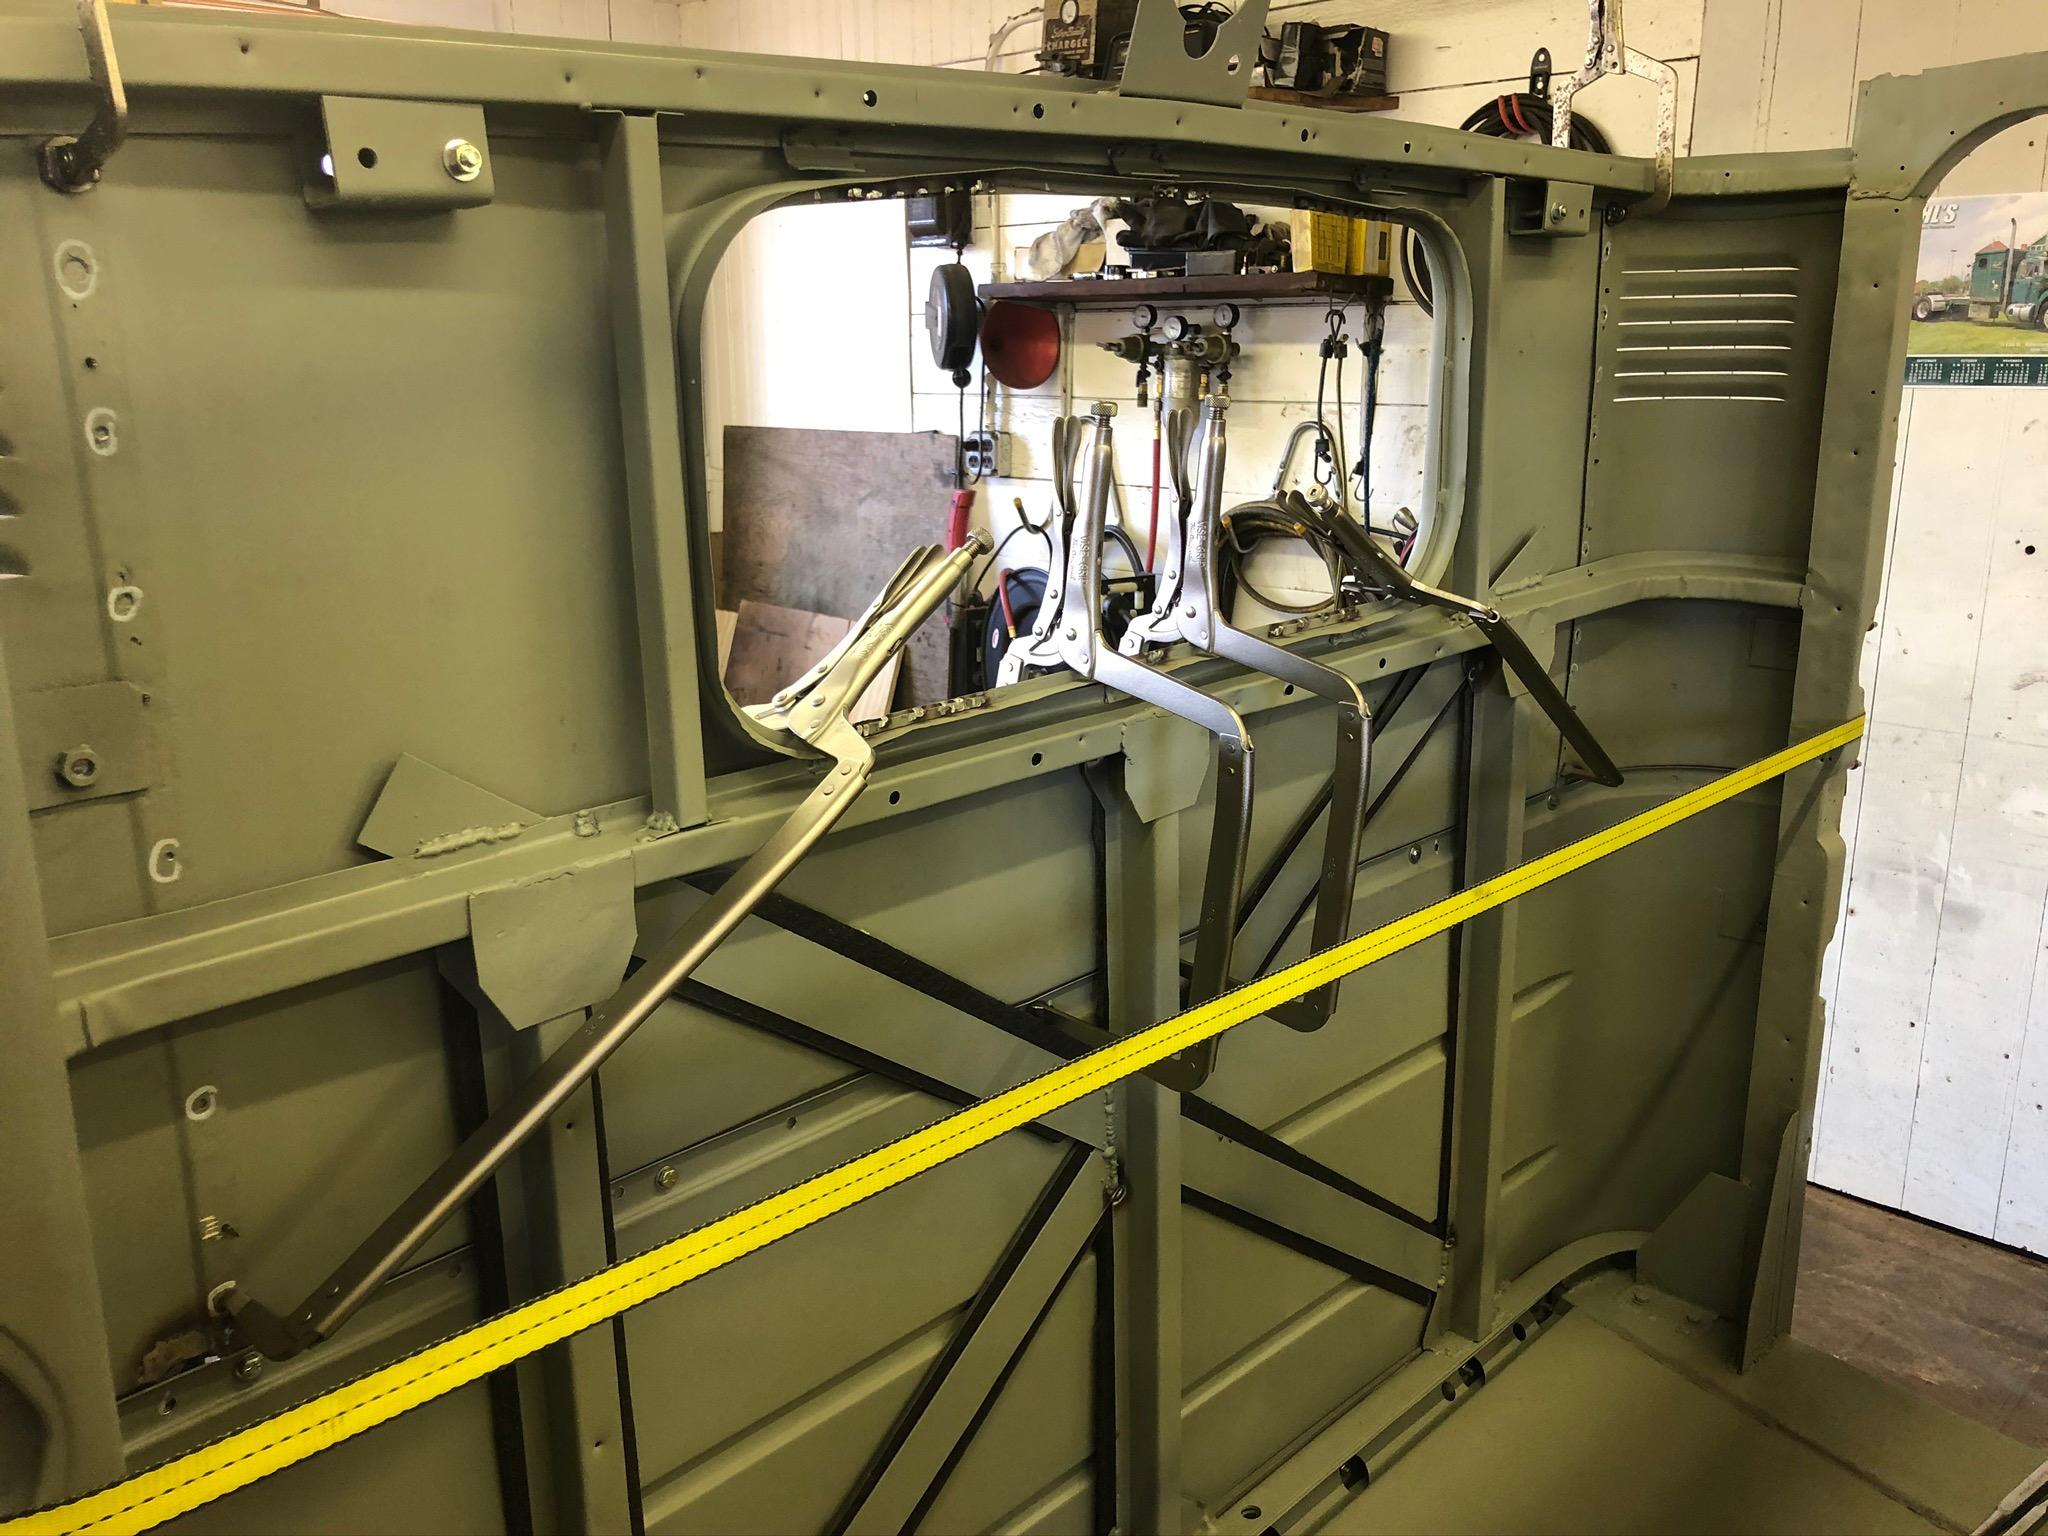
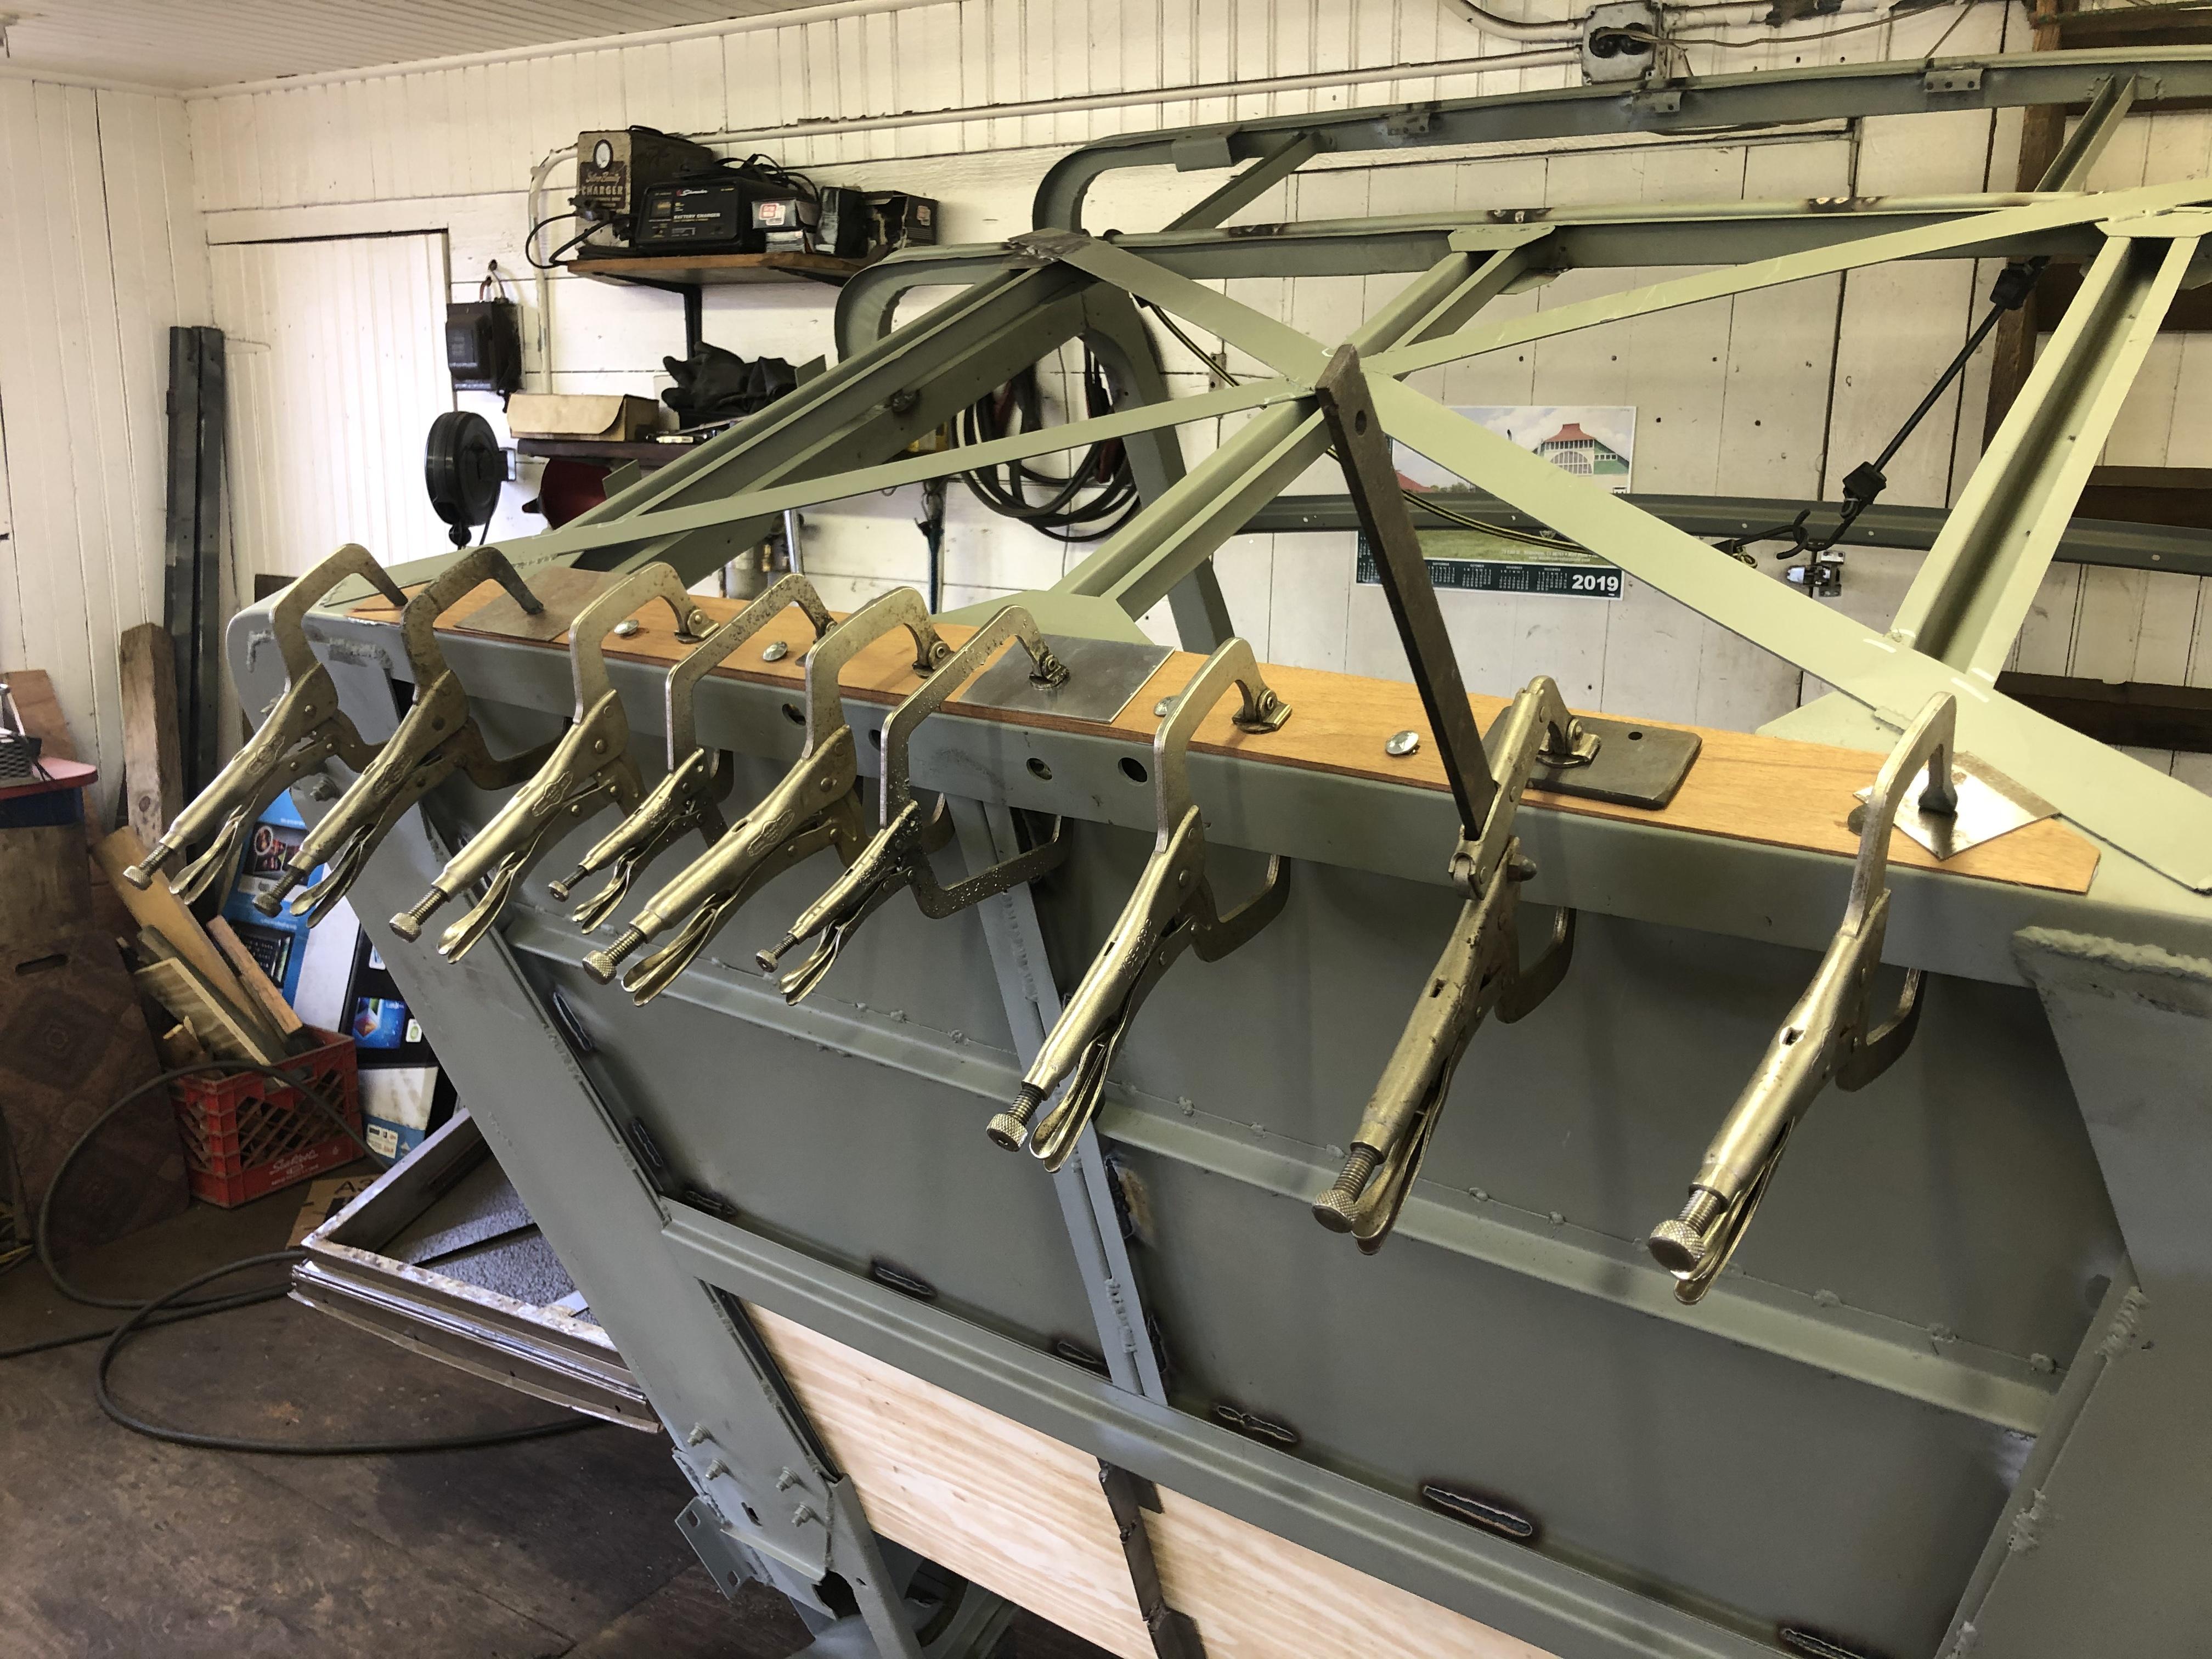
I had to special order them. needed them to reach the hard spots. 24" reach!! -
B-73 Restoration
mattb73lt replied to mattb73lt's topic in Antique and Classic Mack Trucks General Discussion
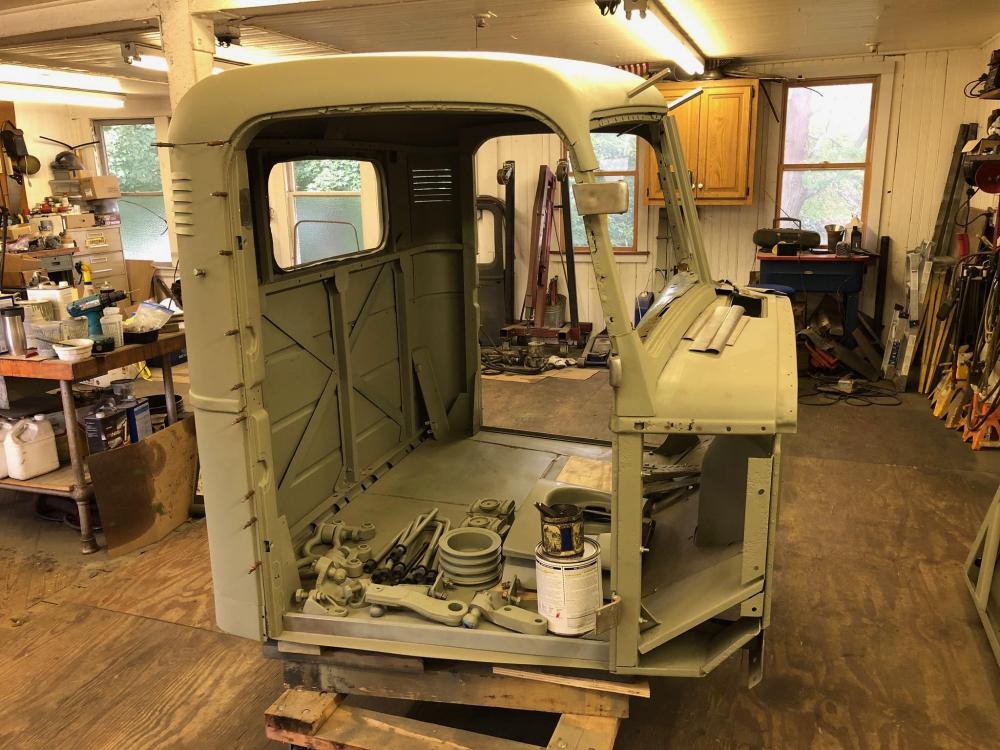
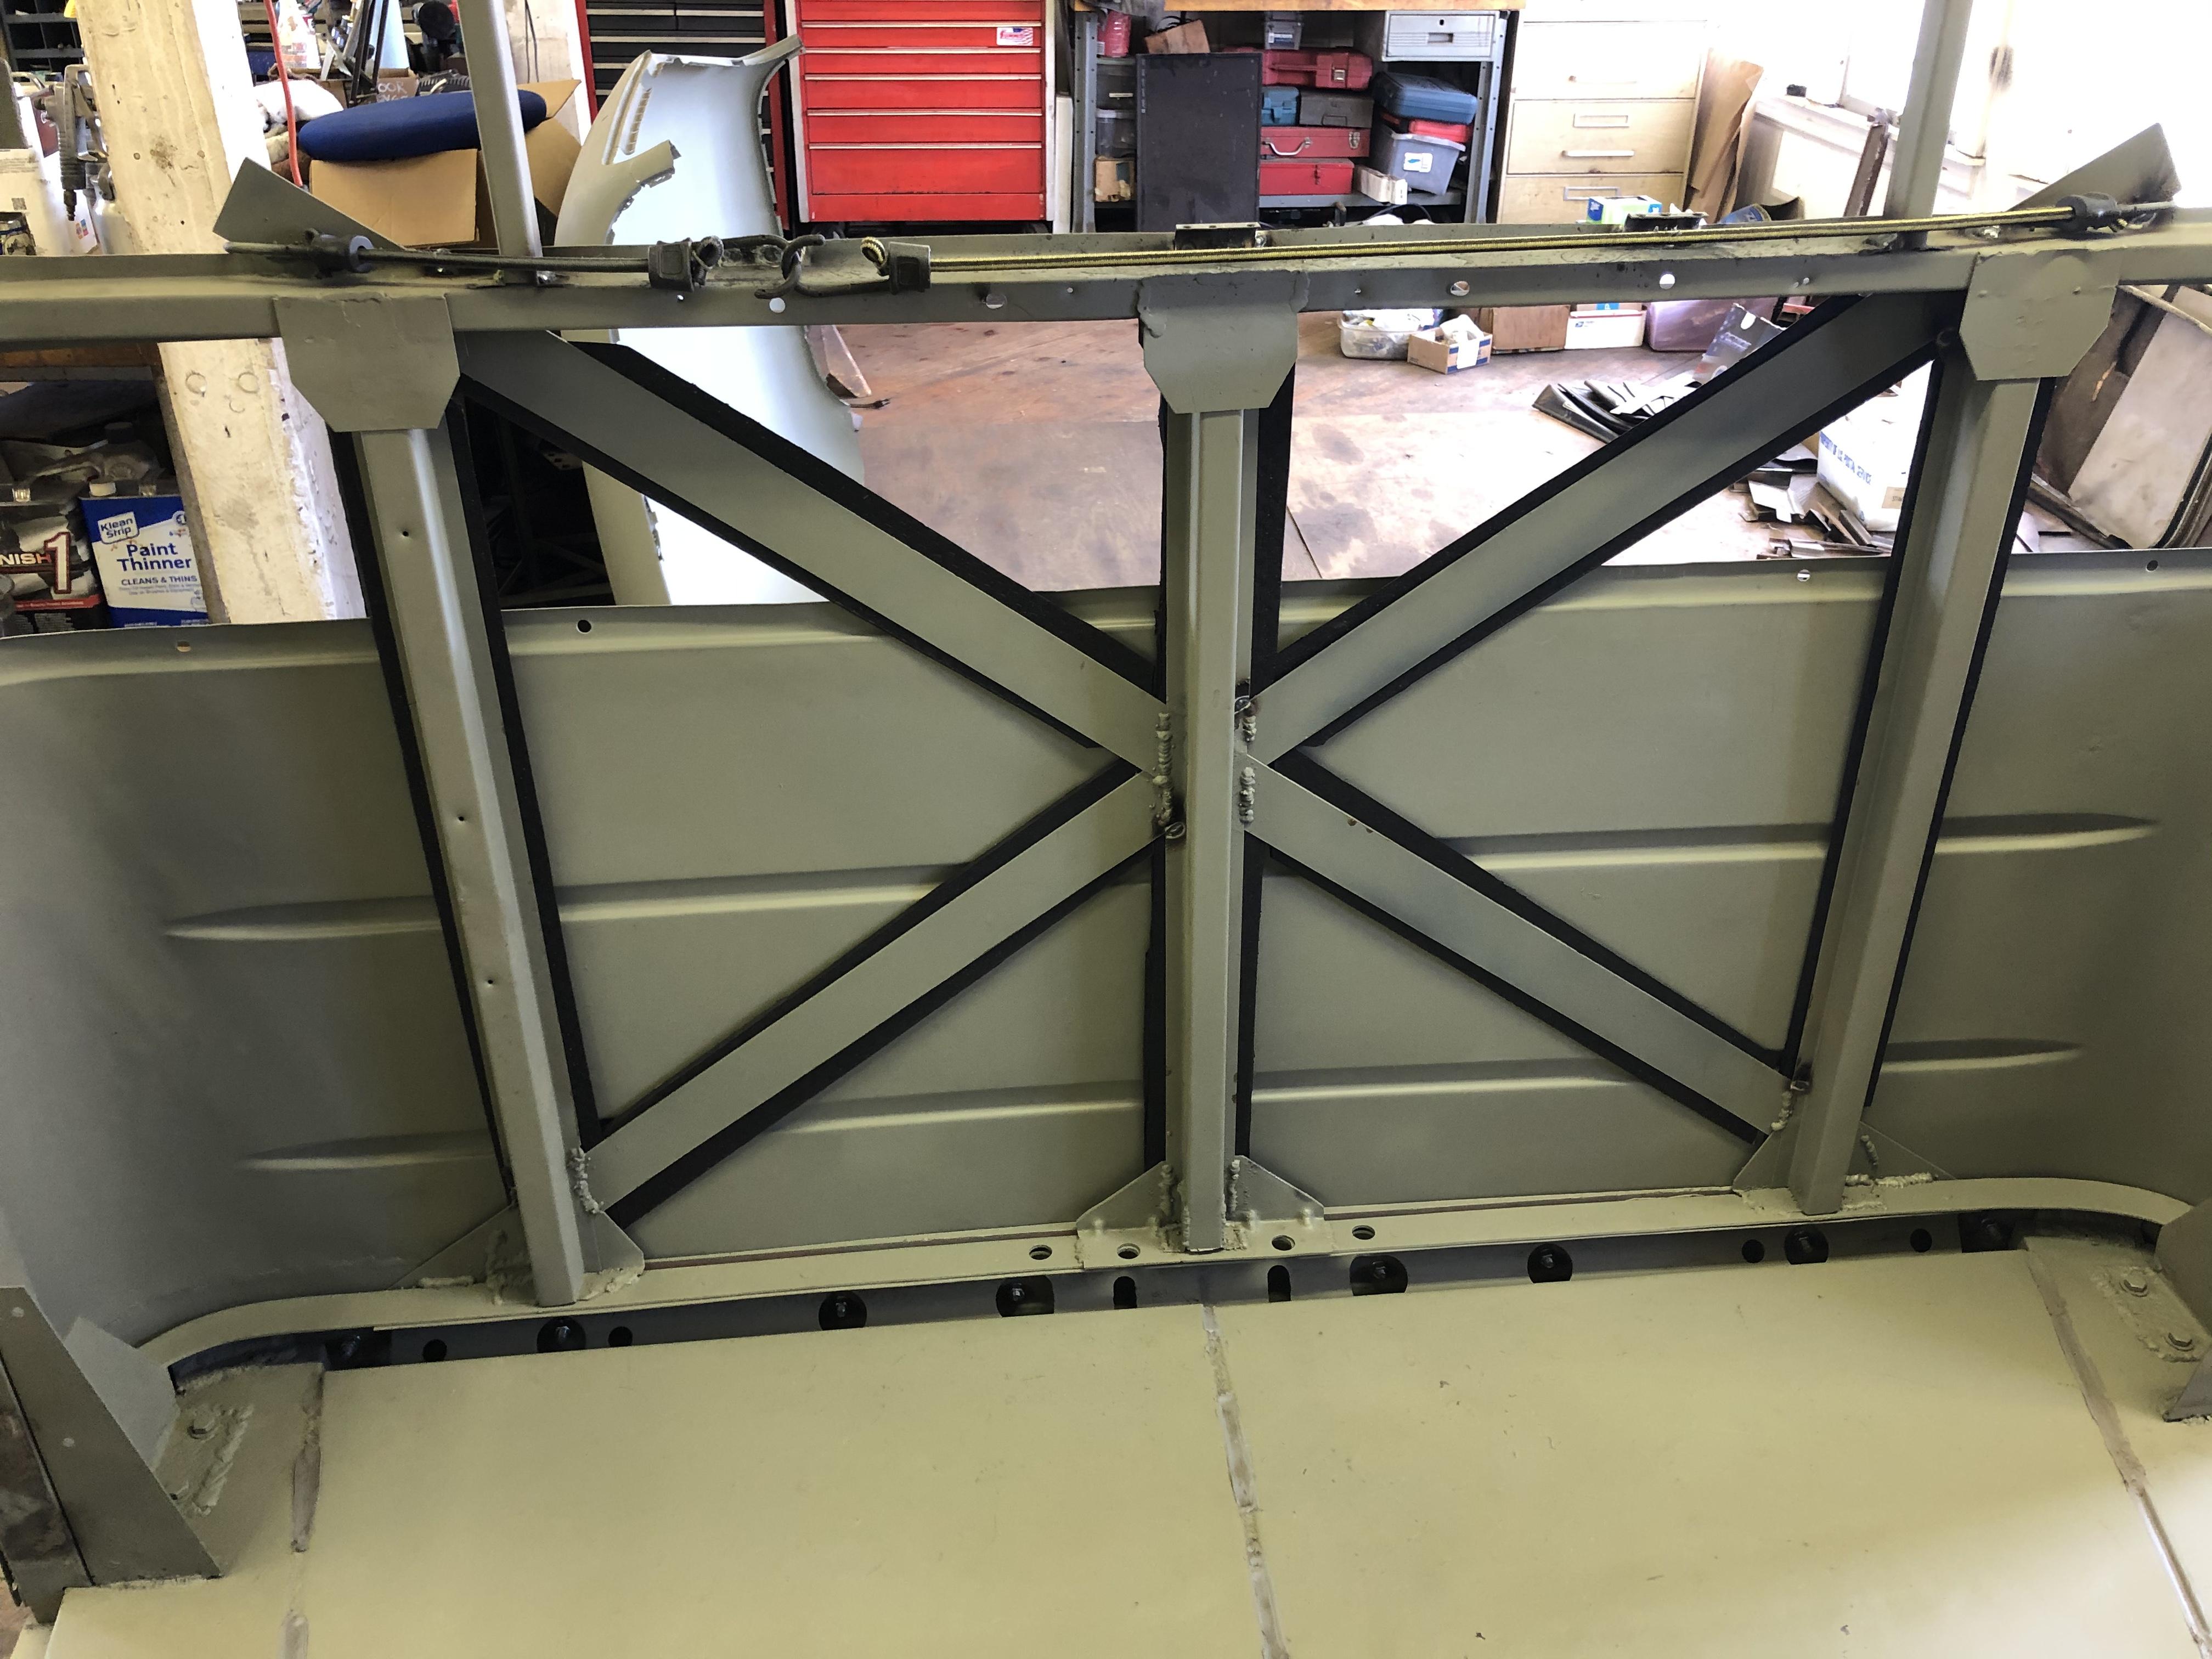
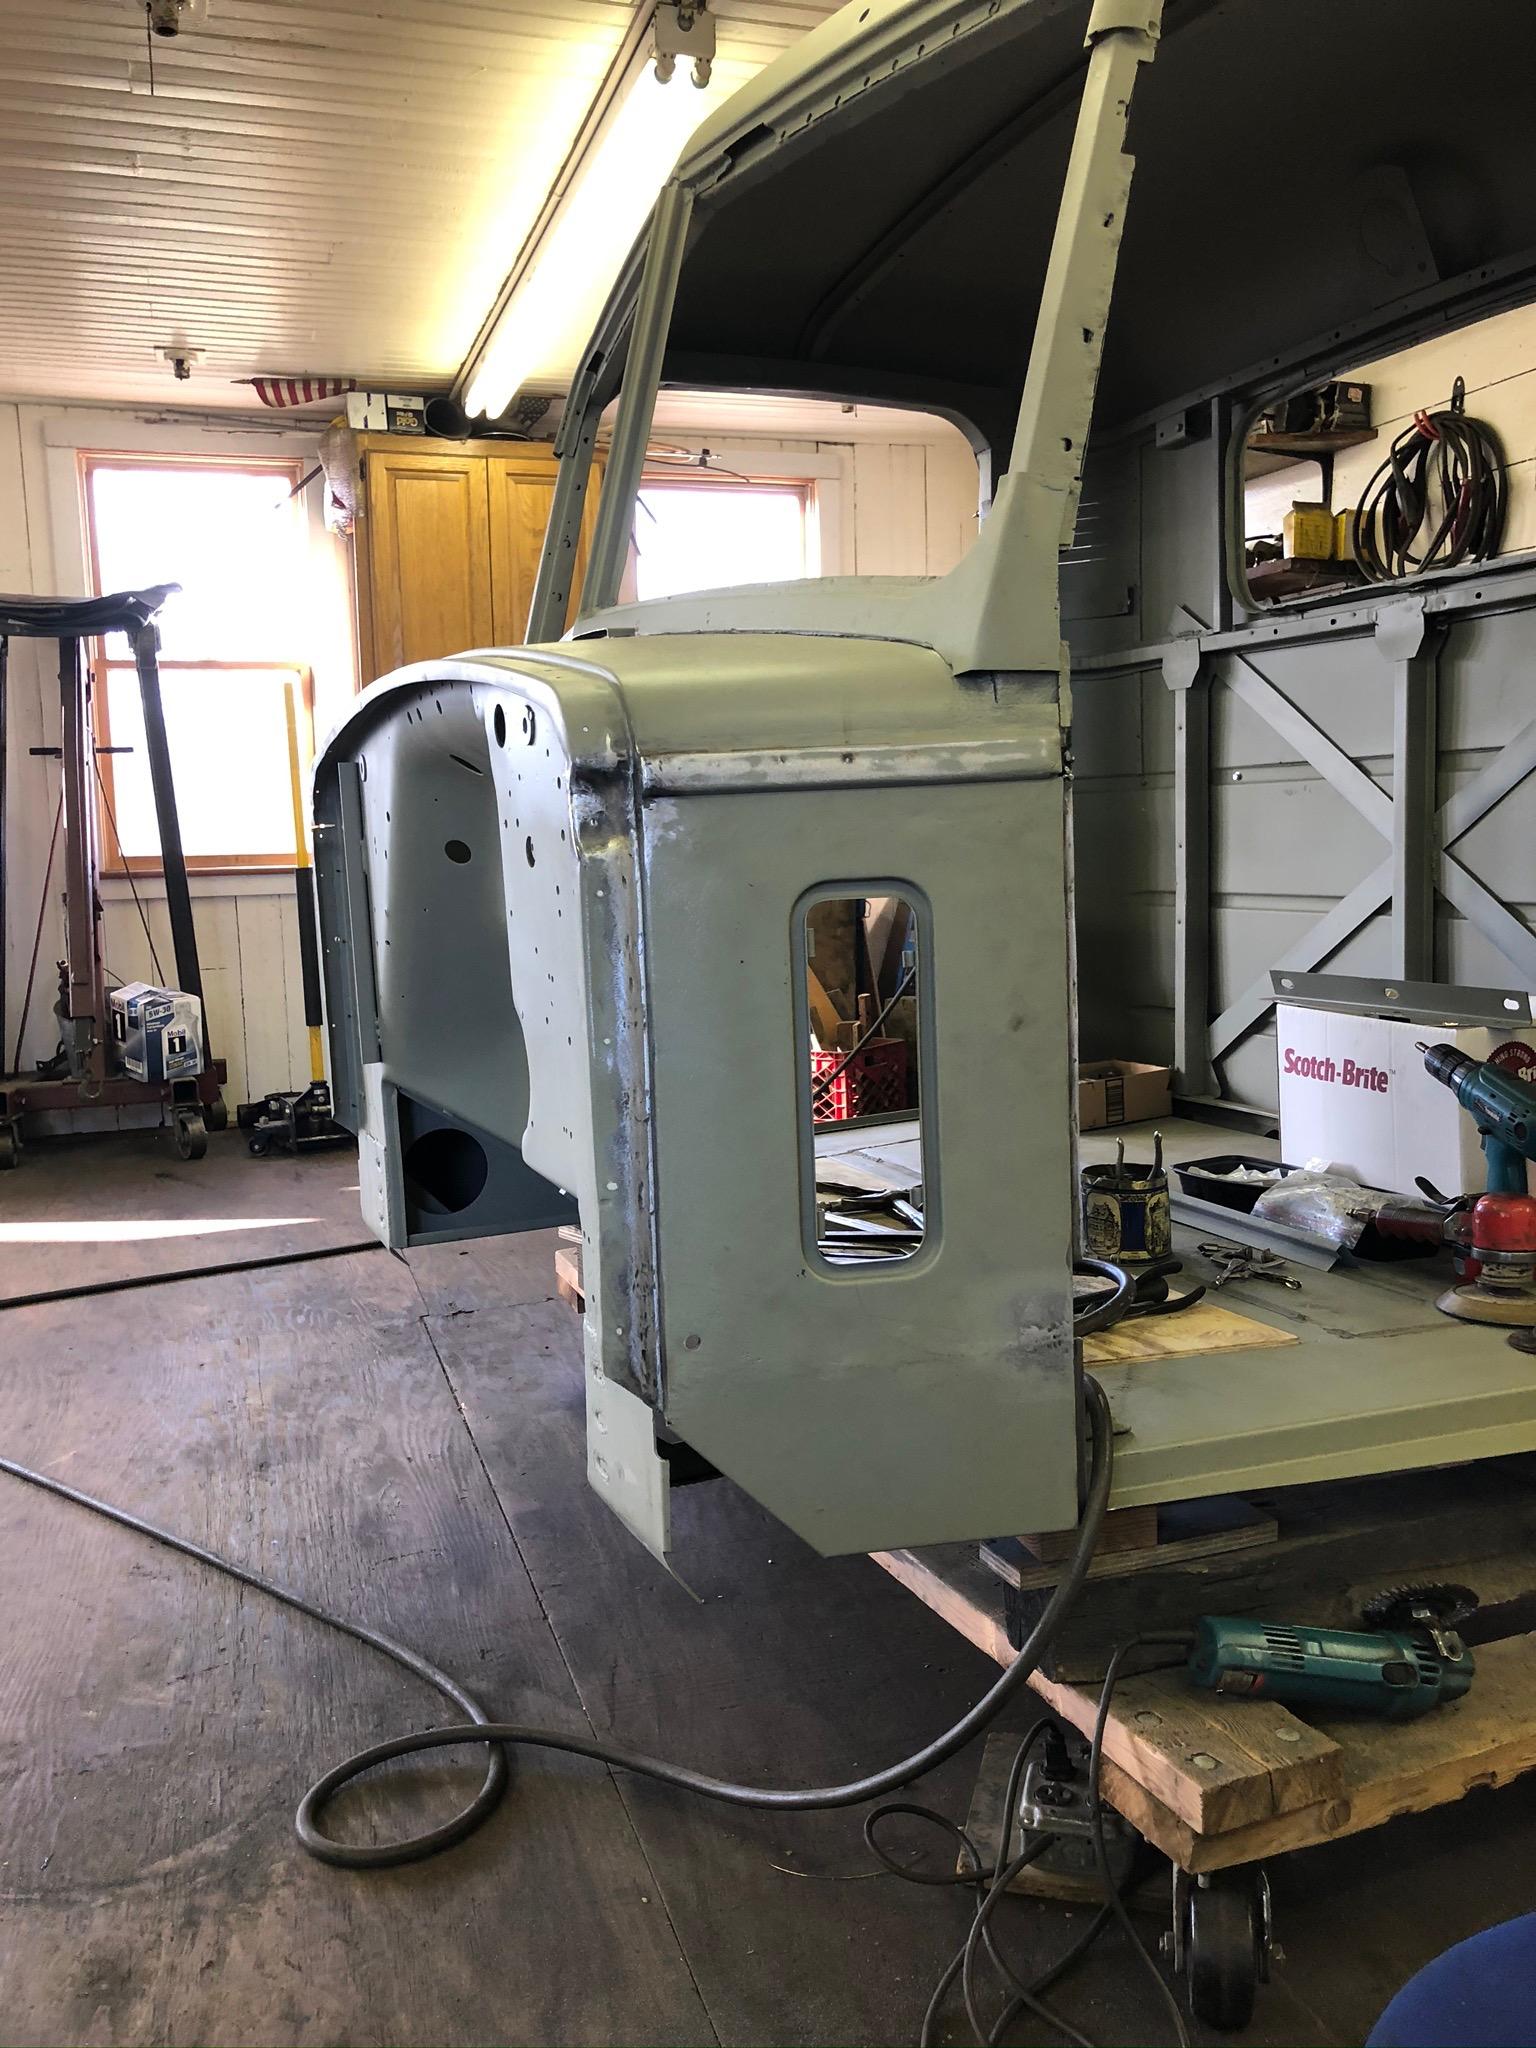
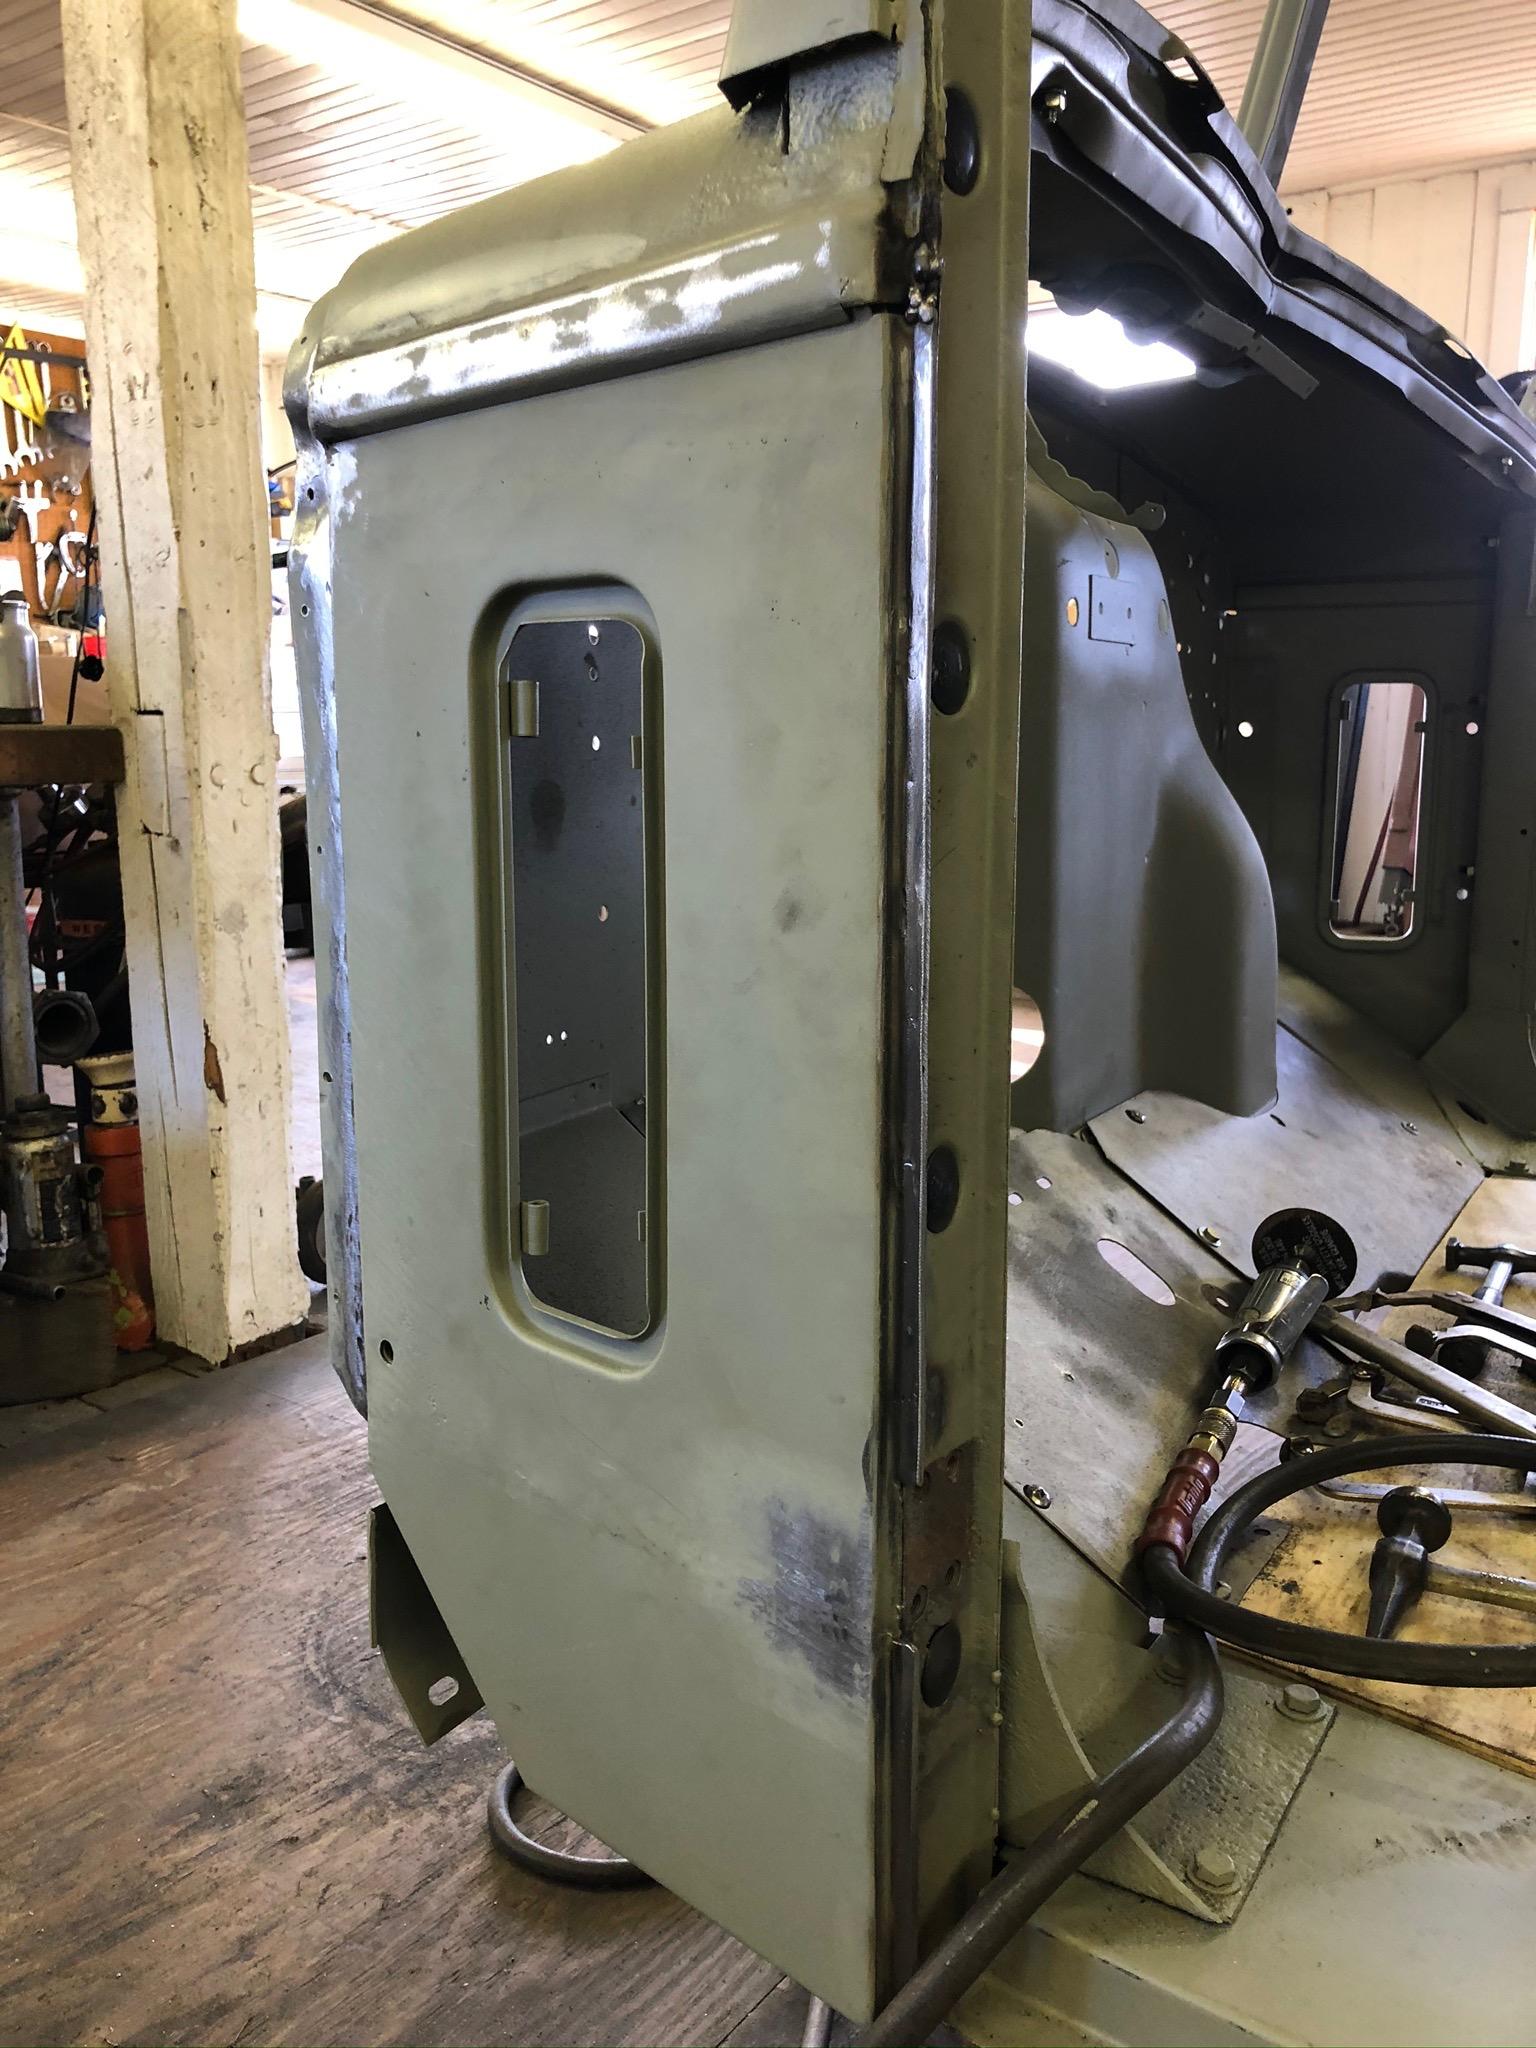
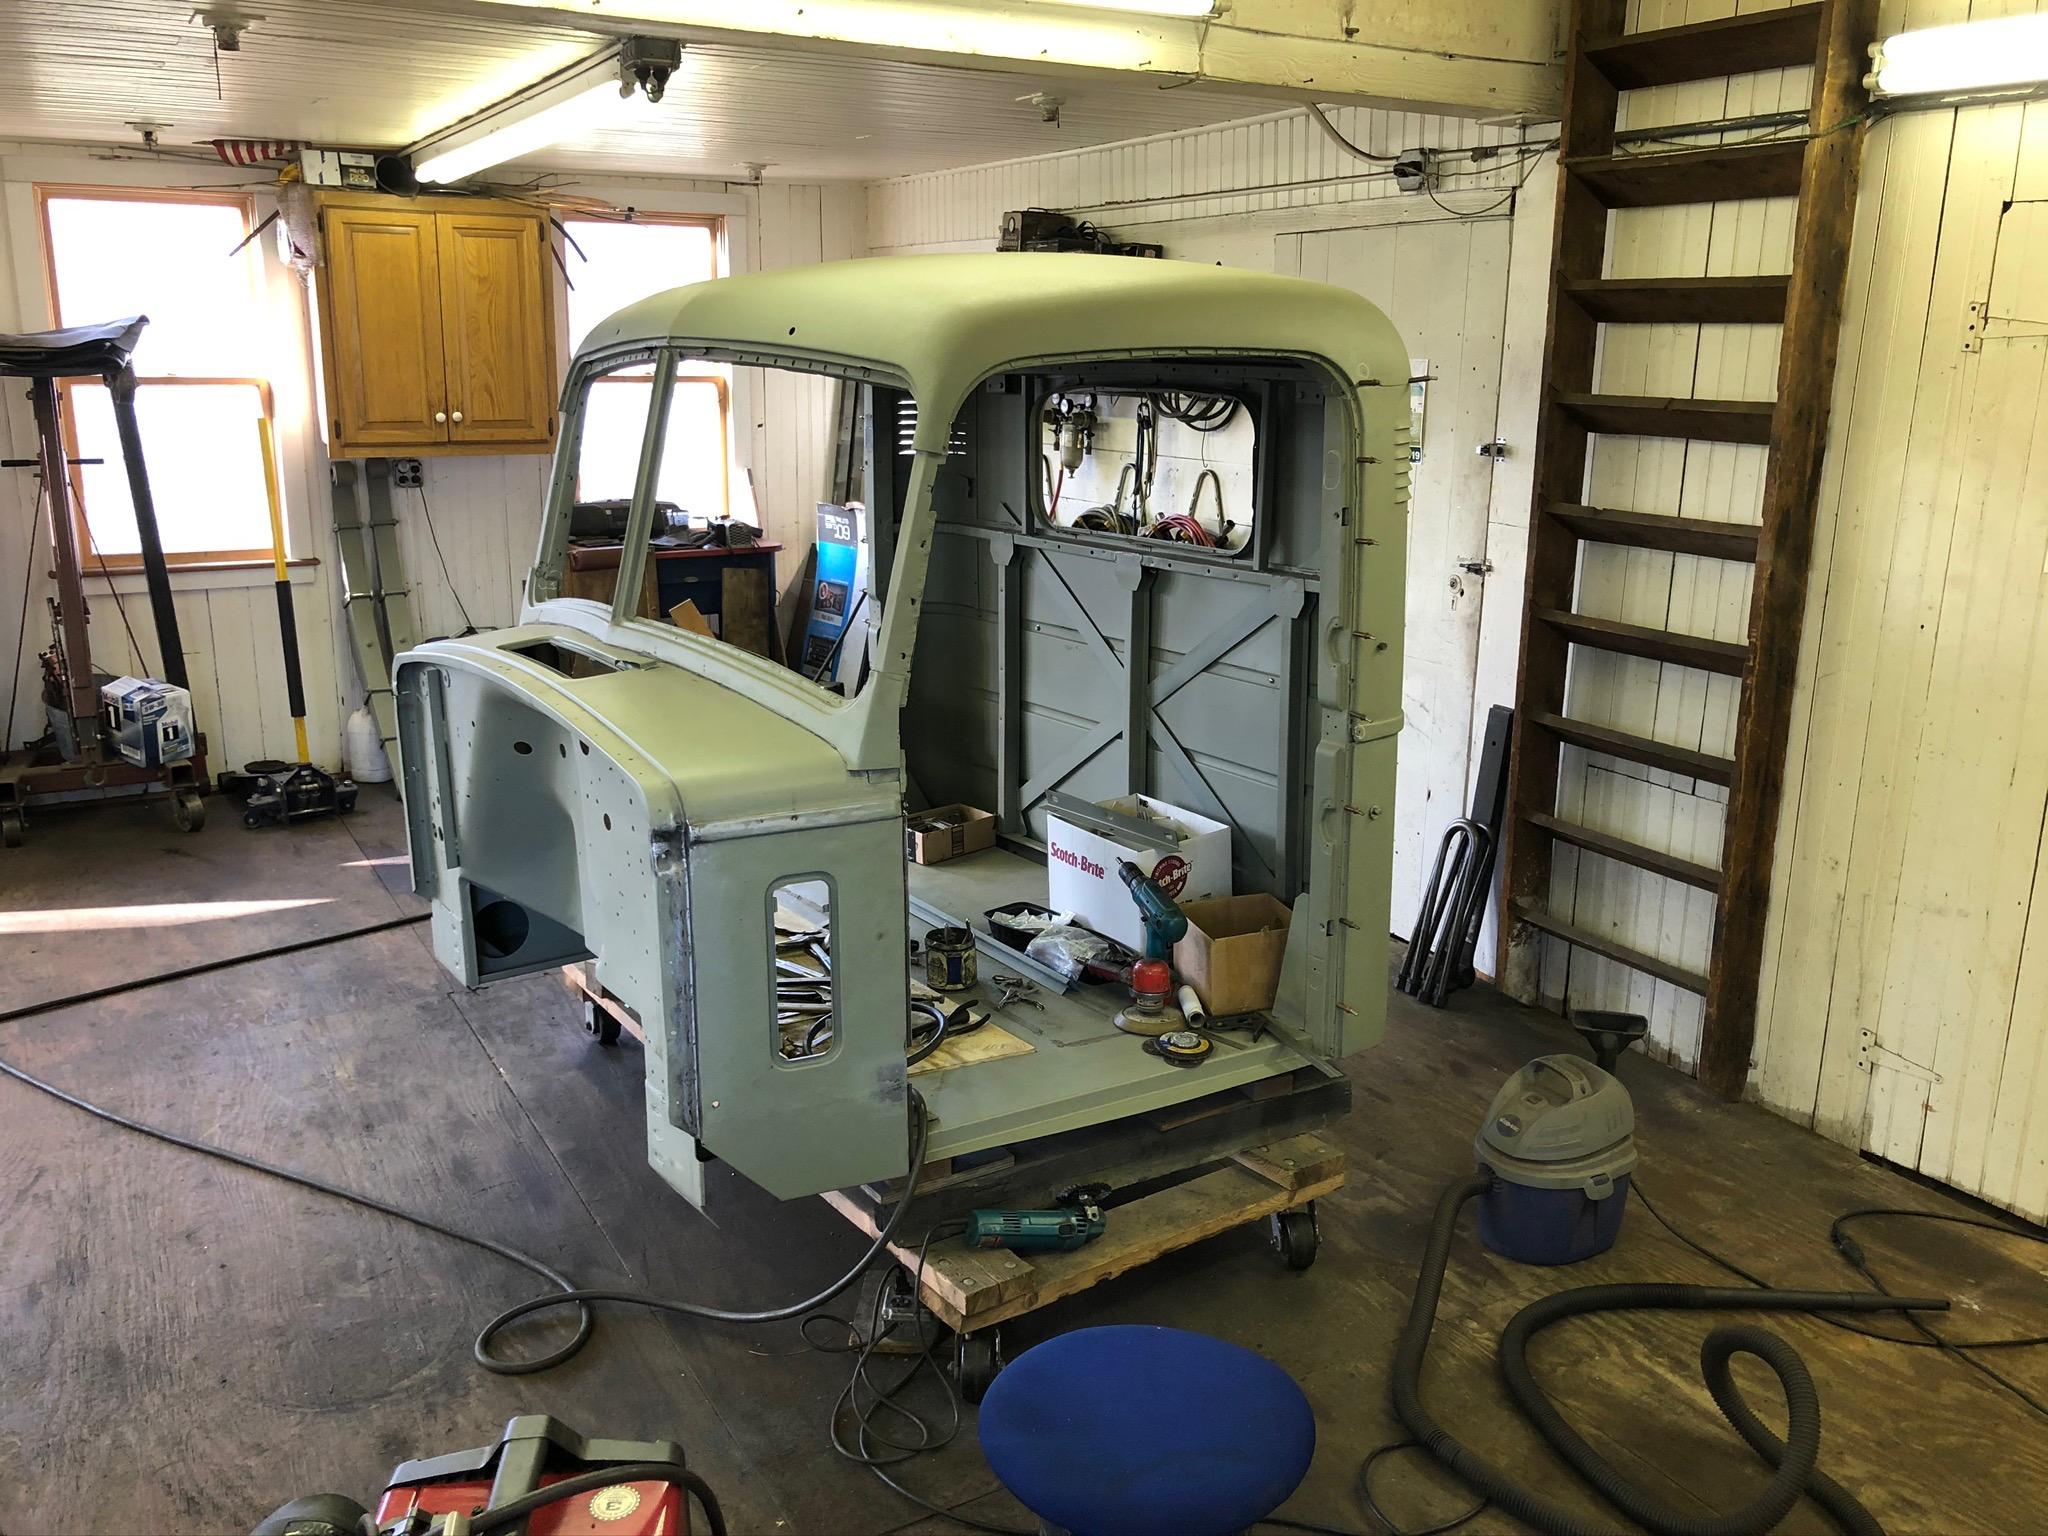
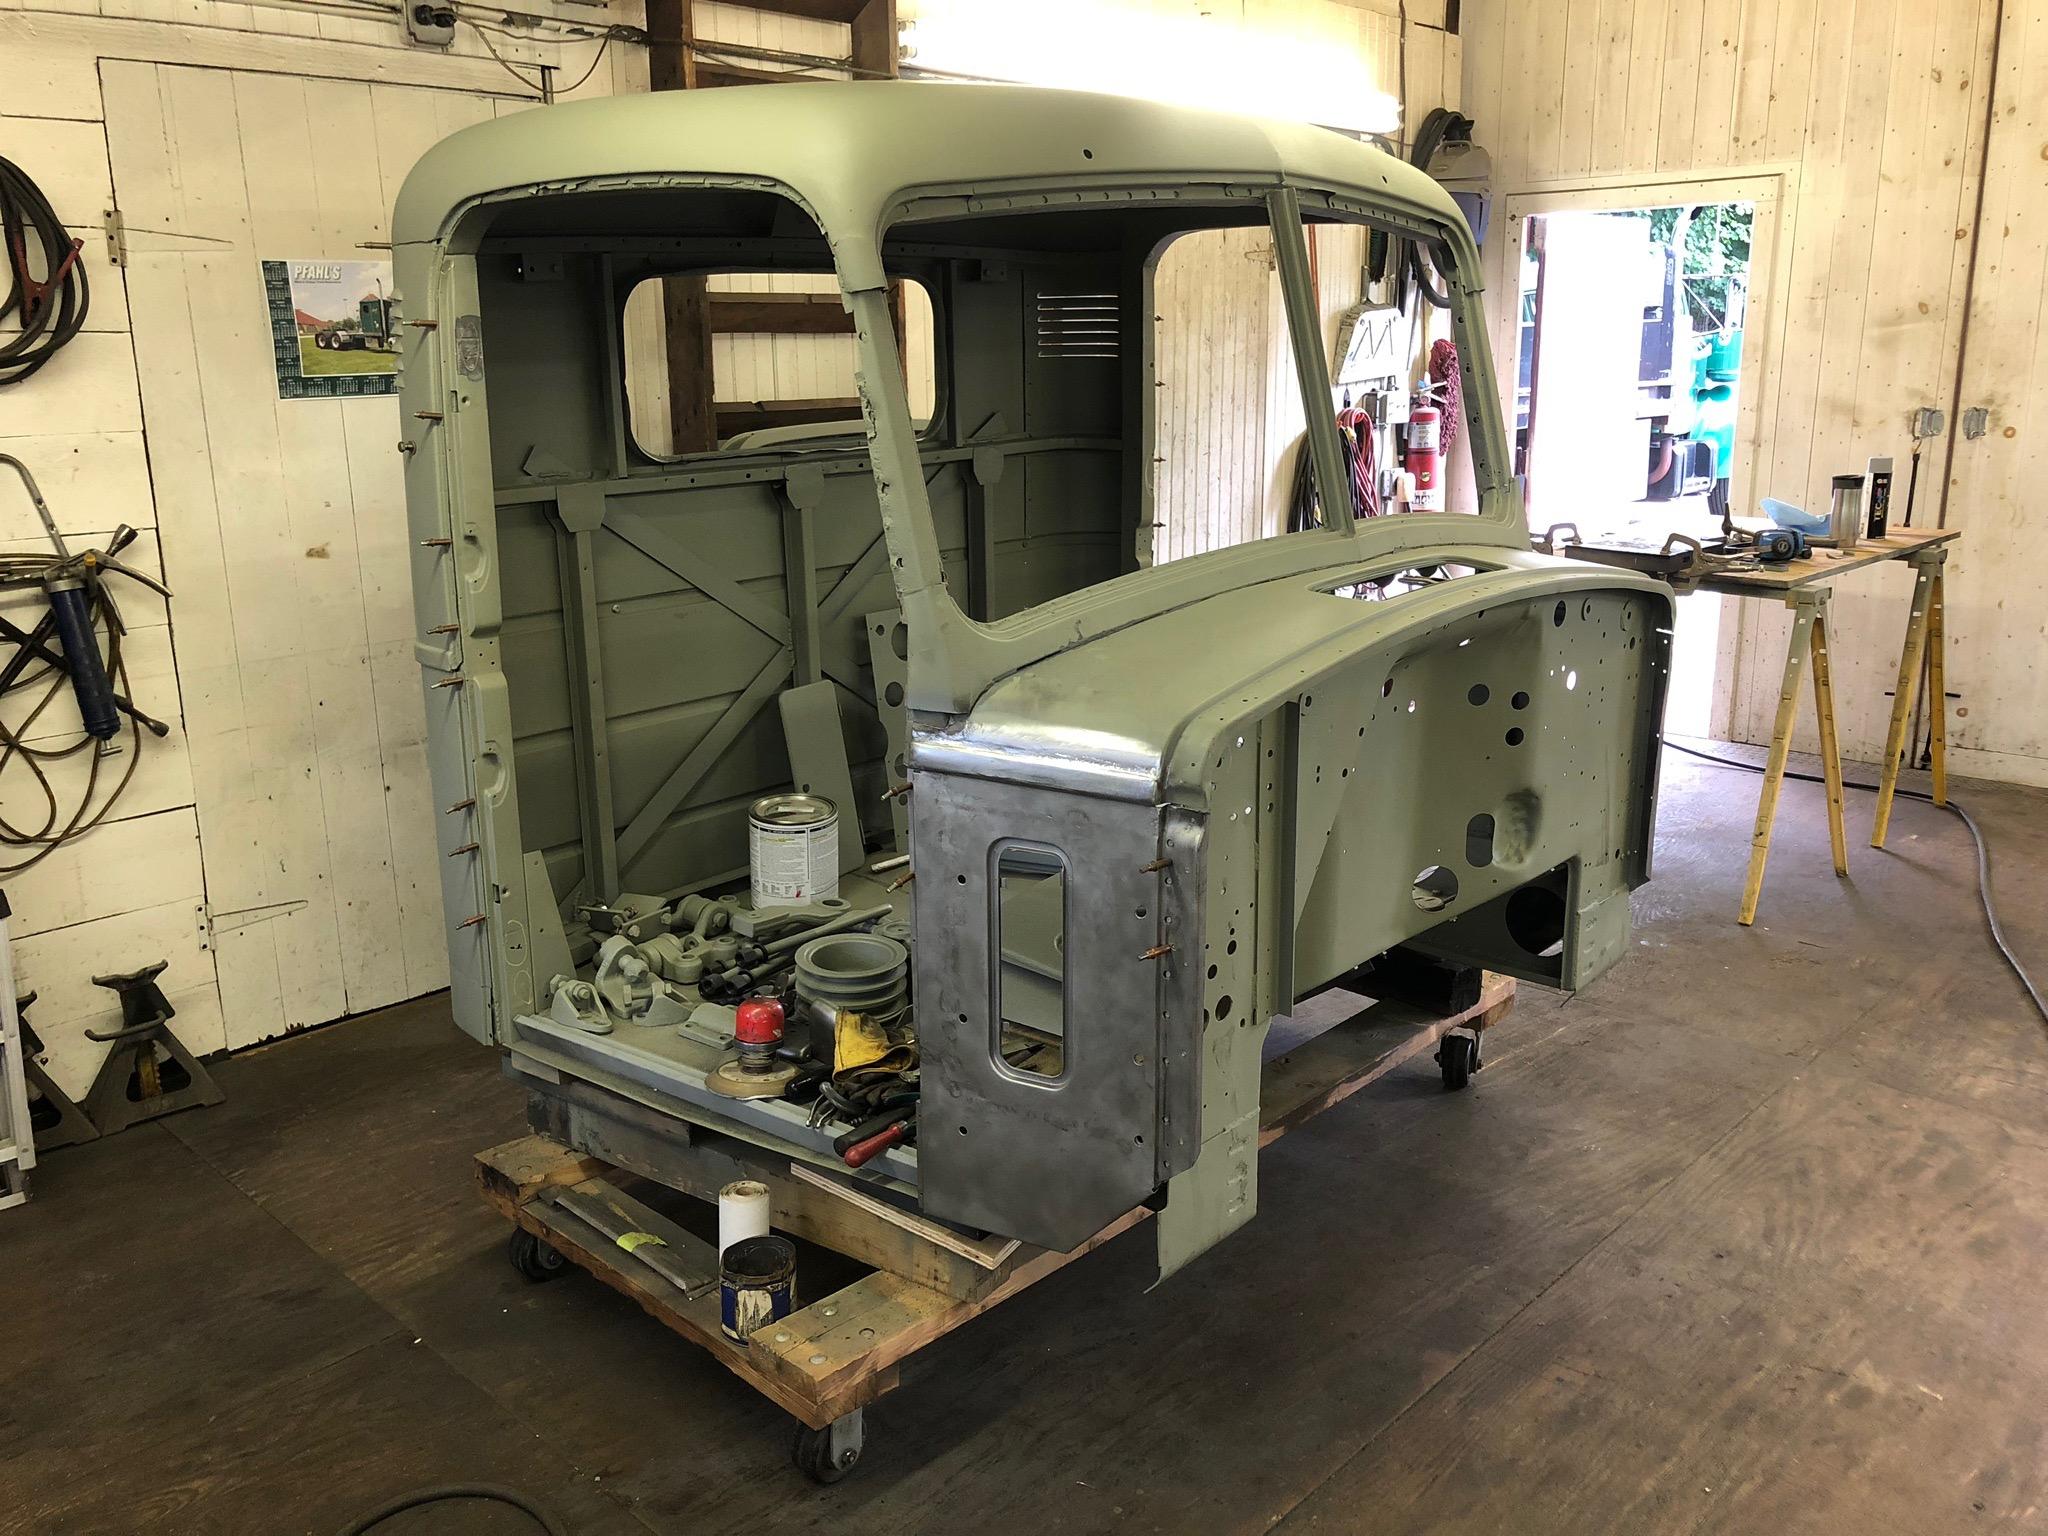
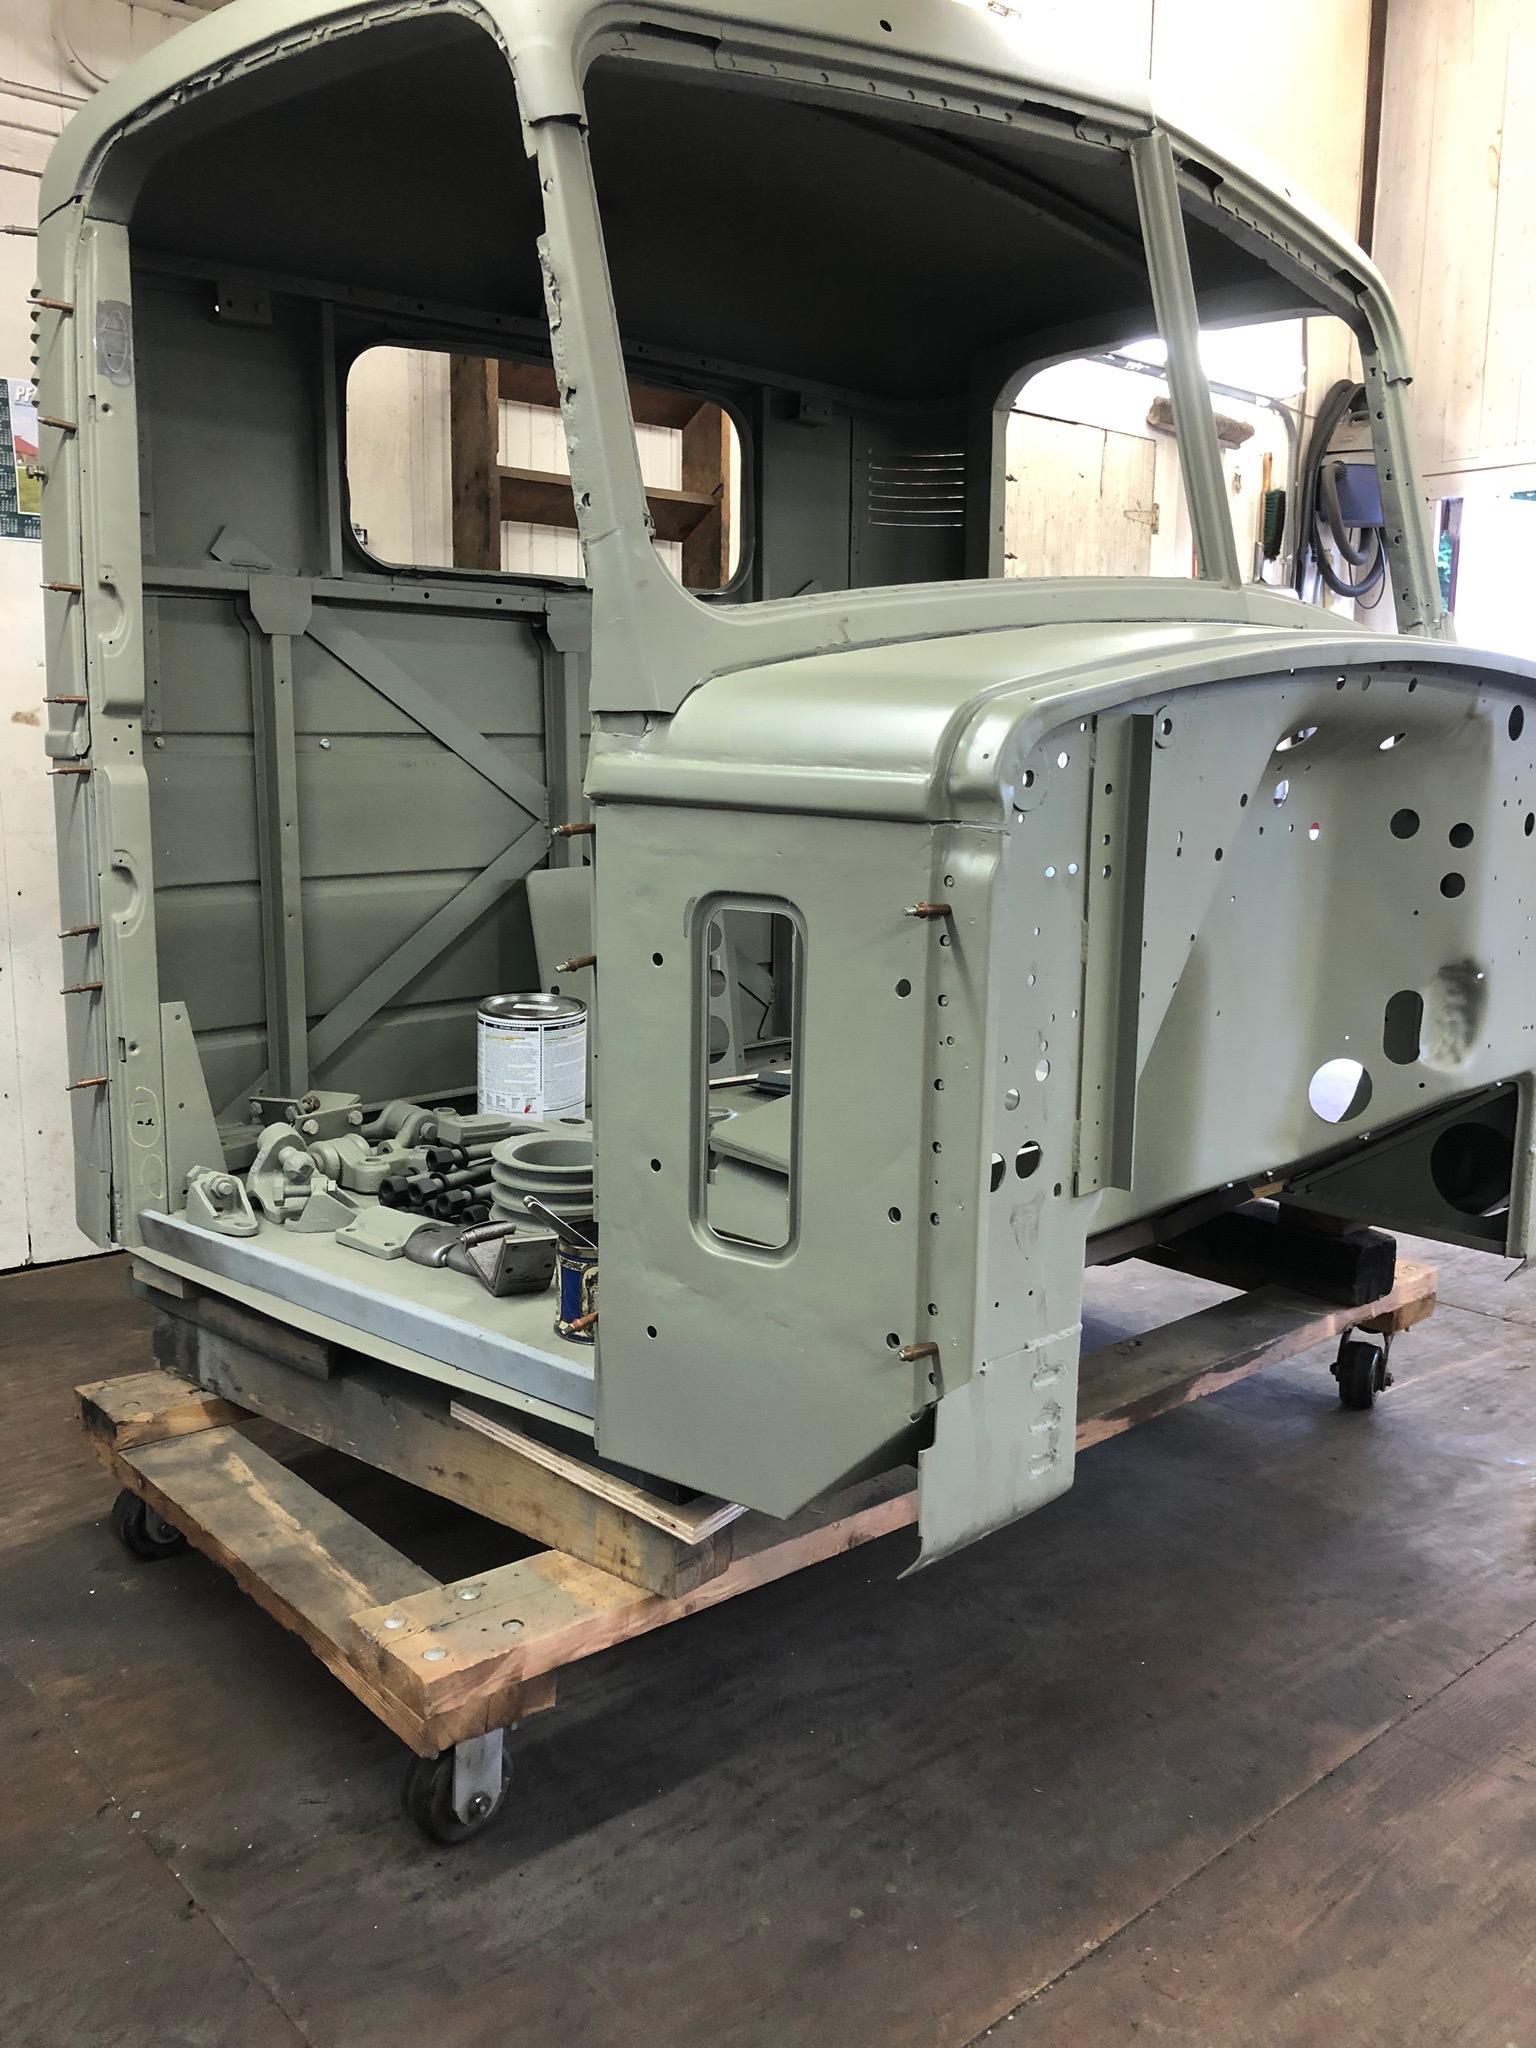
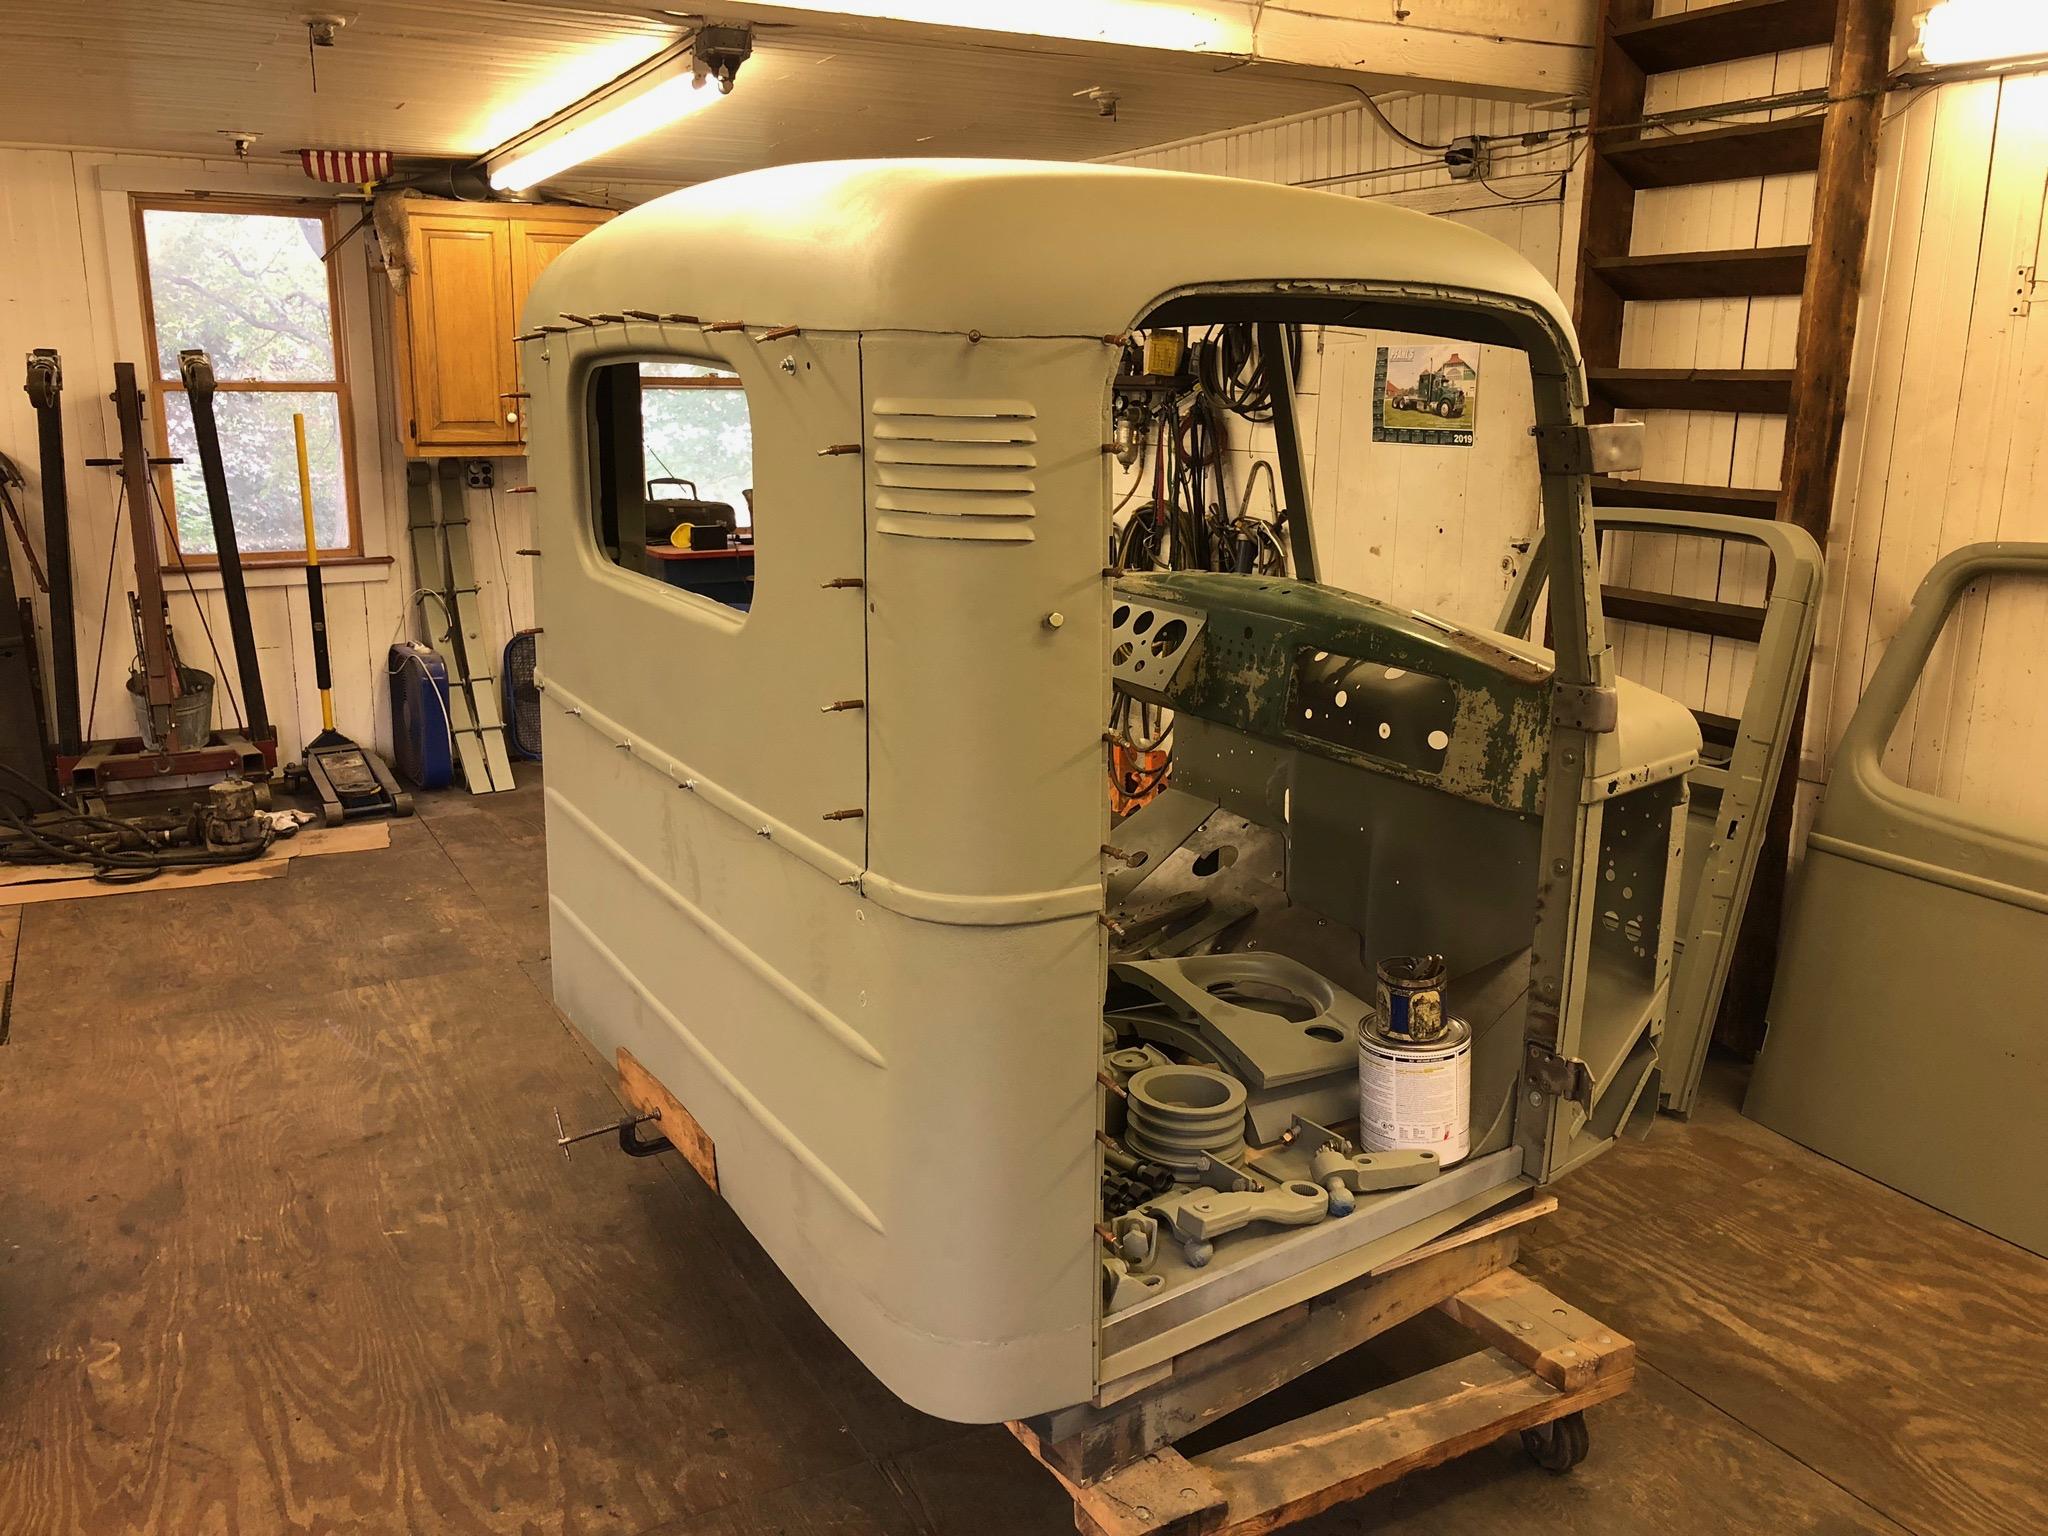
Strapped, clamped, bolted and pinned together. Gaps and panels all lined up and now all welded together in one big piece. Just the roof to attach and a whole bunch of fine tuning before bodywork. Big progress in the last few weeks and can't wait to have this part behind me.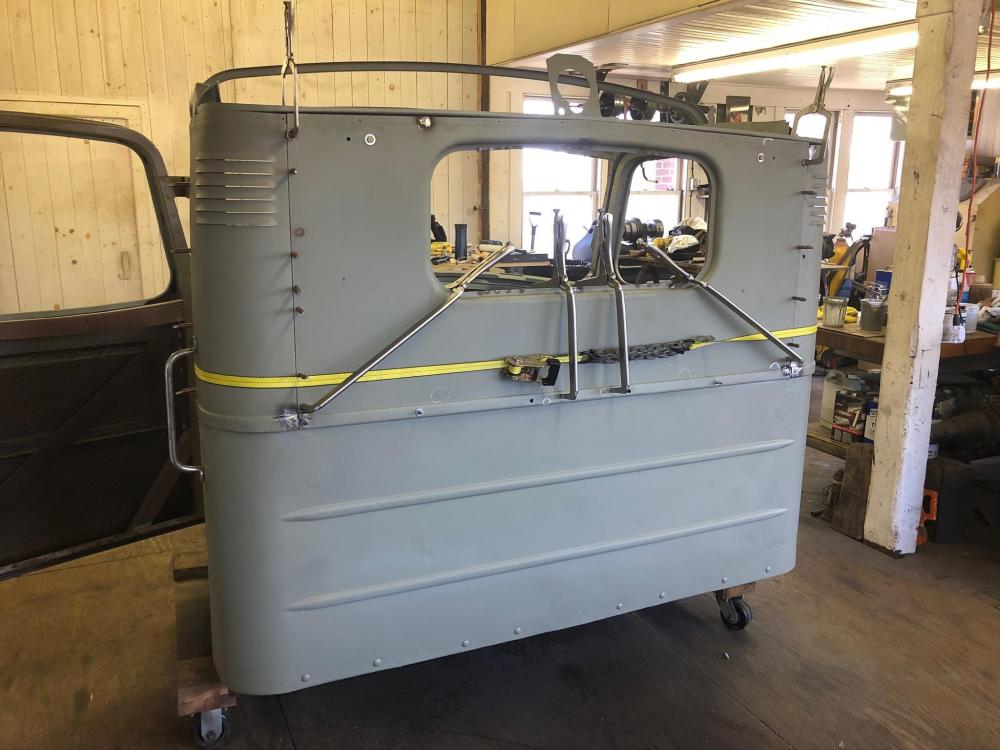
-
B-73 Restoration
mattb73lt replied to mattb73lt's topic in Antique and Classic Mack Trucks General Discussion
Nothing like new. Scored this early N.O.S. LJX (3 hinge, no vent window) door while buying up a bunch of B model parts up in Massachusetts a few years ago. Just needed to remove the forward window channel to make it work. Sanded off the 70+ year old primer to etch prime it. I found one minor ding on the door, but its perfect and will save a lot of time trying to fix the original.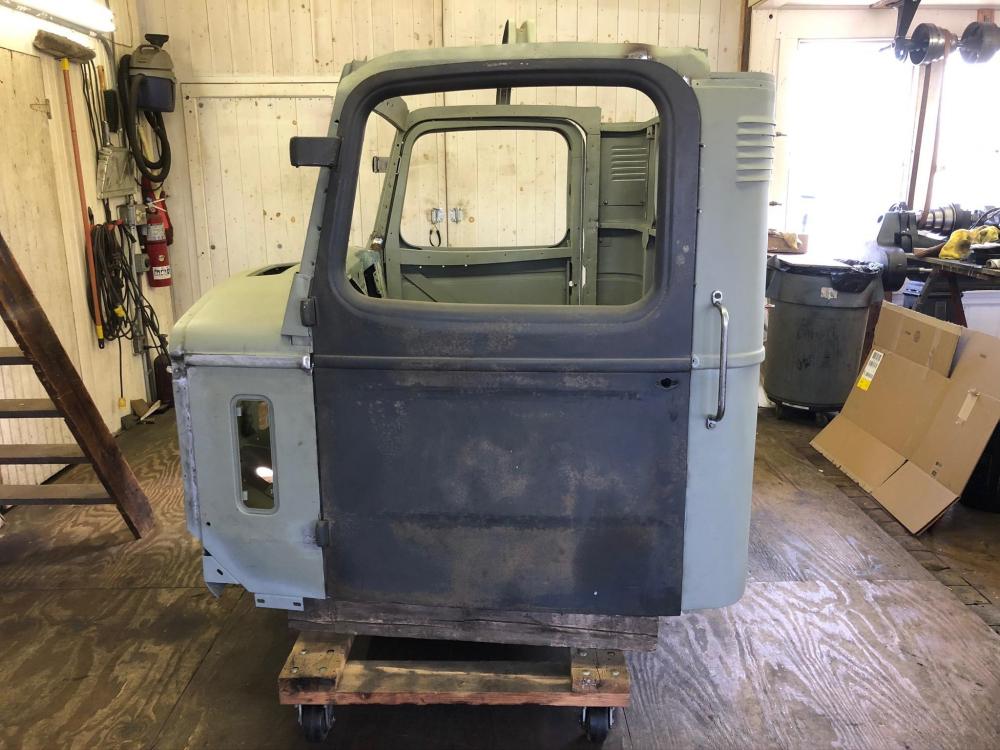


-
L Fire Engine Restoration
mattb73lt replied to CaptainCrutch's topic in Antique and Classic Mack Trucks General Discussion
Wow, you guys are cranking right along on that!! Great job. -
B Model School Bus
mattb73lt replied to fuzzy buzzard's topic in Antique and Classic Mack Trucks General Discussion
Wow, that's remarkably intact, especially the interior!! That would be neat to see restored to original. -
B/L Model Interior Question
mattb73lt replied to mattb73lt's topic in Exterior, Cab, Accessories and Detailing
That is a good point. I'll see if i can source some material that could work. I only have a few pieces that could give a few patterns, but most of the interior was missing. I'm kicking myself I didn't buy one and store it, when i could've. -
Lancaster Upholstery no longer makes the cardboard interior panel kit for B or L model cabs, as they can no longer get the cardboard. What is everyone doing for the interior? Does anyone have another source/provider?
-
Unknown B
mattb73lt replied to CaptainCrutch's topic in Antique and Classic Mack Trucks General Discussion
The one pictured here is a diesel. I'd say Cummins powered, B73/77, with that badging(that you can't read). -
Unknown B
mattb73lt replied to CaptainCrutch's topic in Antique and Classic Mack Trucks General Discussion
I'd say it's a prototype, the engineering dep't. experimenting. There's some other pics(2) in the B Model books, showing a B-77 with the same serial number. In the second photo it sports a experimental cab with a one piece windshield. Someone told me that that was a fiberglass cab they were working on, but was never produced. Then there were the export B-81's that had integral sleeper cabs. I don't think any of those were offered on the domestic market. -
L Fire Engine Restoration
mattb73lt replied to CaptainCrutch's topic in Antique and Classic Mack Trucks General Discussion
That's lot of work, but worth all of it for the use of the better block. Probably a lot less money, even if you rebuild the new block. -
B-73 Restoration
mattb73lt replied to mattb73lt's topic in Antique and Classic Mack Trucks General Discussion
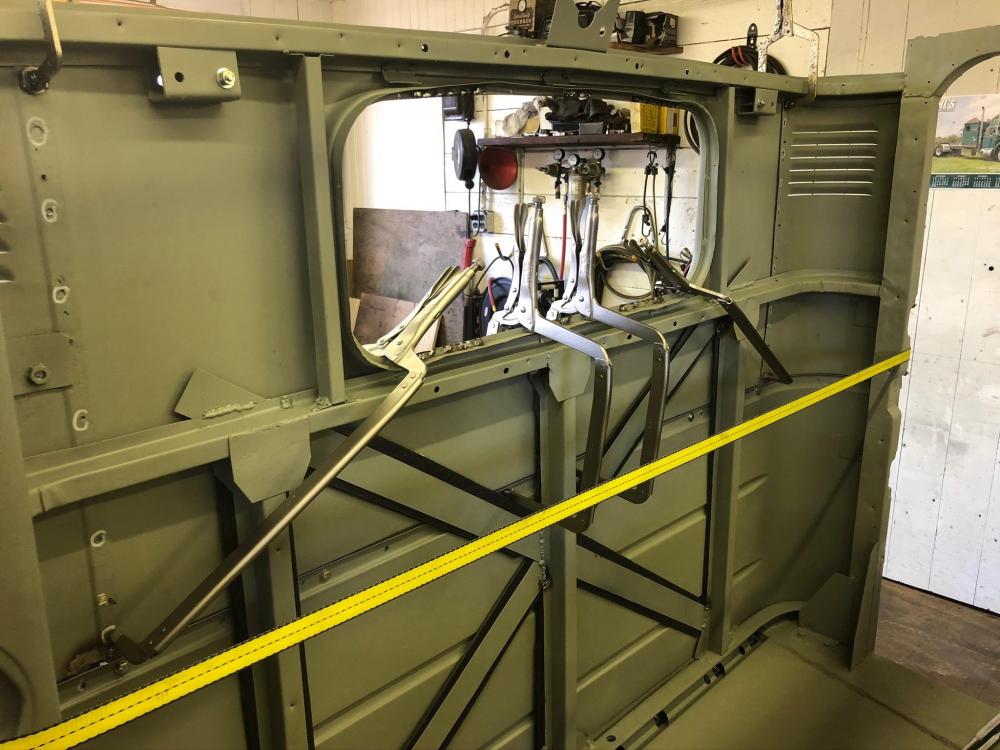
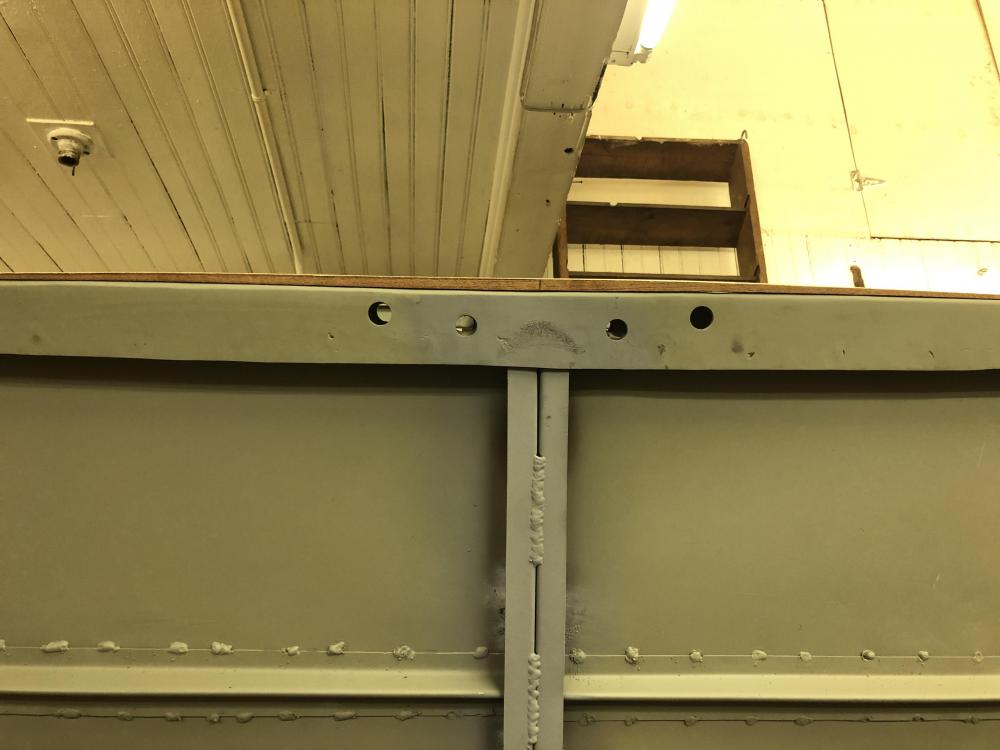
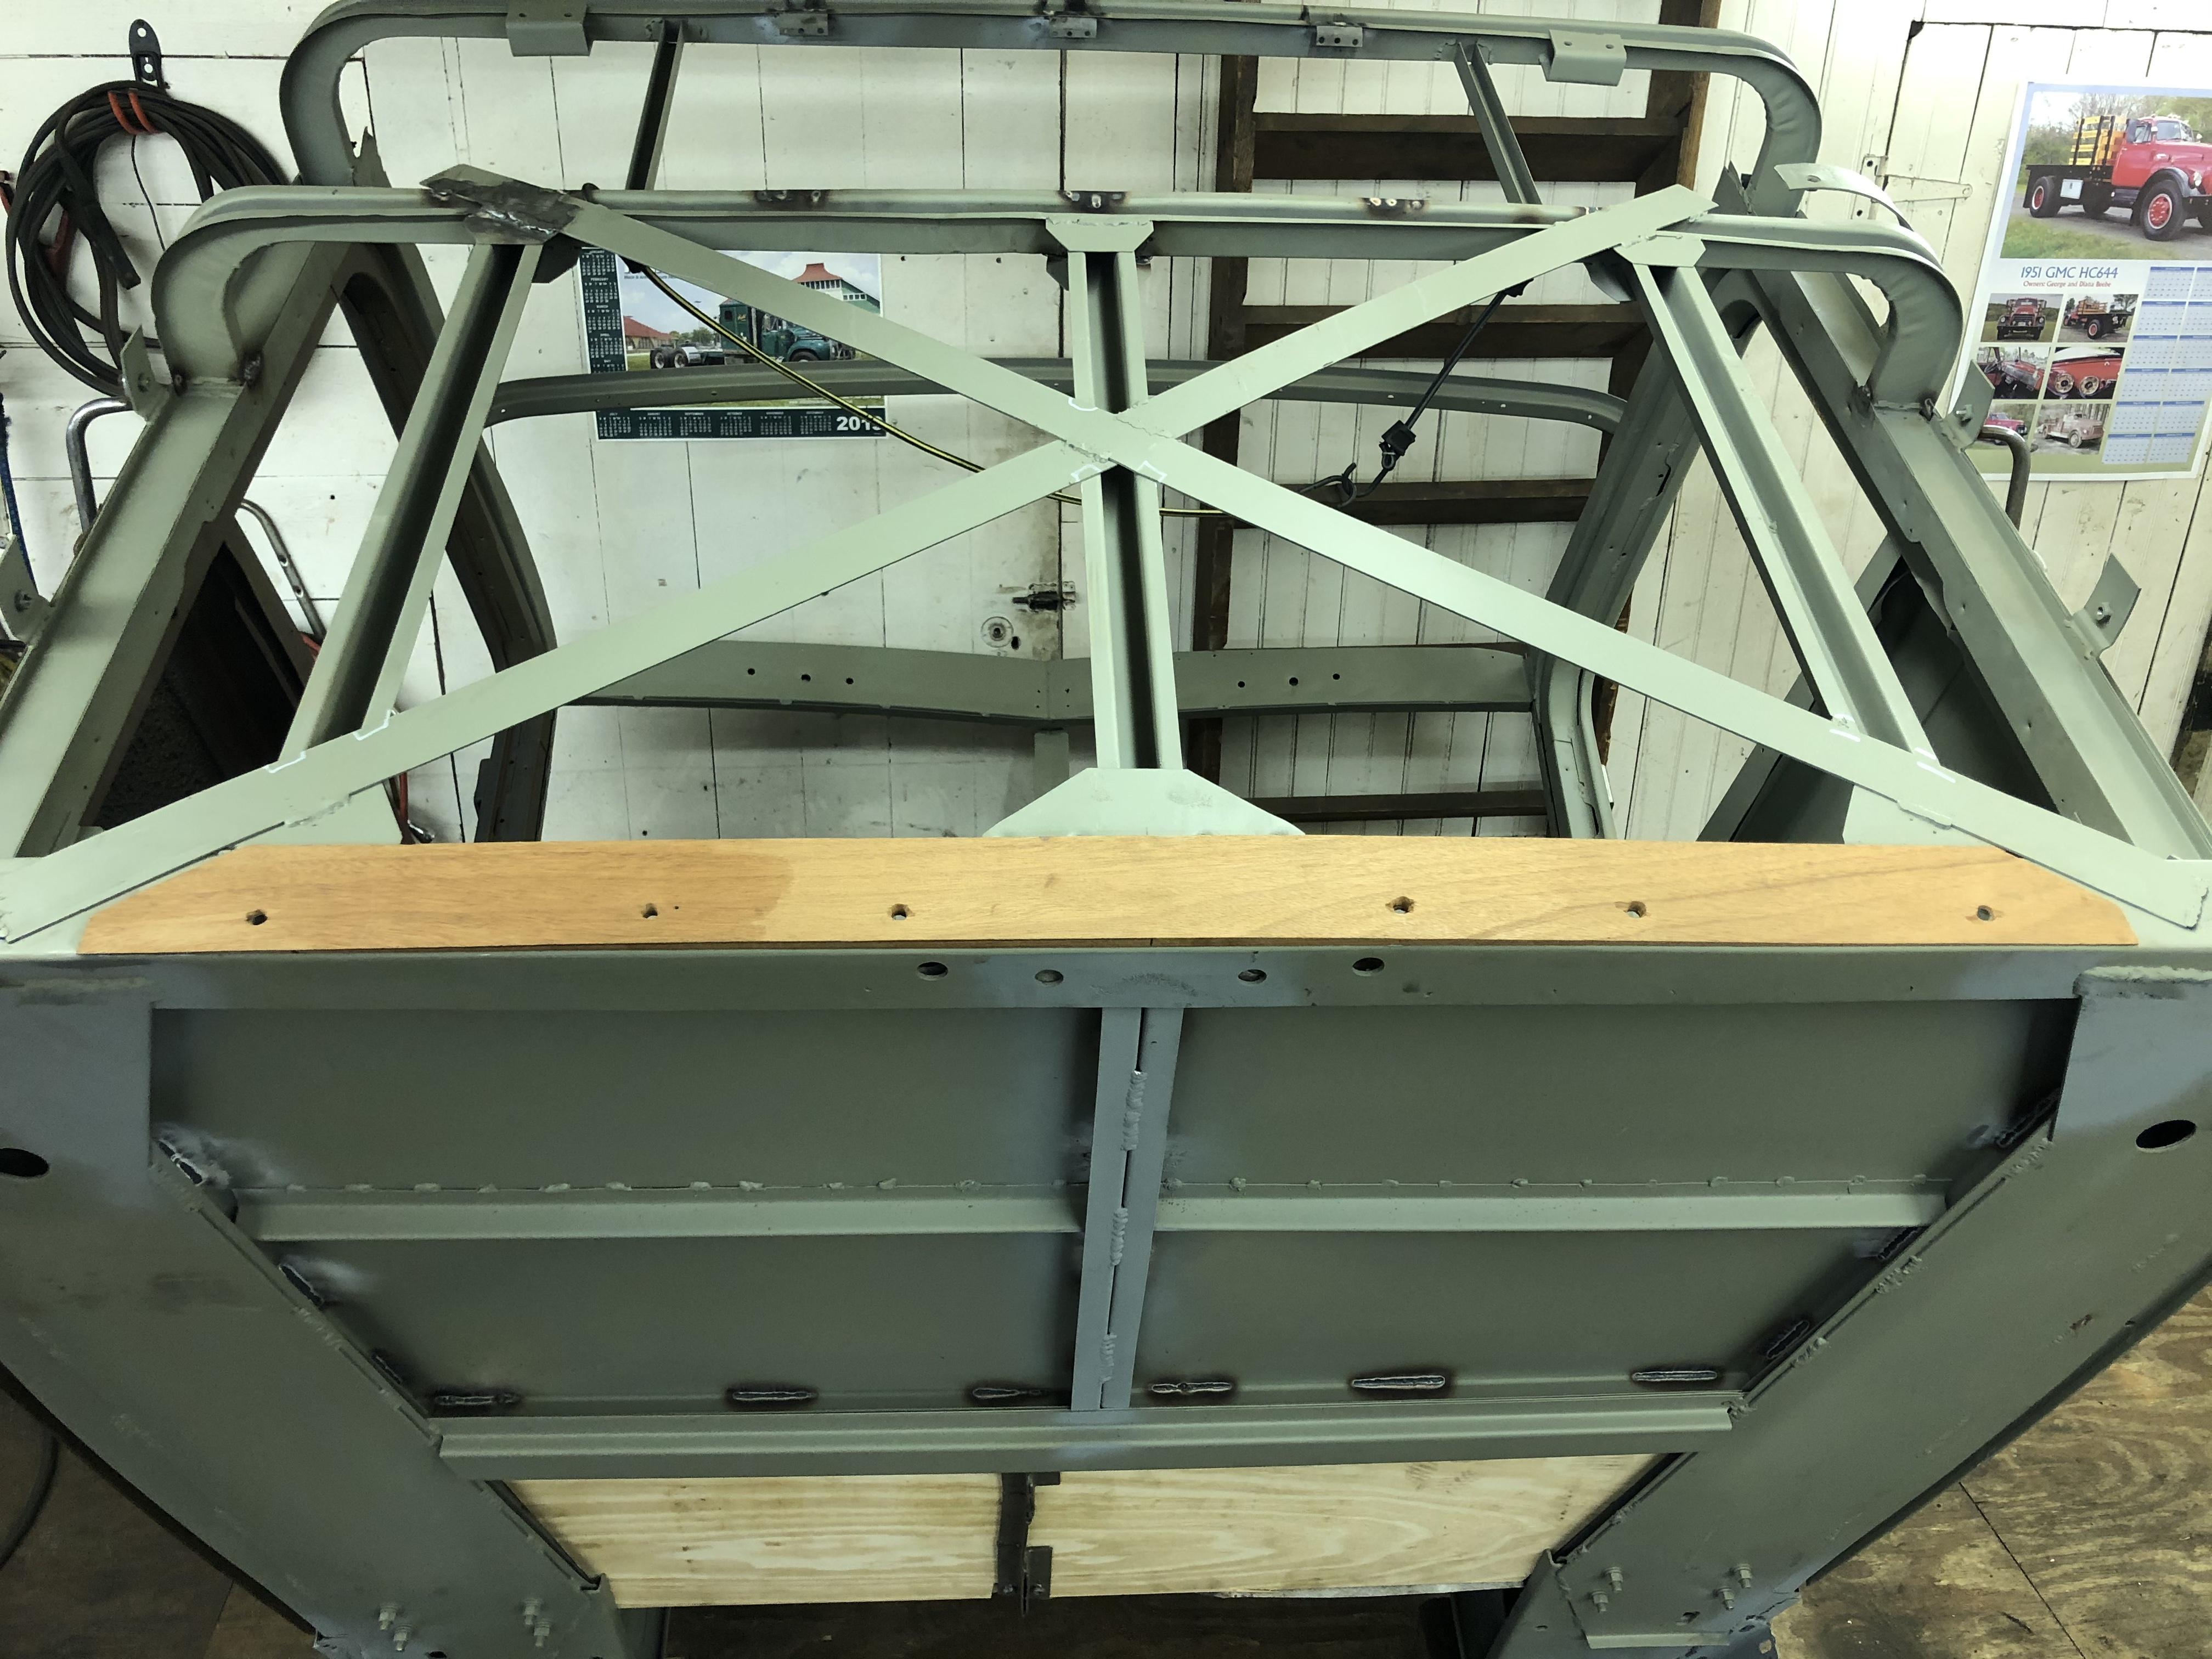
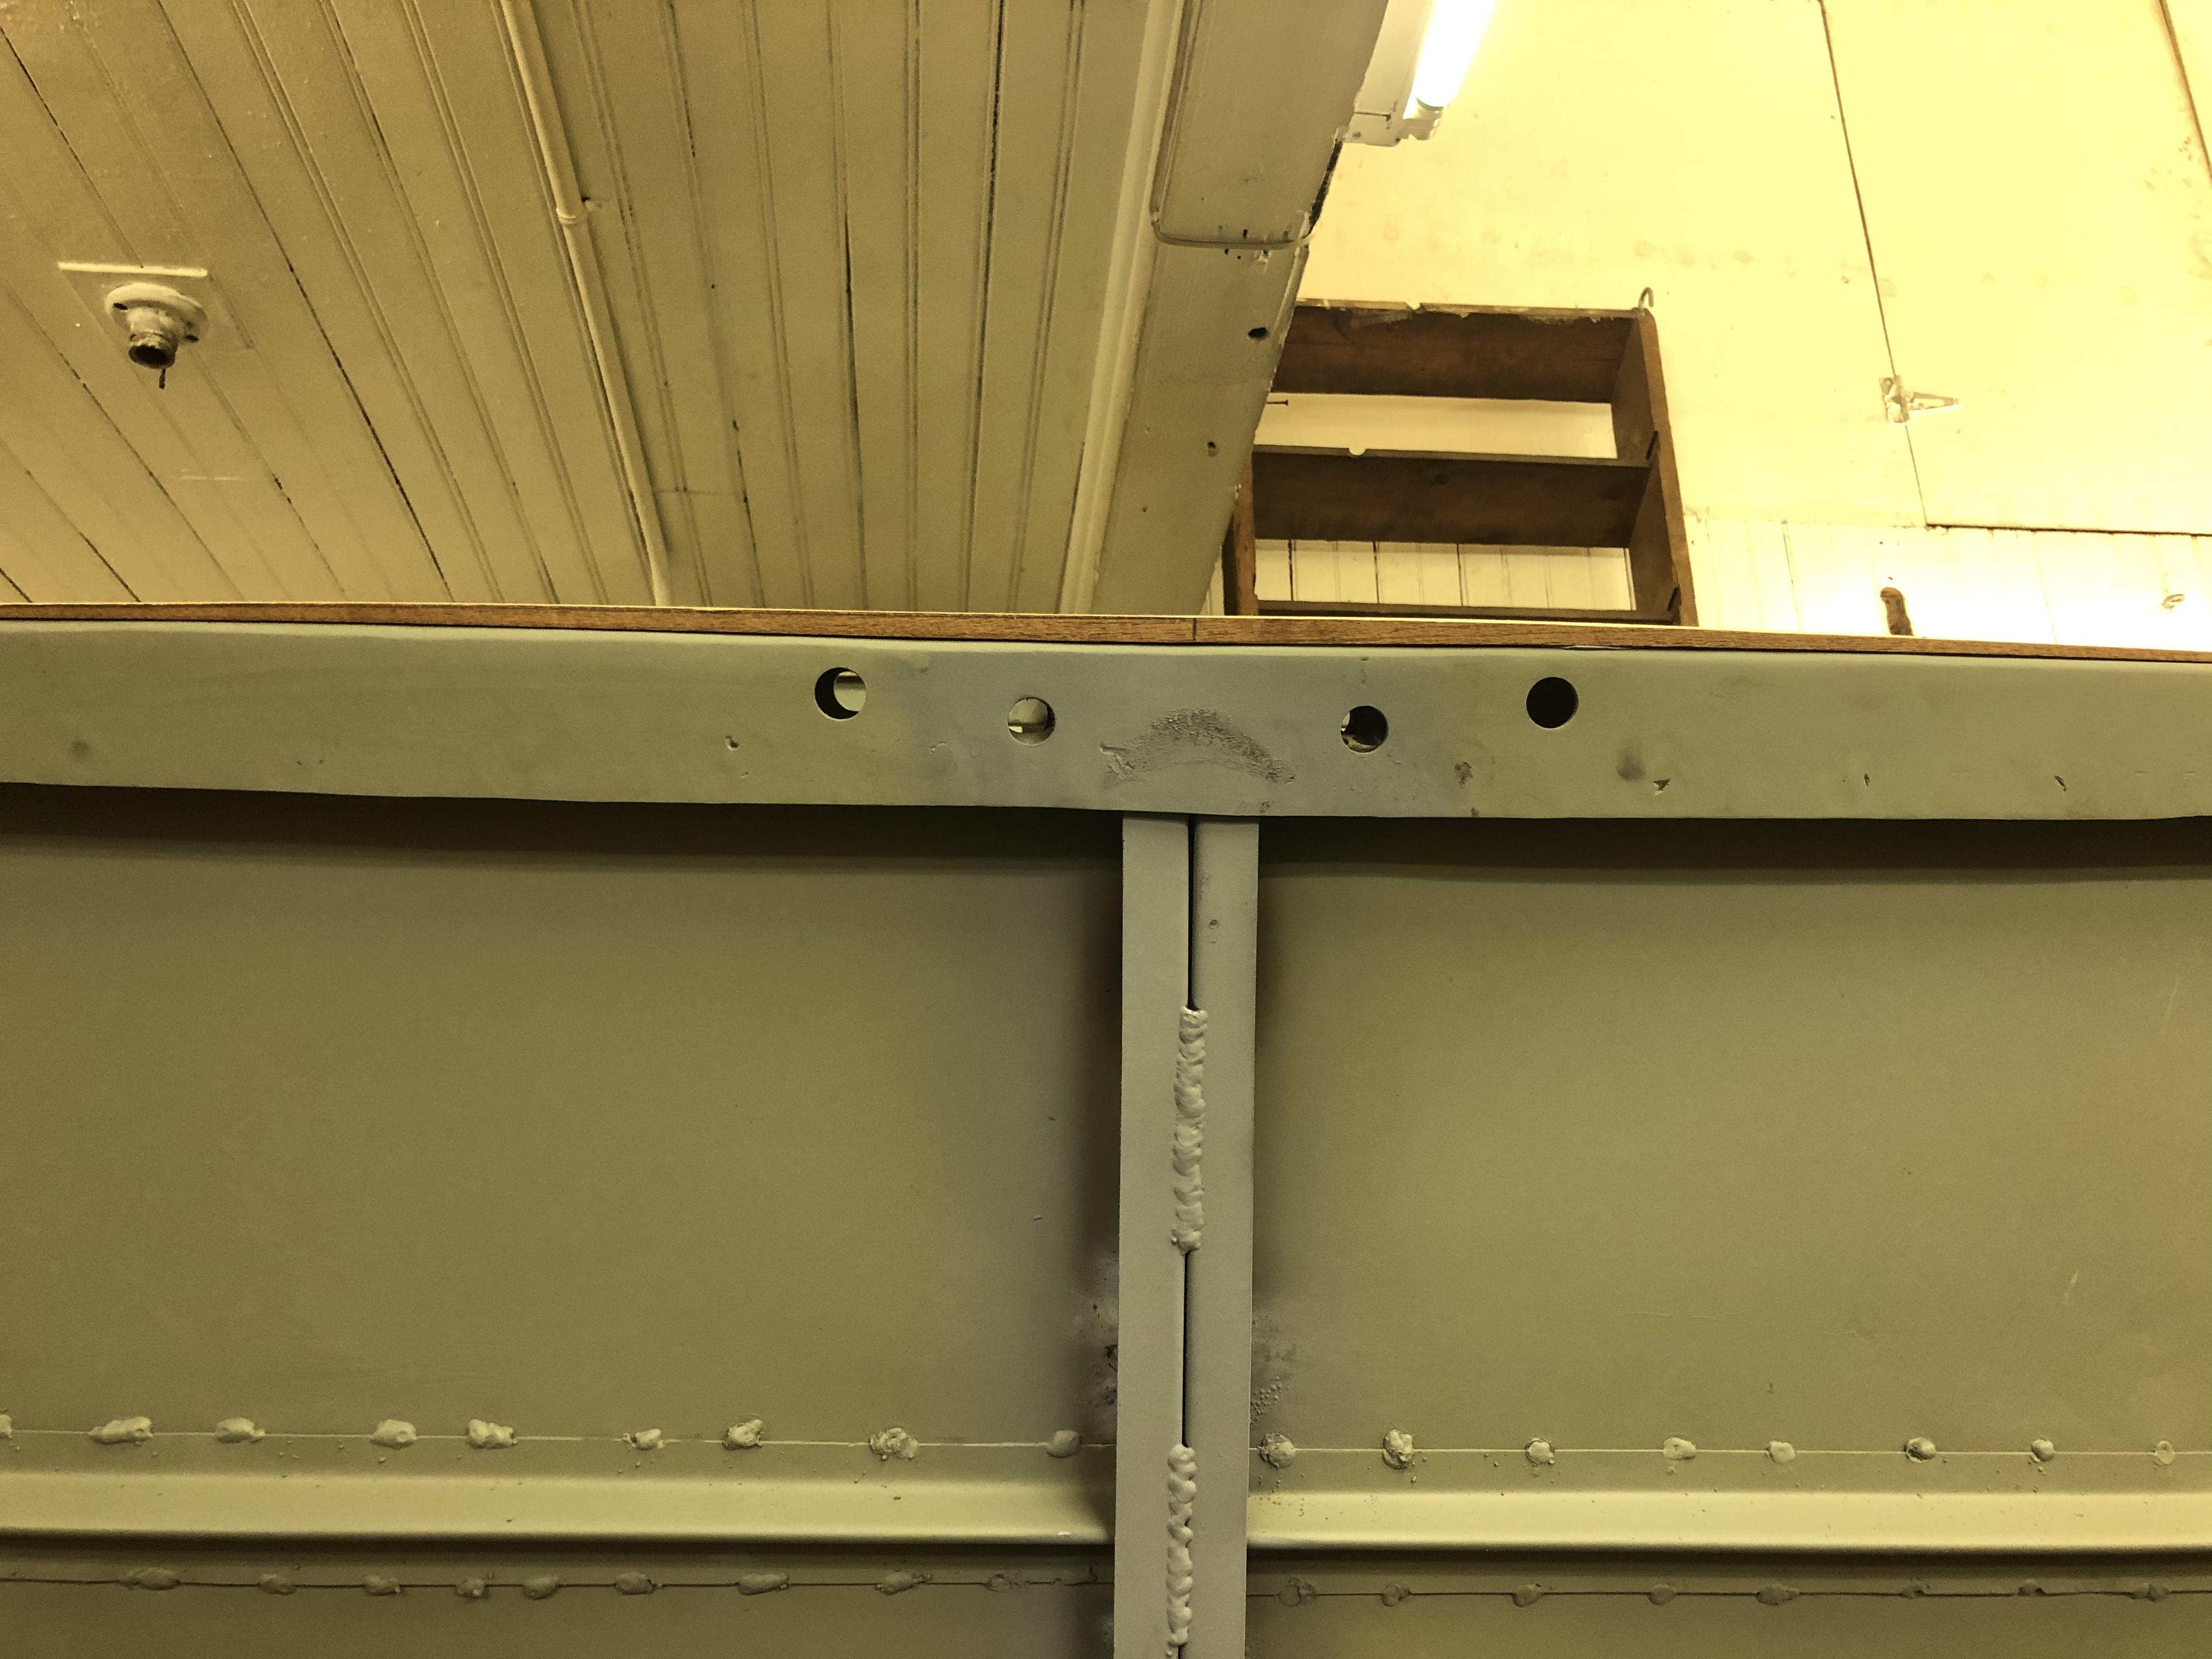
I’m no woodworking expert by any measure. Once I figured out how much of a curve I needed and the area where it needed to be in, I roughed out the mahogany to fit the area, then worked it out where the center needed to be about 7/16” thick and taper down to about 1/16” at each end. I then used a Dewalt hand planer to remove the wood. A regular hand planer would work, too, to shave it down. Now, there’s no void between the sheet metal and the frame. There’s also black tarpaper between the sheet metal and framework, as Mack did at the factory. BTW, you can see the shim peeking out on that interior shot I posted, between the back skin and lower frame. -
B-73 Restoration
mattb73lt replied to mattb73lt's topic in Antique and Classic Mack Trucks General Discussion
And it came out quite good!!

-
B-73 Restoration
mattb73lt replied to mattb73lt's topic in Antique and Classic Mack Trucks General Discussion
Had to get a little creative with my “coach work”. The lower cab frame I had fabricated was made out of three pieces and welded together. The issue with it was it lacked the bow the original had. The upper two frames have it. The bows help keep the sheet metal taught when assembled. Made a template off the upper bows and then made a tapered shim out of mahogany and bonded it to the lower frame. Issue solved!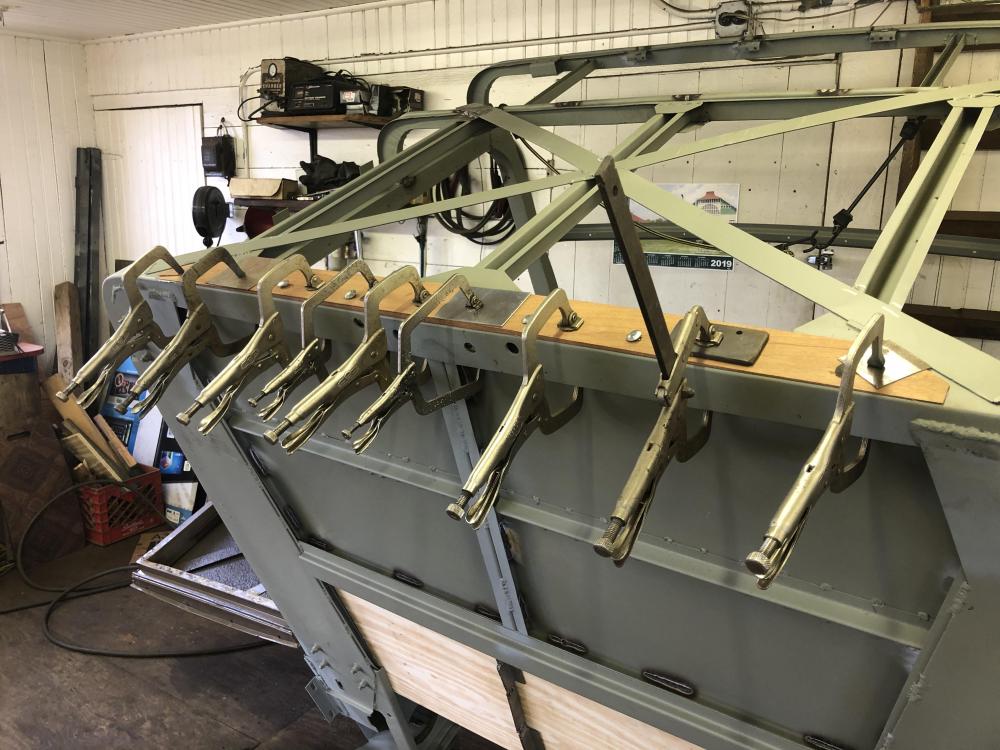

-
B-73 Restoration
mattb73lt replied to mattb73lt's topic in Antique and Classic Mack Trucks General Discussion
Back at it after a busy season with the new job and a friend's project the consumed a lot of time. But, I haven't quit and jumped back in this week getting organized again. This doesn't look like much , but it's the first repaired panel permanently re-attached. The cab needs to go over on it's back one more time for a bunch small things to be completed and undercoating. I'm very optimistic for having the cab ready for paint come this spring and my motivation is increasing about it>


-
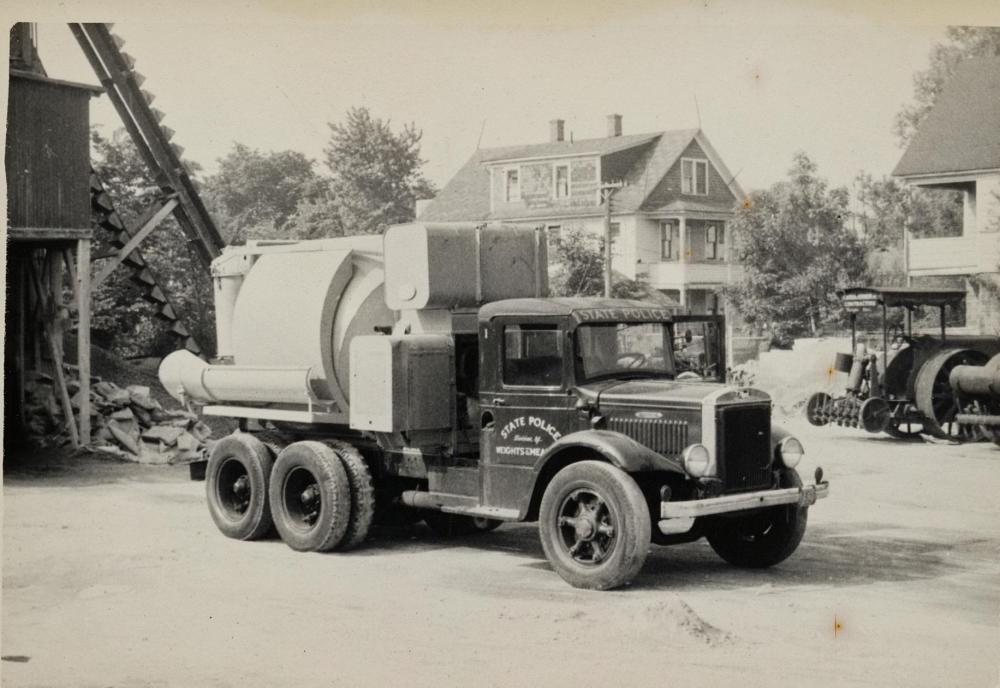
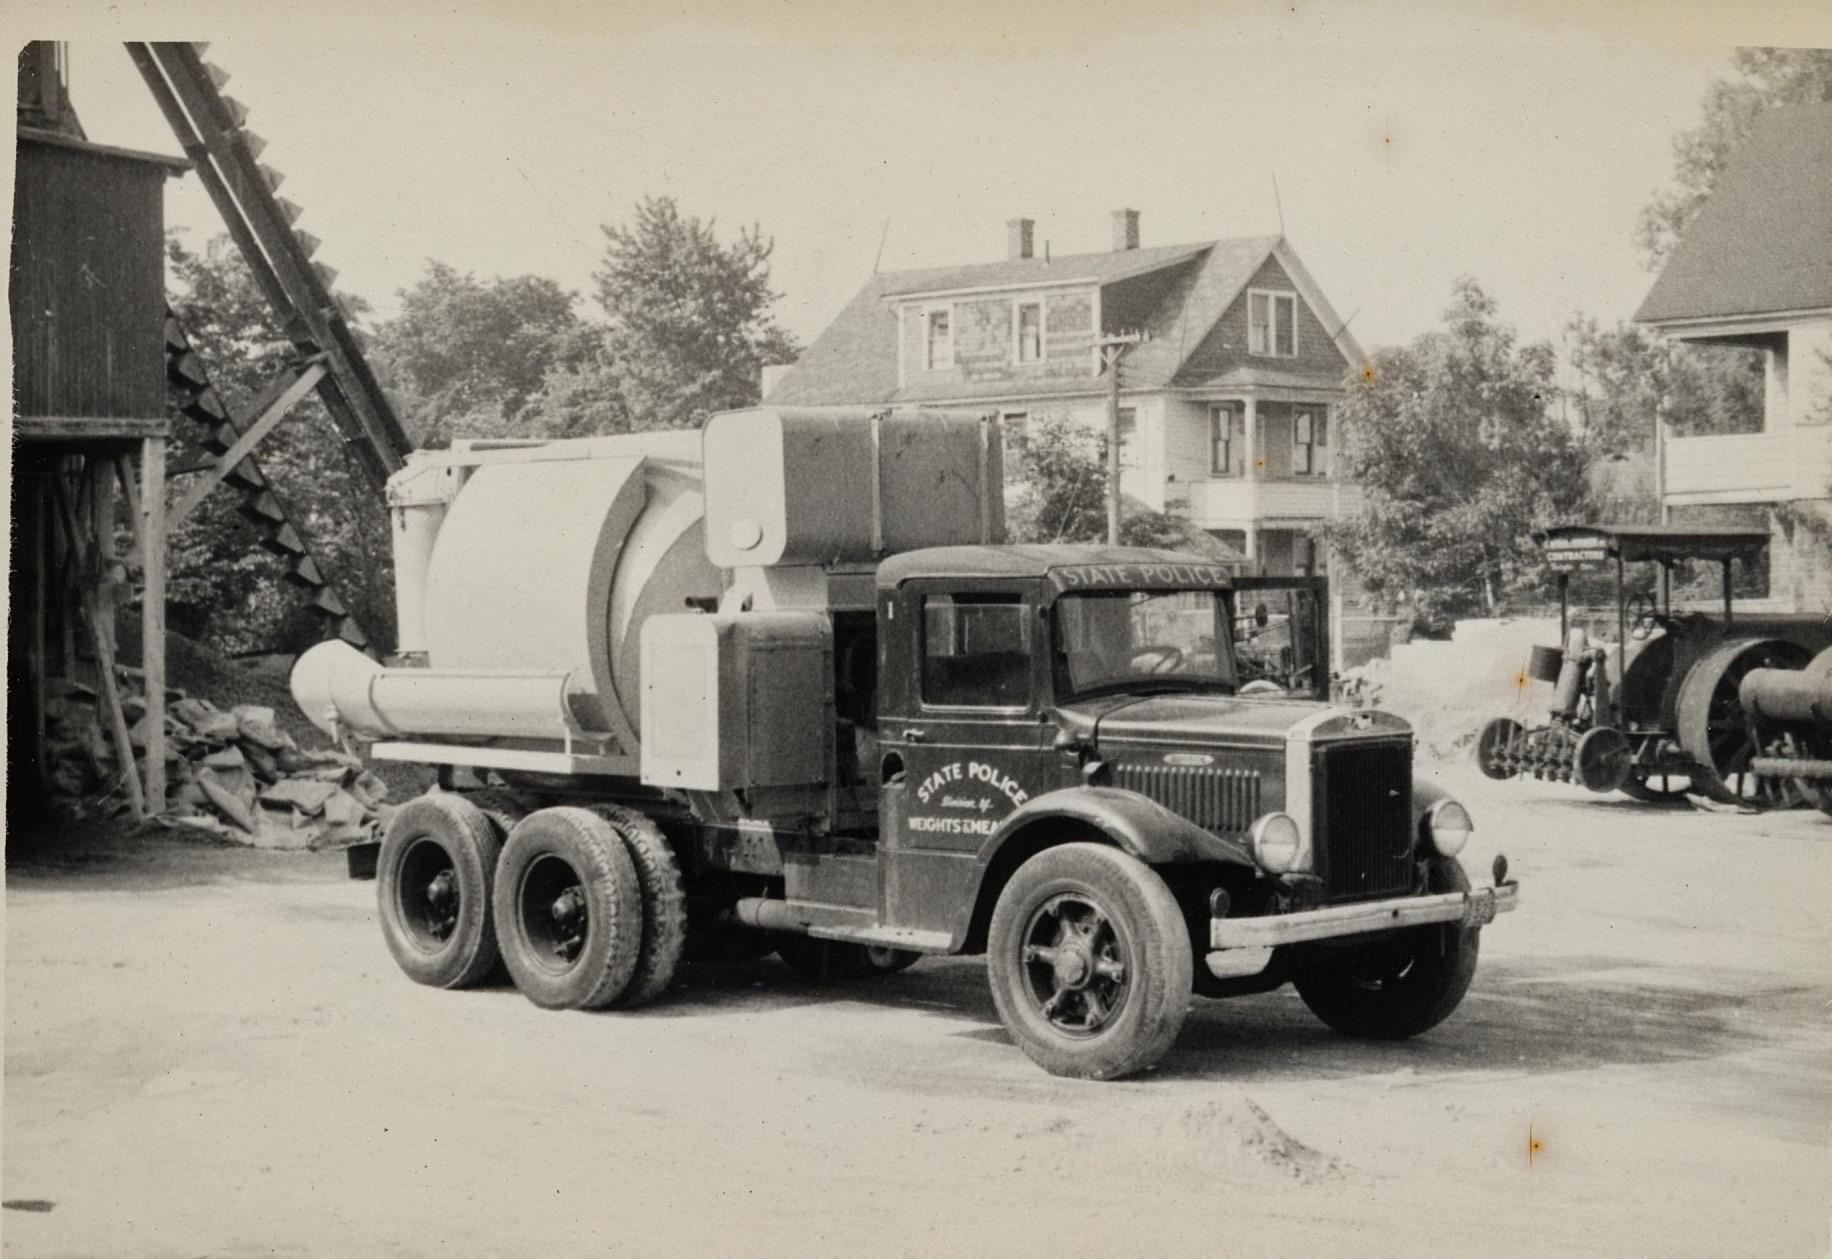
I think it is a Ready-Mix. Looks like ones I've seen.
-
BTW, apparently tire standards are different or ignored by the State Police, as they appear mismatched and the steers look bald. Or maybe the state was broke back then, too??
-
I posted this on a couple of pages on Facebook, but thought it belonged here as well. I received it from the President of our Alumni Assoc., where it was recently donated with a stack of old photos. I found it to be very interesting that the State Police would be operating such a vehicle. The information behind it is back during that period was that there was a lot of fraud in commodities that were sold buy weight or volume. Commodities were diluted, contents mixed and swapped, weights and volumes shorted. The State Police, Div. of Weights and Measures was established to combat this and eliminate the fraud as much as possible. At the time Troopers were called Officers and those assigned had various vehicles to go around the state and to collect samples of dispensed items to be checked, inspected and weighed. Today these functions are performed buy the Dept. of Consumer Protection, who go around certifying fuel pumps, weight scales, etc. I'm sure some fraud still goes on today, but probably no where near the scale back then. It would be cool to find a ten wheel BX to restore, maybe as a tractor.
-
1st official road test
mattb73lt replied to Coenut's topic in Antique and Classic Mack Trucks General Discussion
Wow, that really shows well!! -
B-73 Restoration
mattb73lt replied to mattb73lt's topic in Antique and Classic Mack Trucks General Discussion
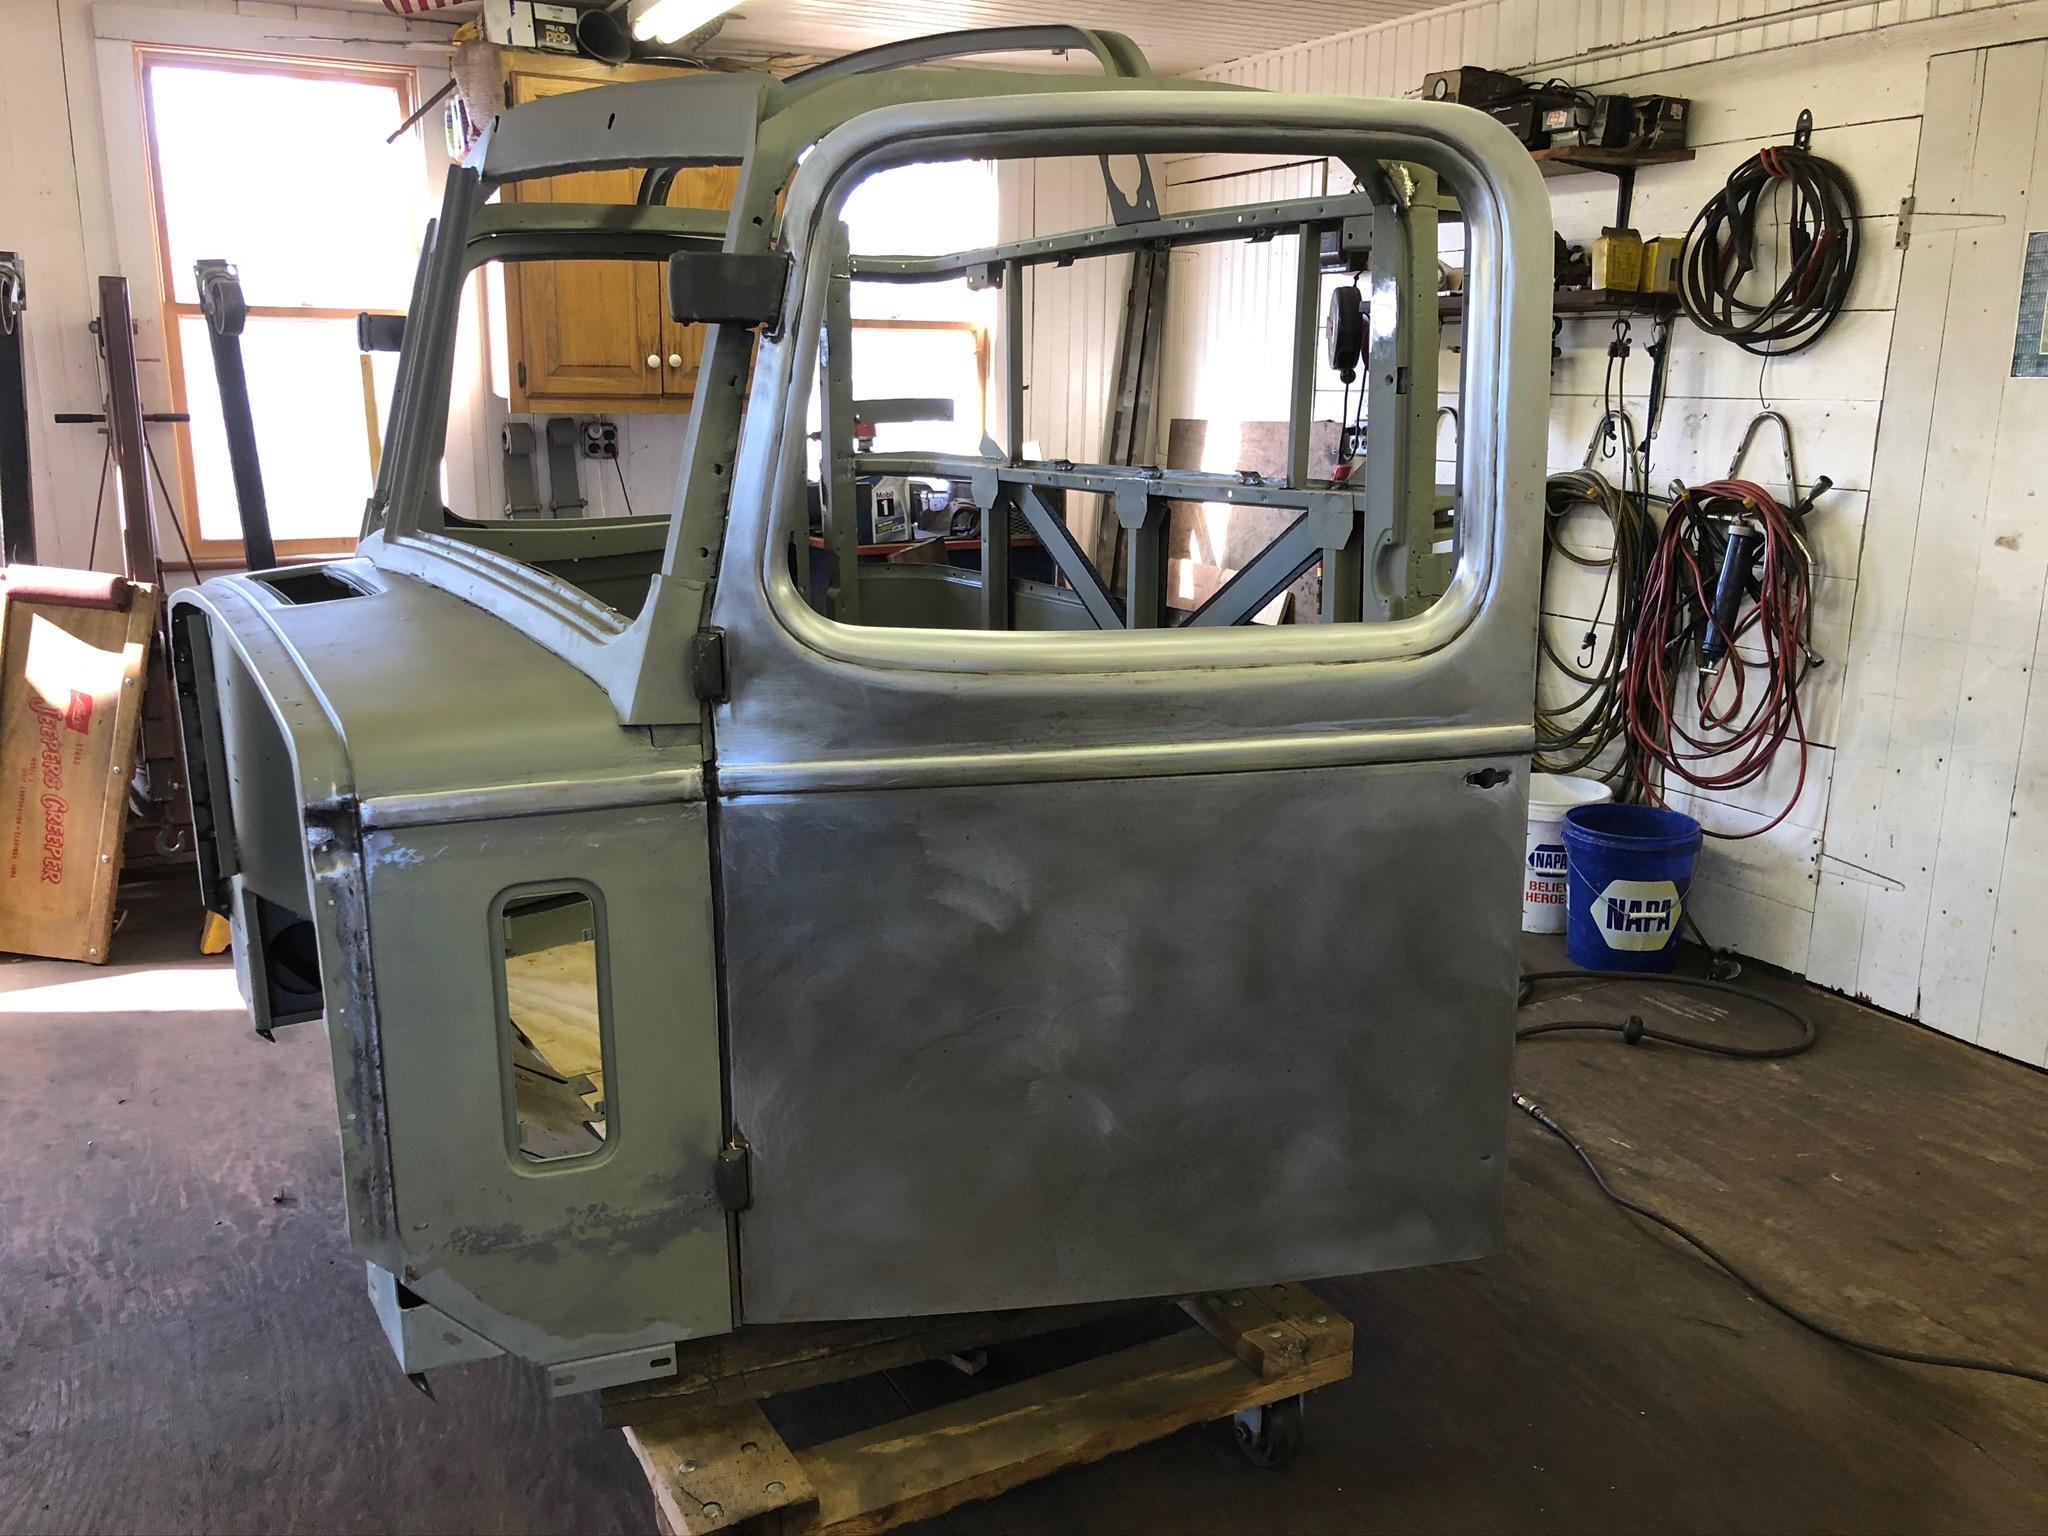
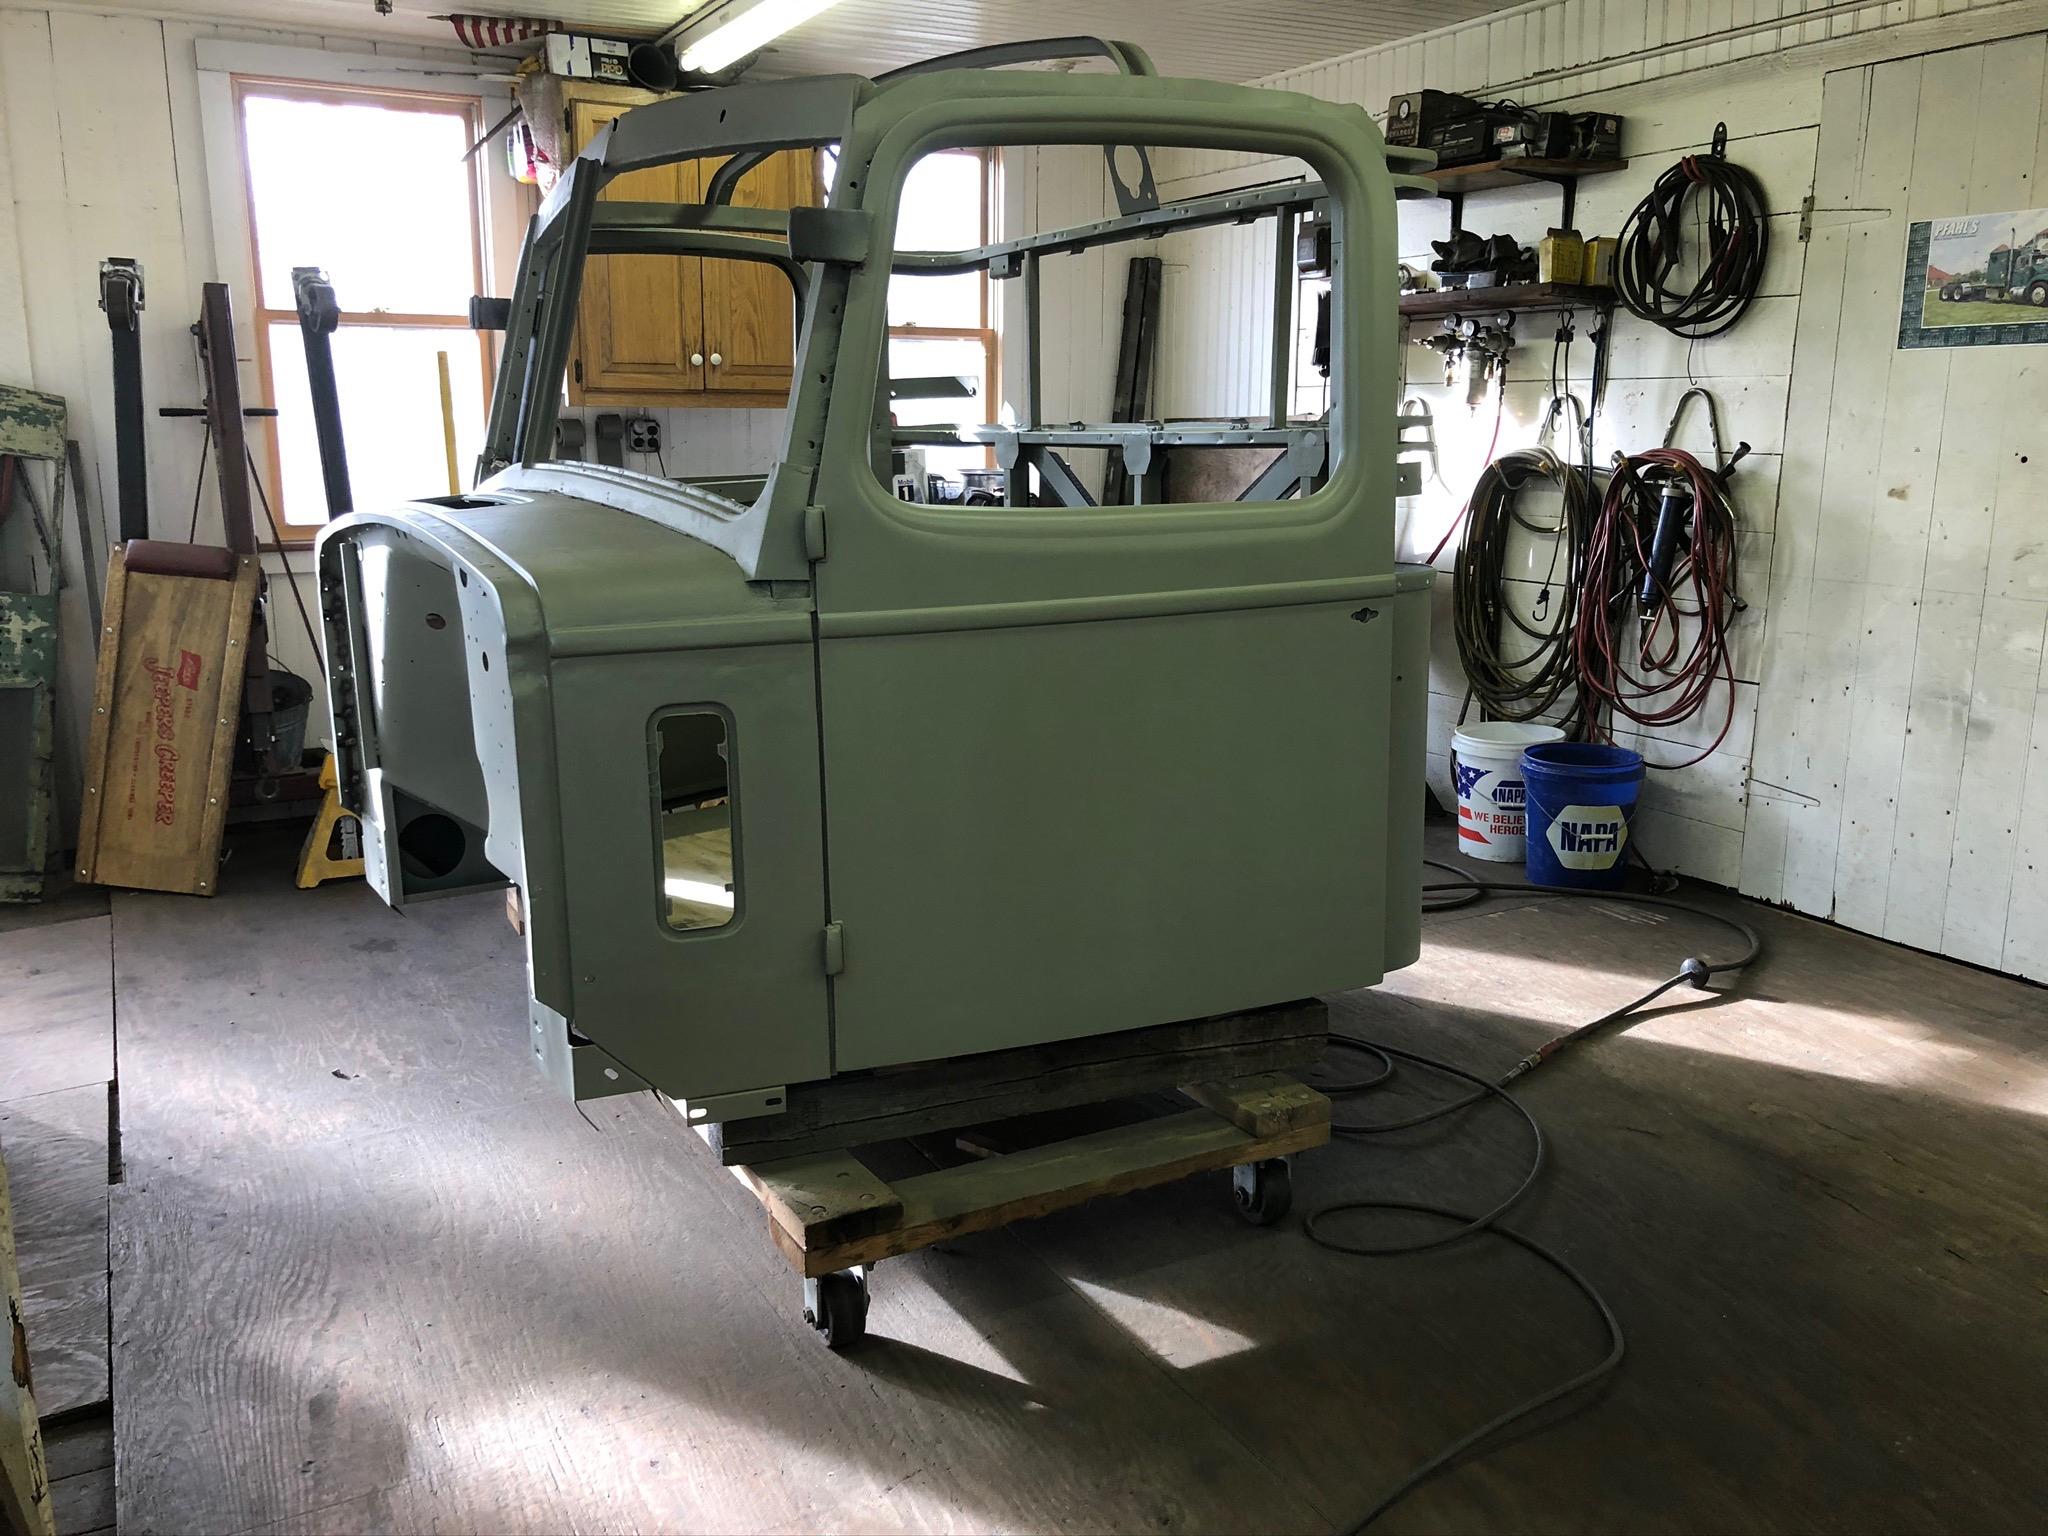
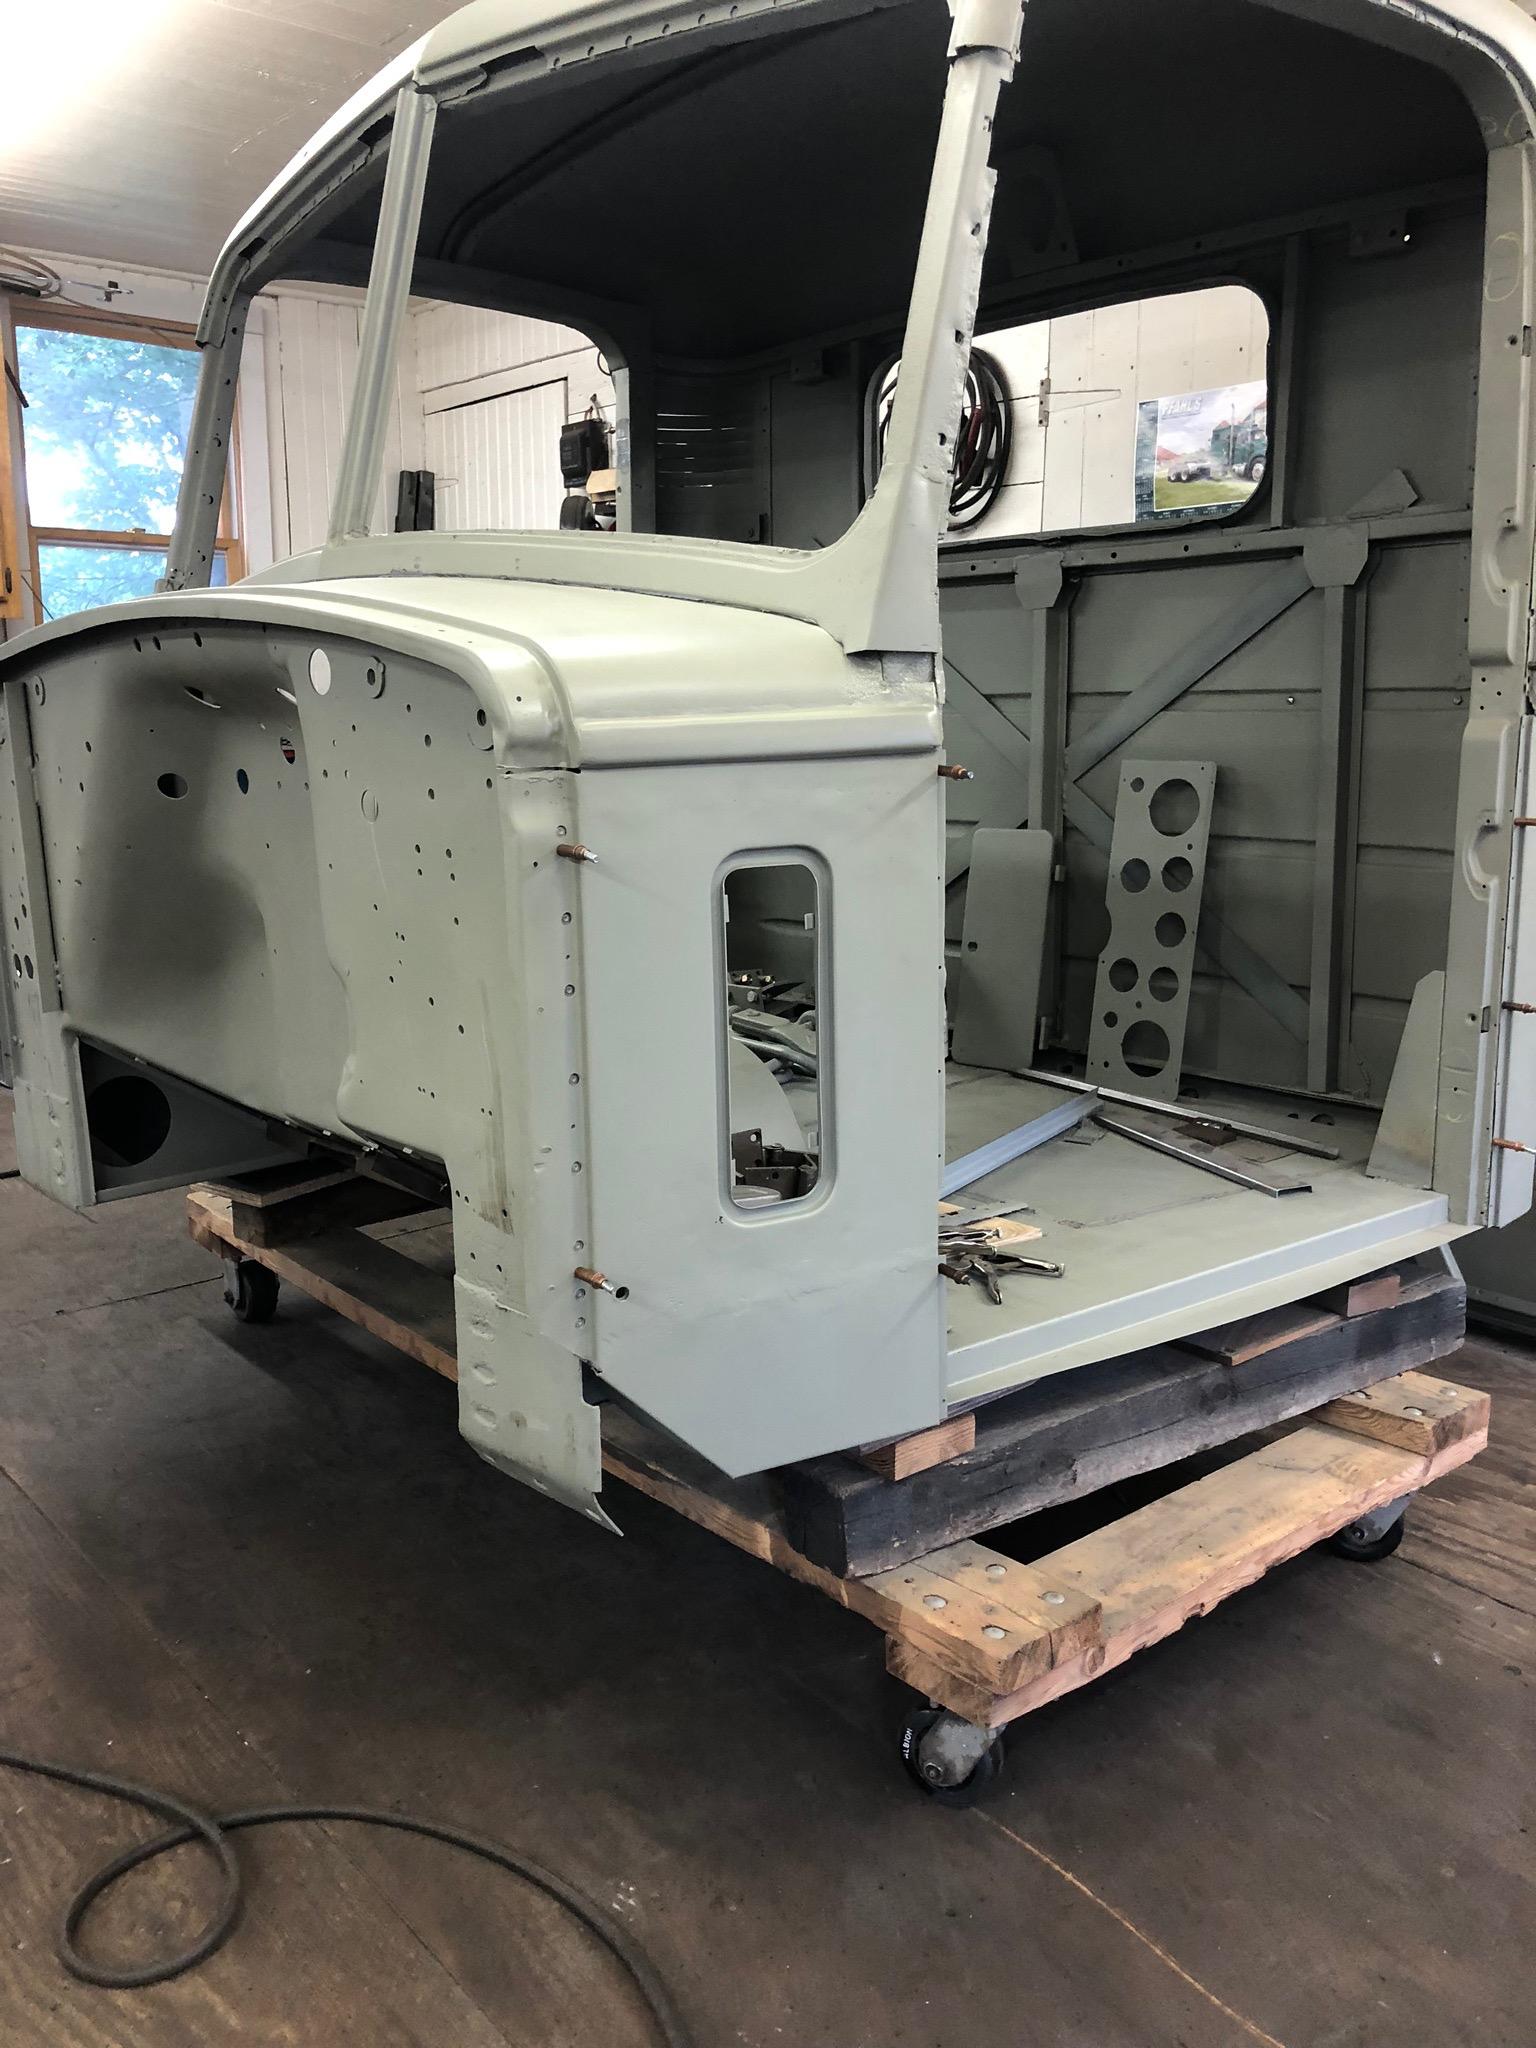
All in primer now! Finished the cowl belt line patches today and primed the lower cowl panels. Now just a lot of small repairs and the windshield area before the body work starts.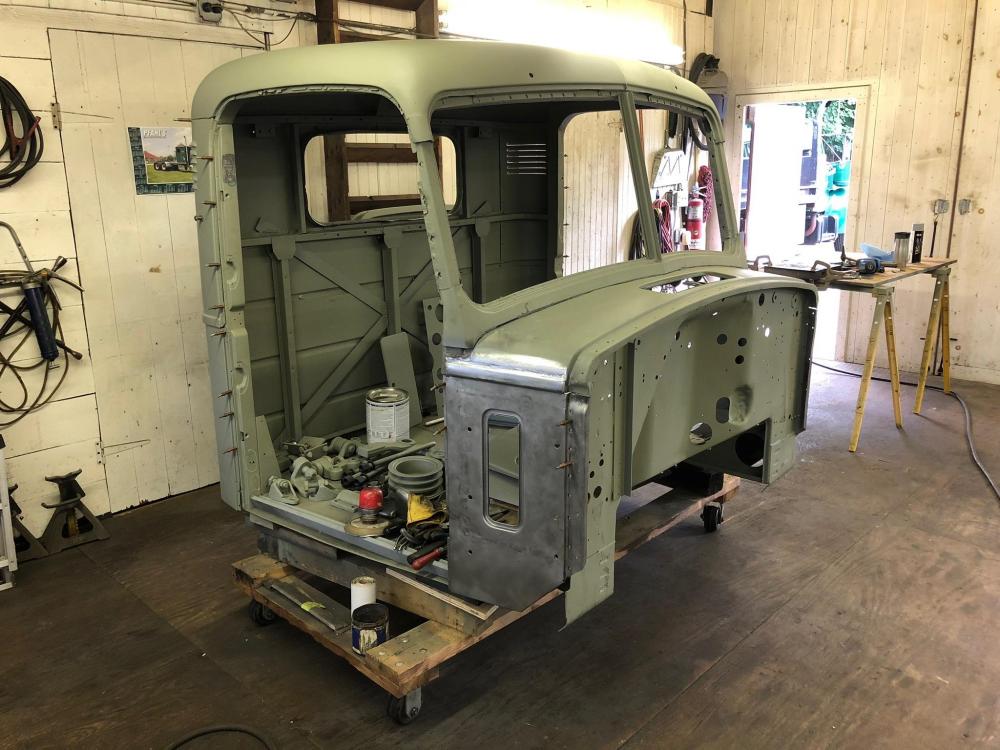

-
B-73 Restoration
mattb73lt replied to mattb73lt's topic in Antique and Classic Mack Trucks General Discussion
I hope so, I’ve got a long way to go to get there. If I don’t, it’ll be close. I am going this Sunday, if the weather is good. -
B-73 Restoration
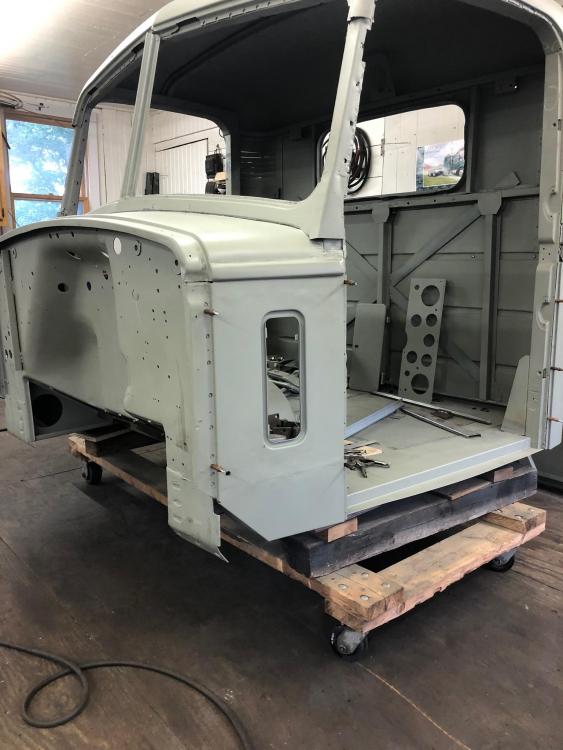
mattb73lt replied to mattb73lt's topic in Antique and Classic Mack Trucks General Discussion
Well, this makes me feel pretty good about the progress on this cab. Everything lines up and it's almost all in one color, instead of the faded paint, primer and rust.

-
B-73 Restoration
mattb73lt replied to mattb73lt's topic in Antique and Classic Mack Trucks General Discussion
I'll probably look at some of their products to finish this cab. Luckily, I do have new windshield seals I sourced years ago from a guy in Mass.


BMT Forum Logo
